- Published on
How to make slack app That Transforms Your Workflow
- Authors

- Name
- Gabriel
- @gabriel__xyz
To make a Slack app, you first need to register it on the Slack API dashboard. From there, you'll define its permissions (OAuth scopes) and grab credentials like a bot token. Then, it's time to build a server that can catch incoming data from services like GitHub and use Slack's APIs to post nicely formatted messages into your workspace.
Why a Custom Slack App Is Your Next Productivity Superpower

Before we jump into any code, let's talk about the why. Building a custom Slack app isn't just a neat technical project; it's about solving a real problem that slows your team down. For most dev teams, the constant dance of tracking GitHub pull requests is a perfect example of this kind of workflow friction.
Right now, your developers are probably switching contexts all day long. They leave Slack, pop over to GitHub to check on PRs, look at CI/CD statuses, and see who needs a review. That constant back-and-forth kills focus and grinds the whole development cycle to a crawl. Our mission is to build a bot that puts an end to that chaos.
Solving a Real-World Problem
This guide is all about a practical application that delivers value from day one. Instead of getting blasted with noisy, generic notifications, we're going to build a smart, tailored app that pipes timely, actionable GitHub PR updates directly into the right Slack channels. It effectively turns your workspace into an intelligent command center for your code.
An integration this targeted has some serious upsides:
*   **Less Context Switching:** It keeps your developers in the zone by bringing critical information to the place where conversations are already happening.
*   **Faster Review Cycles:** The right people get notified the instant a PR is ready for their eyes, which helps slash those frustrating code review delays.
*   **Better Project Visibility:** Everyone gets a clean, real-time feed of development progress, which keeps the entire team aligned without needing another meeting.
By automating how information flows between GitHub and Slack, you're really just giving your team the power to resolve issues faster and keep their momentum without all the manual busywork.
Of course, the official GitHub integration is a decent place to start, but building your own gives you total control over the notification logic and how messages look. If you want to see what the default option offers, check out this guide on how to use the official GitHub Slack app. And for those looking to push the boundaries, exploring innovative software building techniques can unlock even more powerful ways to transform your workflow.
Laying the Groundwork for Your Slack Bot

Alright, let's turn that idea into a real project. The first thing you need to do when you make a Slack app is to get it registered. This all happens on the Slack API website, which will be your command center for managing everything from permissions to credentials.
Head over there and click "Create New App." You'll need to give it a name and pick a development workspace. This is essentially your bot's birth certificate—it gives it an identity your team will see and interact with down the road.
Once the app is created, you’ll land on a dashboard with a menu of features. For our GitHub notifier, the first thing we need to add is a Bot User.
Defining Your Bot and Its Permissions
Find the "Bot Users" (or sometimes "App Home") section in the sidebar and add a bot user. This is the crucial step that actually creates the bot "personality" that can post messages in your workspace. After that's done, we need to tell Slack what our bot is allowed to do.
This is where OAuth scopes come in. They’re just permissions. It can be tempting to grant broad access to get things working quickly, but that's a security risk. A best practice is to stick to a minimal-permissions approach, only granting what your bot absolutely needs.
To start, let's look at the absolute minimum permissions our GitHub notifier needs to do its job.
Essential OAuth Scopes for a GitHub Notifier Bot
| OAuth Scope | Purpose | Reason for Inclusion |
|---|---|---|
chat:write | Post messages to channels | The core function of our bot. Without this, it can't send any notifications. |
users:read | Look up user info by ID | Needed to map a GitHub username to a Slack user ID for @mentions. |
users:read.email | Look up a user by email | A reliable fallback for mapping GitHub commit emails to Slack profiles. |
Sticking to these scopes ensures we follow the "least privilege" principle. If a token ever gets compromised, limiting its permissions drastically reduces the potential damage.
Adopting a "least privilege" principle from the start is non-negotiable for security. By limiting your app's access to only what's required, you drastically reduce the potential impact if a token is ever compromised.
Securing Your App Credentials
With the permissions set, it's time to install the app into your development workspace. Go to the "OAuth & Permissions" page and hit "Install to Workspace." Once you authorize it, Slack will generate two critical pieces of information:
- Bot User OAuth Token: This is your app's password. It’s an
xoxb-token that authenticates its API requests. Treat this exactly like you would any other sensitive credential—never hardcode it or check it into version control. - Signing Secret: This is a unique string used to verify that incoming requests (like events from GitHub) are genuinely from Slack. It’s a key part of securing your app's endpoints from bogus requests.
You'll want to store both of these securely. For local development, an .env file is a great place for them.
Now you have a registered app, a bot user, and the essential credentials locked down. We've built the secure foundation we need to start writing the server code that will bring these notifications to life.
With your app registered and credentials tucked away safely, it’s time to build the engine. This is where your bot comes to life—a server that listens for events from Slack and knows how to respond. When you make a slack app, this server is its central nervous system.
We'll be using Node.js for this, a solid choice for building fast, event-driven applications. To make our lives easier, we're bringing in two fantastic libraries:
*   **[Express.js](https://expressjs.com/):** A lean and flexible web framework for Node.js. It gives us a straightforward way to create an endpoint to catch webhook data from Slack.
*   **[Bolt for JavaScript (@slack/bolt)](https://slack.dev/bolt-js/):** This is Slack's official framework for building apps. It handles a ton of the boilerplate for you, like verifying request signatures and managing event subscriptions, so we can jump straight to the fun part—the app's logic.
These two work together beautifully. Express will handle the public-facing HTTP server, and Bolt will manage all the Slack-specific details under the hood.
Setting Up Your Project
First things first, let's get our project structure in place. Open up your terminal, create a new directory for your app, and run npm init -y inside it. This command quickly scaffolds a package.json file, which will keep track of all our project's dependencies.
Next, we need to install our tools. We'll need @slack/bolt, express, and dotenv to manage the secret credentials we stored in the .env file.
Run this command from your project directory: npm install @slack/bolt express dotenv
This command pulls down the libraries from the npm registry and adds them to your project, ready for us to use.
A quick but crucial tip: create a
.gitignorefile and addnode_modules/and.envto it. This prevents you from accidentally committing your secret keys or a massive folder of dependencies to version control. It's a fundamental step for security and good repository hygiene.
Initializing the Bolt App
Alright, let's write some code. Create a new file named app.js. This is where we'll initialize our Bolt app and plug in the credentials you saved from the Slack API dashboard.
We'll start by importing the libraries and creating a new Bolt app instance. Here, you'll pass in your Bot Token and Signing Secret from the .env file. Bolt uses these to authenticate with Slack's API and, just as importantly, to verify that any incoming requests are genuinely from Slack and not a malicious actor.
This is what the basic structure of a Bolt app looks like—pretty simple, right?
The code just needs your signing secret and bot token to spin up a server and start listening for events on a specific port.
Here’s a starter snippet for your app.js file. It sets up a basic Express server and tells Bolt to handle any requests coming in at the /slack/events endpoint.
require('dotenv').config();
const { App } = require('@slack/bolt');
const express = require('express');

// Initializes your app with your bot token and signing secret
const boltApp = new App({
  token: process.env.SLACK_BOT_TOKEN,
  signingSecret: process.env.SLACK_SIGNING_SECRET
});

const expressApp = express();

// The new Slack event adapter requires an endpoint url to listen for events
expressApp.use('/slack/events', boltApp.receiver.router);

// Start your server
const port = process.env.PORT || 3000;
(async () => {
  await expressApp.listen(port);
  console.log(`⚡️ Bolt app is running on port ${port}!`);
})();
This small block of code gives us a simple but secure foundation. Bolt's receiver automatically handles the tricky challenge/response handshake that Slack’s Events API requires for verification. It also verifies the signature of every single incoming request using your signing secret, so you don't have to.
The developer ecosystem around Slack has absolutely exploded, right alongside the platform's revenue. With Slack’s revenue projected to hit a massive $4.22 billion globally by 2025 and capture 25% of the enterprise productivity market, building smart integrations is a great wave to ride. You can find more insights on Slack's market growth at electroiq.com.
With our server ready, the next step is to start listening for webhooks from GitHub.
Connecting GitHub Webhooks to Your Slack App
Alright, we've got a secure server ready to listen for incoming data. Now, it's time to build the bridge between GitHub and your new Slack app. This is where webhooks come in.
Think of a webhook as an automated message sent from one app to another when a specific event happens. In our case, GitHub will fire off a webhook to our server every time there's activity on a pull request.
The first step is to get this set up in your GitHub repository. Head over to your repo's "Settings," find the "Webhooks" section, and click "Add webhook." This is where you'll tell GitHub exactly which events you care about.
You definitely don't want to spam your channels with every single update. It’s all about being selective.
*   **`pull_request`:** This is the big one. It fires for key actions like `opened`, `closed`, `reopened`, and `ready_for_review`.
*   **`pull_request_review`:** Also super useful for tracking when reviews are `submitted`, `edited`, or `dismissed`.
By choosing only the events that matter, you're building an app that delivers high-signal, low-noise notifications.
Exposing Your Local Server with Ngrok
Now we hit a classic development hurdle: GitHub needs a public URL to send its webhooks, but our server is just running on our local machine (like localhost:3000). It's not accessible from the internet. To get around this, we'll use a fantastic tool called ngrok.
Ngrok creates a secure tunnel from a public URL straight to your local server. It’s an absolute lifesaver for testing webhooks because you don't have to deploy your app every time you tweak the code.
Using ngrok is like giving your local development server a temporary public address. It's a game-changer for iterating quickly, letting you test the end-to-end flow from GitHub to Slack in real time.
Once you have ngrok installed, just pop open your terminal and run a simple command: ngrok http 3000
Ngrok will spit out a public URL (something like https://random-string.ngrok.io). Copy this URL, paste it into the "Payload URL" field in your GitHub webhook settings, and don't forget to add your endpoint path (e.g., https://random-string.ngrok.io/slack/events).
The diagram below shows the basic server process, from setup and initialization to securing your credentials.
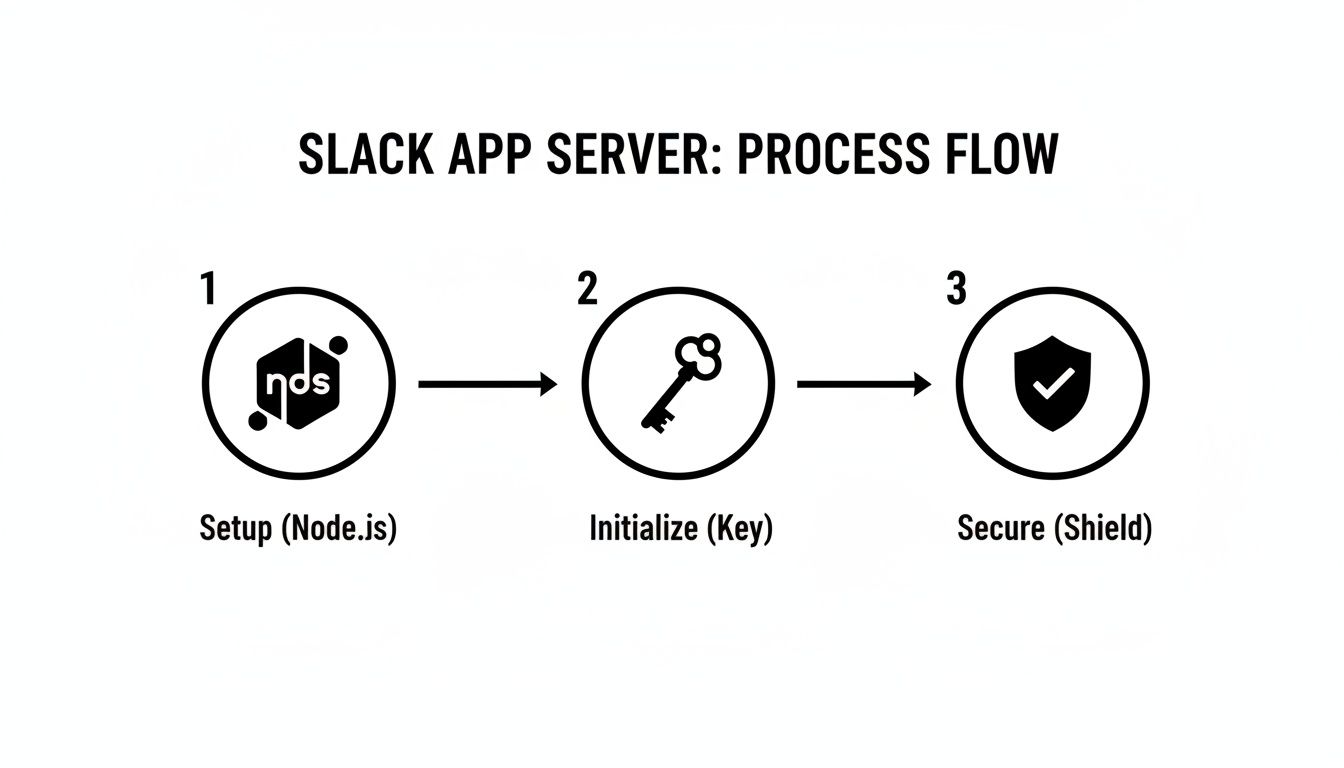
This flow really highlights how each step builds on the last to create a reliable and secure foundation for your app.
Handling Incoming GitHub Payloads
When GitHub sends a webhook, it packs a JSON payload with all the event details. Your server's job is to catch this payload, parse it, and pull out the juicy bits needed to craft a helpful Slack message. For instance, you’ll probably want to grab:
*   The pull request title and URL
*   The author's GitHub username
*   The list of requested reviewers
This is where building a custom app really shines. You can create logic that maps specific repositories to specific Slack channels. Imagine all pull requests for the frontend-app repo going straight to #dev-frontend, while api-service PRs land in #dev-backend. This kind of intelligent routing is a massive upgrade from generic, one-size-fits-all notifications.
This level of customization is a huge reason for Slack's explosive growth. By 2024, Slack hit an estimated 42 million daily active users, a number driven by an ecosystem of over 1,500 official integrations and countless custom apps helping teams build their perfect workflow.
Of course, if you need a solution right now, you can always explore how to get GitHub PR notifications in under a minute with a pre-built tool. But building your own gives you total control over the notification logic, allowing you to craft the perfect messages for your team.
Crafting Dynamic and Actionable Slack Messages
Just dumping raw GitHub data into a channel won't cut it. If you want your team to actually pay attention to these notifications, the messages need to be clear, engaging, and above all, actionable. This is where we go beyond plain text and tap into Slack's Block Kit, their UI framework for building rich, interactive messages.
Instead of a dull, easy-to-ignore line of text, you can build messages that cleanly display the pull request title, a direct link, the author, and a list of requested reviewers. Think of it as creating a tiny, purpose-built UI for every single notification. This simple shift in thinking transforms your app from a basic notifier into a genuinely helpful team assistant.
Building Rich Messages with Block Kit
Block Kit provides a whole set of pre-built components—or "blocks"—that you can stack together to create visually organized, interactive messages. It’s a bit like playing with LEGOs to design the perfect notification.
For our GitHub pull request notifier, a solid message structure might look something like this:
*   **Header Block:** A bold, can't-miss-it title like "New Pull Request Ready for Review."
*   **Section Blocks with `mrkdwn`:** Perfect for displaying key details like the PR title (as a clickable link), the author, and the destination branch.
*   **Context Block:** A more subtle, smaller text area for showing the repository name or other metadata without cluttering the main message.
This kind of structure makes the most critical information instantly scannable. A developer can grasp the entire context in a single glance without ever leaving Slack to click through to GitHub.
The Power of Direct Mentions
Here's where the real magic happens: mapping GitHub usernames to their corresponding Slack user IDs. It sounds simple, but this connection allows your app to send direct @mentions, which is hands-down the most reliable way to get the right eyes on a pull request. A generic message in a busy channel is easy to miss, but a direct mention cuts right through the noise.
To get this working, your app will need to fetch a list of Slack users (using the users:read scope we set up earlier) and build a simple lookup table. For example, you’d map a GitHub username like dev-jane to her Slack user ID, U012AB3CD.
Then, when a PR is opened with dev-jane as a reviewer, your app constructs the message to include <@U012AB3CD> instead of just her name. Slack handles the rest, automatically rendering it as a highlighted mention and sending her a direct notification. This one detail can drastically speed up your review times. And while the tech is cool, the words you use matter, too. Good messaging is key, and it's worth exploring how to master the art of transforming your startup's messaging to make sure every notification hits the mark.
By translating a GitHub event into a direct, personal notification, you're not just passing information—you're initiating a specific action and removing the friction that causes delays.
Your code will end up using the chat.postMessage method, passing in the channel ID and the JSON payload that represents your Block Kit layout. With that, you can start sending polished, informative messages that your team will actually appreciate. For more ideas on connecting your development tools, you might find our guide on setting up code quality checks with GitHub Actions and Slack useful.
Common Questions When Building a Slack App
Even with a detailed guide, a few questions always pop up once you start building. Let's tackle some of the most common ones developers run into when creating an integration like our GitHub notifier.
First up is deployment. After you've tested everything locally with a tool like ngrok, your app needs a permanent home. Services like Heroku, Vercel, or AWS are all solid choices. The general idea is to push your code, set your SLACK_BOT_TOKEN and SLACK_SIGNING_SECRET as environment variables in your hosting provider's dashboard, and finally, update your GitHub webhook URL to point to your new live server address.
Can This App Use Slash Commands?
Absolutely, and it's a great way to make your app more interactive. The Bolt for JavaScript library makes adding slash commands incredibly simple. You’ll start by registering a new command in your Slack App's settings under the "Slash Commands" section.
Then, back in your server code, you can listen for it with a handler as straightforward as app.command('/your-command', async ({ command, ack, say }) => { ... });. This lets users actively request information from your app instead of just passively receiving notifications.
The golden rule for security is to never commit secrets like API keys to your git repository. Always use environment variables. For local work, a
.envfile works great—just remember to add.envto your.gitignorefile to keep it out of your codebase.
When you move to a production environment, use your hosting provider’s built-in system for managing secrets. This isn't just a suggestion; it's a non-negotiable practice for keeping your app and its credentials secure. A single exposed token could compromise your entire workspace, and this simple step prevents that from happening.
Stop drowning in notification noise and start shipping faster. PullNotifier delivers clean, actionable GitHub pull request updates right inside Slack, cutting review delays and keeping your team in sync. Get started for free at PullNotifier.com and transform your code review process today.