- Published on
Create a Bot in Slack The Definitive Developer's Guide
- Authors

- Name
- Gabriel
- @gabriel__xyz
So, you want to build a Slack bot? Excellent. The basic idea is simple: you register a new app in your workspace, give it the right permissions, tell it what events to listen for, and then write some code to make it all work. This turns your concept into an interactive tool that can automate tasks, respond to commands, and post messages right inside your team’s channels.
Your Blueprint for Building a Slack Bot
Let's walk through the entire process of creating a bot in Slack, from the initial spark of an idea to a fully functioning application. We'll skip the jargon and break everything down into clear, manageable stages. Think of this as the mental model for what we’re about to build.
A Slack bot isn't just one chunk of code; it's a small ecosystem. Every bot is technically a "Slack App" that you register with Slack. This app is then granted specific permissions—called scopes—that define what it's allowed to do, like posting messages (chat:write) or keeping an eye on channel activity.
The Core Components of a Slack Bot
At its heart, your bot is just listening for specific triggers and reacting to them. You'll primarily deal with two types of triggers:
*   **Events:** These are things that happen *in* Slack. A new user joining a channel (`member_joined_channel`) or someone mentioning your bot (`app_mention`) are both events. Your bot subscribes to these and runs a piece of code whenever they fire.
*   **Interactions:** These are direct actions a user takes *with* your bot. We're talking about things like clicking a button, submitting a form in a pop-up modal, or running a slash command like `/your-command`.
To tie all this together, we’ll be using the Bolt framework, which is Slack’s official toolkit for both Node.js and Python. Bolt is a lifesaver because it simplifies how you handle events, interactions, and API calls, letting you sidestep a ton of boilerplate code.
This whole journey boils down to three essential phases: blueprinting your idea, configuring the app in Slack, and finally, writing the code.
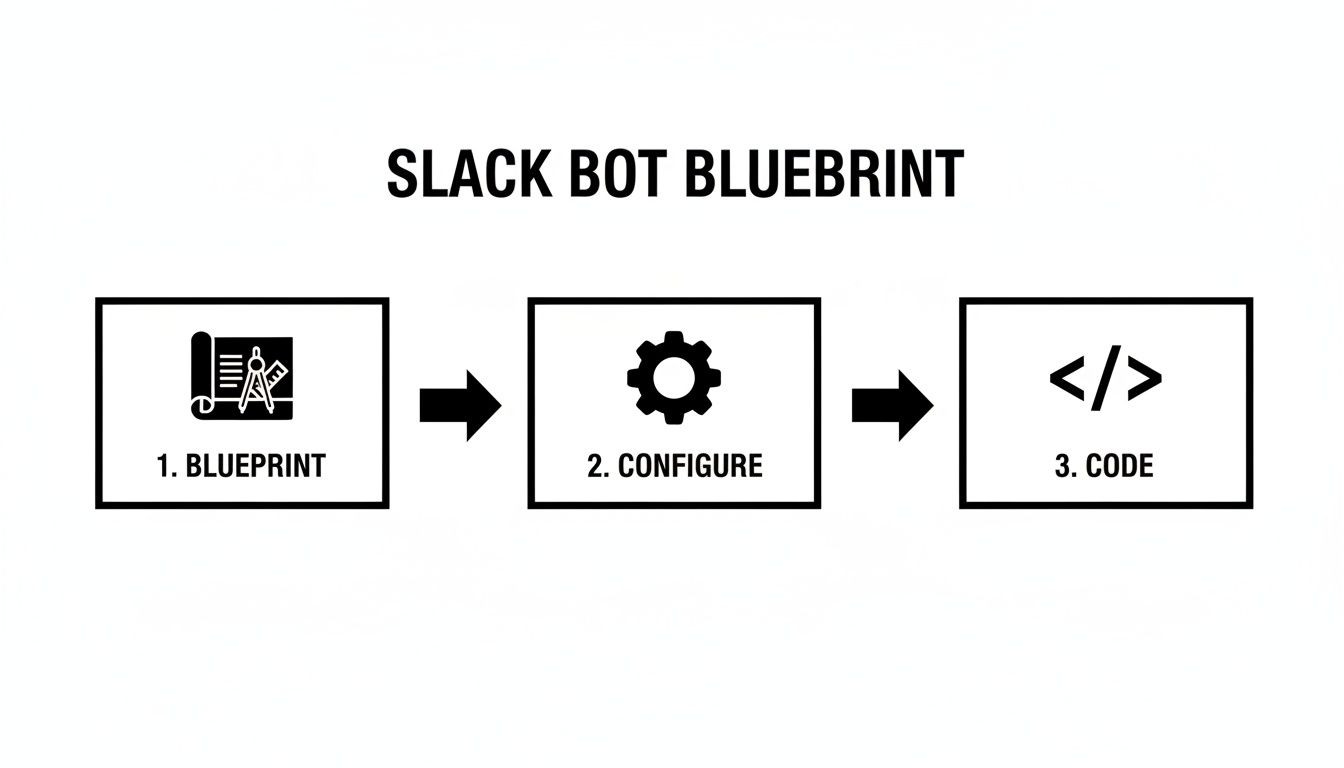
This visual roadmap drives home a key point: a successful bot starts with a solid plan before you ever touch the technical setup. Many organizations are tapping into Slack bots for all sorts of automation. If you're curious about the broader landscape, exploring how custom automation development projects are typically managed can offer some great insights.
To give you a clearer picture of the road ahead, here’s a quick summary of the main stages we’ll cover.
Slack Bot Creation Stages at a Glance
| Stage | Key Activities | Primary Goal |
|---|---|---|
| 1. Blueprint | Define the bot's purpose, features, and user flow. | Create a clear plan and scope for the bot's functionality. |
| 2. Configuration | Register the Slack App, set scopes, subscribe to events, and enable interactions. | Set up the foundational permissions and listeners within the Slack platform. |
| 3. Coding | Write the application logic using a framework like Bolt to handle events and interactions. | Bring the bot to life by implementing its core functionality. |
| 4. Deployment | Host the bot on a server or cloud platform so it's always online. | Make the bot accessible and operational for your Slack workspace. |
This table provides a high-level overview, but we'll be diving deep into each of these stages.
By the time you finish this guide, you’ll have a firm grip on this entire lifecycle, setting you up for success as we get into the hands-on steps.
Configuring Your App and Setting Permissions
Alright, this is where your bot idea starts to become a real thing in your Slack workspace. We're not touching any code just yet—first, we need to handle the setup inside Slack's API dashboard. Getting this right is fundamental; it’s how you give your bot its identity and define what it's allowed to do.
First things first, head over to the Slack API page and click "Create an App." You'll get a couple of options, but for a custom bot, starting "From scratch" is usually the way to go. Give your app a descriptive name like "Code Review Helper" or "Team Standup Bot" and pick the workspace you'll be using for development.

Think of this initial step as creating a container for your bot. All its settings, permissions, and features will live here, laying the foundation for the code we'll write later.
Defining Your Bot's Abilities with Scopes
With your app created, the next critical move is to define what it can and can't do. In the Slack world, permissions are managed through OAuth scopes. Imagine scopes are like individual keys that let your bot open specific doors. For instance, granting the chat:write scope lets your bot post messages, but it doesn't give it permission to read them.
The principle of least privilege is your best friend here. Only request the scopes your bot absolutely needs to do its job. This isn't just a security best practice—it also builds trust. When people install your app, they can see it isn't asking for weird, unnecessary access to their data.
For a simple bot that just needs to respond to mentions and slash commands, you'll likely need a few core scopes:
*   **`app_mentions:read`**: Lets your bot see messages that directly @mention it.
*   **`chat:write`**: Grants permission to post messages in channels and conversations.
*   **`commands`**: Allows your bot to register and respond to slash commands.
Here’s a small detail that often trips up new developers: every time you add a scope, you have to reinstall the app in your workspace for the changes to take effect. It's a quick but crucial step. For a deeper dive into this, our guide on how to make a Slack app from scratch has more detailed examples.
Installing the App and Securing Your Token
Once you've set up your scopes under the "OAuth & Permissions" section, it's time to install the app into your development workspace. Just click the "Install to Workspace" button, which kicks off an OAuth flow where you authorize the permissions you just selected.
After a successful installation, Slack will give you the golden ticket: the Bot User OAuth Token. This string, which usually starts with xoxb-, is the key your application will use to authenticate with the Slack API.
Treat this token like a password. Never, ever hardcode it into your source code or check it into a public repository. The standard move is to store it as an environment variable, which your application can pull securely when it runs. This is non-negotiable for protecting your workspace and your bot's integrity.
The explosion of bot adoption has totally changed how development teams work. Today, there are over 750,000 custom bots and integrations active across Slack, with the average user interacting with at least three of them daily. This massive ecosystem shows just how important it is to build secure, well-configured bots from the get-go. You can find more cool stats on Slack's growth at sqmagazine.co.uk.
At this point, you have an authenticated bot user sitting in your workspace. It can't do anything yet, but it's officially registered, its permissions are set, and its token is safely stored. Now it’s ready to be brought to life with some code.
Building Your Bot's Brain with the Bolt Framework
Alright, you've got your app configured and your tokens are safely tucked away. Now for the fun part: actually writing the code that brings your bot to life. We're moving from Slack's dashboard into your code editor to build the bot's "brain."
Instead of getting tangled up in raw API requests and webhook validations, we're going to use Slack's official toolkit, the Bolt framework.
Bolt is a real game-changer if you want to create a bot in Slack. It's available for both Node.js (JavaScript/TypeScript) and Python, and it handles all the low-level, tedious parts of interacting with the Slack platform. This lets you focus on building cool features instead of writing boilerplate to handle event subscriptions, interactive components, or API calls.
Think of it like this: without Bolt, you’d be manually verifying every single request from Slack, parsing gnarly JSON payloads, and structuring your API calls just right. With Bolt, you just write simple functions that listen for things, like a user mentioning your bot.
Getting Started with Bolt for Node.js
Let's walk through a practical example with Bolt for Node.js, a popular choice because of its non-blocking, asynchronous nature. First, you'll need to get a new project set up and install the package.
*   Create a new project directory and run `npm init -y` to get started.
*   Install the Bolt package with `npm install @slack/bolt`.
*   Create a new file, `app.js`, which is where your bot's logic will go.
Now, let's write the code to get your app running. You'll need those tokens you secured earlier. We'll use environment variables to keep them safe and out of your source code.
// app.js
const { App } = require('@slack/bolt');
require('dotenv').config();

// Initializes your app with your bot token and signing secret
const app = new App({
  token: process.env.SLACK_BOT_TOKEN,
  signingSecret: process.env.SLACK_SIGNING_SECRET,
  socketMode: true, // Enable Socket Mode for local development
  appToken: process.env.SLACK_APP_TOKEN // Token generated from the App-level tokens page
});

(async () => {
  // Start your app
  await app.start(process.env.PORT || 3000);
  console.log('⚡️ Bolt app is running!');
})();
Pro Tip: Socket Mode is fantastic for local development. It creates a direct WebSocket connection to Slack, so you don't have to expose your local machine to the internet with tools like ngrok. Just flip the switch for Socket Mode in your app's settings on the Slack API dashboard.
Listening for Events and Sending Replies
The heart of most Slack bots is listening for events and reacting to them. The most common one for a conversational bot is app_mention, which triggers anytime a user @mentions your bot in a channel.
Bolt makes this incredibly straightforward. Let's add an event listener to our app.js file.
// Responds to any message that mentions the bot
app.event('app_mention', async ({ event, client, say }) => {
  try {
    // Acknowledge the mention with a simple reply
    await say(`Hello there, <@${event.user}>! You mentioned me.`);
  } catch (error) {
    console.error(error);
  }
});
That tiny block of code does a surprising amount of work. It tells Bolt to listen for any app_mention event. When one comes in, the handy say() utility function (a shortcut from Bolt) posts a message right back to the same channel. Notice how it grabs the user ID from event.user to personalize the response. Easy.
A Look at Bolt for Python
If you're more of a Python person, the process is just as clean. The concepts are identical, just with Python's syntax. After you install the package (pip install slack_bolt), your setup and event listener will look something like this:
# app.py
import os
from slack_bolt import App
from slack_bolt.adapter.socket_mode import SocketModeHandler
from dotenv import load_dotenv

load_dotenv()

# Initializes your app with your bot token and socket mode handler
app = App(token=os.environ.get("SLACK_BOT_TOKEN"))

# Listens for mentions and replies
@app.event("app_mention")
def handle_app_mention_events(body, say):
    user_id = body["event"]["user"]
    say(f"Hi there, <@{user_id}>! Thanks for the mention.")

if __name__ == "__main__":
    handler = SocketModeHandler(app, os.environ["SLACK_APP_TOKEN"])
    handler.start()
See? The structure is remarkably similar. This consistency is what makes Bolt such a great framework, no matter which backend language you prefer. You define your app, then use decorators (@app.event) to register your listeners.
Managing Interactive Components
A truly useful Slack bot does more than just chat. Interactive components like buttons, dropdowns, and modals create a much more engaging experience for users. The backend logic for these can get tricky, but Bolt simplifies this too.
Let's say your bot posts a message with a "Generate Report" button. Here’s how you’d handle the click.
First, you'd send a message containing the button. This is done using Slack's Block Kit, which is their UI framework for building layouts in messages.
// Example of sending a message with a button
await client.chat.postMessage({
  channel: event.channel,
  blocks: [
    {
      "type": "section",
      "text": {
        "type": "mrkdwn",
        "text": "Would you like to generate the weekly sales report?"
      }
    },
    {
      "type": "actions",
      "elements": [
        {
          "type": "button",
          "text": {
            "type": "plain_text",
            "text": "Generate Report"
          },
          "action_id": "generate_report_click" // A unique identifier for this action
        }
      ]
    }
  ]
});
Next, you need a listener to catch that button click. The action_id is the key here—it’s how you identify which button was pressed.
// Listens for a button click with the action_id 'generate_report_click'
app.action('generate_report_click', async ({ body, ack, say }) => {
  // Acknowledge the click immediately
  await ack();

  // Respond to the user
  await say(`<@${body.user.id}> clicked the button! Generating report...`);
});
The ack() function is critical. Slack requires your app to acknowledge any interactive event within 3 seconds. Bolt handles this beautifully; calling ack() sends the necessary 200 OK response back to Slack, letting it know you're on the job. After that, you're free to perform a longer task and send a follow-up message with say().
Using Bolt, you've now built the core logic for a bot that can be initialized securely, listen for mentions, and handle interactive elements. That’s a solid foundation to build on before we get into testing and deployment.
From Localhost to Live Deployment
A bot that only works on your laptop isn't going to help your team much. To be truly useful, your bot needs to move from your local machine to a live server that's always online. This transition really boils down to two key phases: getting your local testing right and then pushing your code out into the wild.
Real-Time Testing with Ngrok
Getting your bot to respond to real Slack events while the code is still on your machine can feel like a bit of a magic trick. Slack's APIs live on the public internet, so they need a way to send event notifications—like button clicks or user mentions—back to your local server. This is where a tool like ngrok is a lifesaver.
Ngrok creates a secure tunnel from a public URL straight to your machine. When you run it, you get a temporary web address that forwards all incoming traffic to a specific port on your localhost, like port 3000 where your Bolt app is probably running.
To get it going, you just run a command like ngrok http 3000 in your terminal. You'll then copy the public URL it spits out (it'll look something like https://random-string.ngrok.io) and paste it into your Slack app's "Request URL" field under "Event Subscriptions" and "Interactivity & Shortcuts."
This setup lets Slack's servers talk directly to your code, giving you a live feedback loop for debugging. You can trigger commands in your workspace and instantly see the results in your local console, making it way easier to iron out bugs before you even think about deploying.
One of the most common hangups I see during local testing is a timeout error. Slack is impatient; it expects a response within three seconds of sending an event. If your bot needs to do something slow, like query a database, make sure you acknowledge the event immediately with
ack()and then handle the heavy lifting asynchronously.
Once your bot is thoroughly tested and behaving as expected, it's time to find it a permanent home on the internet.
Deploying Your Bot to the Cloud
For most Slack bots, developer-friendly platforms like Heroku and Vercel are excellent choices because they make deployment incredibly simple. These platforms can often deploy straight from your Git repository, which is a huge time-saver.
Deploying to Heroku:
*   **Create a `Procfile`**: This is just a simple text file in your project's root that tells Heroku how to run your app. For a Node.js project, it’s usually one line: `web: node app.js`.
*   **Set Environment Variables**: In the Heroku dashboard, go to your app's settings and add your `SLACK_BOT_TOKEN`, `SLACK_SIGNING_SECRET`, and any other secrets. This is critical for keeping your tokens out of your codebase.
*   **Push to Deploy**: Connect your Heroku app to your GitHub repository. From there, pushing to your `main` branch will automatically kick off a new deployment.
The process for Vercel is quite similar, with a heavy focus on a seamless, Git-based workflow. The big takeaway is that these platforms handle all the server management headaches, so you can just focus on building cool features for your bot.
Using Docker for Advanced Deployments
For more complex applications or for teams that have standardized on containerization, using Docker is a powerful move. A Dockerfile acts as a blueprint for building an image of your application, bundling up all the code, libraries, and dependencies it needs to run.
This image can then be deployed anywhere Docker is supported—from an AWS EC2 instance to a Kubernetes cluster—which guarantees consistency between your development and production environments.
Containerizing your Slack bot makes it portable, scalable, and much easier to manage in larger systems. This is especially handy when you're integrating with other services, a common scenario when you're using GitHub Actions to send Slack notifications.
Whether you opt for a simple PaaS like Heroku or a more robust container-based approach with Docker, a solid deployment strategy is the final, crucial step to bringing your Slack bot to your team.
Custom Bot vs. PullNotifier for GitHub Alerts
While learning to create a bot in Slack is a fantastic engineering skill, it's not always the smartest move for every problem. When it comes to managing GitHub pull request notifications, you're looking at a classic build-versus-buy scenario. Building a custom bot gives you ultimate control, sure, but a specialized tool like PullNotifier can save you hundreds of development hours right off the bat.
The right choice really boils down to your team’s specific needs and resources. Do you really need a notification system that talks to some proprietary internal tool? Or are you just trying to cut through the noise of the default GitHub alerts?
When to Build a Custom Bot
Building your own bot makes sense when your workflow is genuinely one-of-a-kind. If you need to trigger actions in an internal system, enforce a super-complex, company-specific review process, or spit out highly customized reports that no off-the-shelf tool could dream of, then rolling your own is the way to go.
This path gives you total control over every single feature, from the exact wording of a notification to deep integrations with your existing tech stack.
Consider building if your requirements include:
*   **Deep internal tool integration:** Connecting PR events to a proprietary project management system or an internal database.
*   **Highly specific business logic:** Enforcing a multi-stage approval process that needs sign-off from different departments based on the code changes.
*   **Unique reporting needs:** Creating custom analytics dashboards from pull request data that go way beyond standard metrics.
Building a custom bot is an investment in a tailored solution. It’s powerful when you have a long-term need for a workflow so specific that no existing product can adequately address it, justifying the ongoing maintenance and development costs.
When to Use PullNotifier
For most teams, the goal is much simpler: get clear, actionable, and timely pull request notifications in Slack without the firehose of default alerts. This is exactly where a dedicated solution like PullNotifier shines. It was designed from the ground up to solve this one problem exceptionally well, which means you don't have to build, deploy, and maintain your own infrastructure.
Using a tool like PullNotifier frees up your engineering team to focus on your core product instead of getting bogged down with internal tooling. Setup is quick, the system is reliable, and it comes loaded with features you’d otherwise have to build from scratch, like intelligent reviewer routing and consolidated, thread-based updates. If you want to dive deeper, you can master Slack-GitHub integration for workflow success with our detailed guide.
Enterprise adoption of sophisticated bot automation in Slack is taking off. Integrations are now a core part of business strategy, with 33% of enterprise clients using Slack Connect for external automations and AI use among desk workers surging 233% in just six months. Companies know that effective bots drive productivity and revenue, a trend backed by recent findings about AI's impact on workforce productivity. Using a polished tool aligns with this modern approach to workplace efficiency.
Custom Bot vs. PullNotifier for GitHub Notifications
To help you decide, here’s a direct comparison of building a custom solution versus using a specialized tool for your GitHub-to-Slack workflow.
| Feature | Custom Slack Bot | PullNotifier |
|---|---|---|
| Setup Time | Weeks to months of development, testing, and deployment. | Under 5 minutes. No code required. |
| Maintenance | Ongoing effort required for updates, bug fixes, and infrastructure management. | Zero maintenance. Handled entirely by the PullNotifier team. |
| Core Functionality | You build everything from scratch: event handling, message formatting, etc. | Out-of-the-box features like smart routing, threaded updates, and user mapping. |
| Customization | Infinite. Can be integrated with any internal or proprietary system. | High. Customizable rules for channels, labels, and authors, but no custom code. |
| Cost | High upfront and ongoing engineering costs (salary, infrastructure). | Low, predictable subscription fee. Free for small teams. |
| Reliability | Depends entirely on your team's implementation and infrastructure. | High. Professionally maintained and monitored for uptime. |
Ultimately, if your needs align with what a dedicated tool offers, you'll save an enormous amount of time and resources. For highly niche, internal workflows, building a custom bot remains a powerful option.
Got Questions? We’ve Got Answers.
Even with a great framework like Bolt, you're bound to hit a few snags or have questions pop up as you build out more complex features. Let's tackle some of the most common hurdles developers face when building a Slack bot, so you can keep your project moving.
What Are the Most Common Mistakes with Slack Bot Permissions?
The single biggest mistake I see is requesting way too many permissions right from the start. It's tempting to grab broad scopes like chat:write.public just in case, but that's a security risk waiting to happen. Do you really need your bot to be able to post in every public channel? Probably not.
Always stick to the principle of least privilege. Only request the permissions your bot absolutely needs to do its job. If it only needs to post in one specific channel, use chat:write instead.
Another classic stumble: forgetting to reinstall the app in your workspace after changing its scopes. Slack won't apply new permissions until you do, and it's a step that’s surprisingly easy to forget when you're in the middle of a fast-paced dev cycle.
How Do I Handle Rate Limits with the Slack API?
Sooner or later, you'll probably run into Slack's API rate limits, especially if your bot is chatty and sends a lot of messages quickly. While Bolt has some built-in logic to help, a high-traffic bot needs a smarter strategy.
When you get hit with a 429 Too Many Requests error, the API response will include a Retry-After header. This tells you exactly how many seconds to wait before trying again. Your code should be built to catch this specific error, pause for that duration, and then gracefully retry the request. If you want to be more proactive, try to design your bot to batch messages or spread out API calls over time.
Can My Slack Bot Interact in Private Channels or DMs?
Yep, it absolutely can. But there are a few rules. A bot can't just barge into a private channel on its own; a member of that channel has to explicitly invite it.
The same goes for direct messages (DMs). A user has to message the bot first to kick off the conversation. Your bot isn't allowed to slide into a user's DMs unprompted if they've never interacted with it before.
To make these interactions possible, you'll need the right scopes:
*   **`im:history`**: To read DMs.
*   **`mpim:history`**: For reading group DMs.
*   **`im:write`**: To send DMs.
Remember to add these on top of any other scopes your bot already needs.
What Is the Difference Between the Events API and RTM API?
This one comes up a lot. The Events API is the modern, recommended way for your bot to get information from Slack. It works on a "push" model—Slack sends your bot an HTTP POST request whenever an event you've subscribed to happens. It’s scalable, easier to manage, and the standard for any new Slack app you build. In fact, the Bolt framework is built exclusively on the Events API.
The Real Time Messaging (RTM) API is the older method. It uses WebSockets to create a persistent, open connection—a "pull" model where your bot has to maintain the connection and listen for a constant stream of data. While it still has a few niche uses, the Events API is more efficient and what Slack recommends for pretty much every use case today.
Building a Slack bot to manage GitHub pull request notifications is a great project, but it also means taking on the burden of building and maintaining it yourself—time that could be spent on your actual product. PullNotifier gives you a production-ready solution that sets up in minutes and cuts through the noise of default GitHub alerts. Get clear, actionable PR updates without writing a single line of code. Start streamlining your code reviews today at pullnotifier.com.