- Published on
A Developer's Guide to Git Merge One Branch Into Another
- Authors

- Name
- Gabriel
- @gabriel__xyz
Merging code is the heart of collaborative software development, making the git merge command one of the most essential tools in your kit. Knowing how to git merge one branch into another is how you’ll integrate new features, roll out bug fixes, and keep everyone’s work in sync. It’s the final step that brings separate lines of development together into a single, cohesive project.
Why Merging Branches Is a Core Developer Skill
On any software project that's moving at a decent pace, you'll have developers working on different things at the same time. One person might be building a new payment gateway on a feature/stripe-checkout branch, while another is patching a critical vulnerability on a hotfix/log4j-update branch.
These independent lines of work are what we call branches. They’re a safe space to experiment and build things in parallel without blowing up the main codebase, which is usually develop or main.
But once that work is done, what happens? The new code needs to find its way back home. That's where merging comes in. Merging is simply the act of taking all the changes from one branch and applying them to another. This process usually creates a special "merge commit" that neatly ties the histories of the two branches together, giving you a crystal-clear record of when a feature was finished and folded into the project.
The Foundation of Team Collaboration
Without a solid merging strategy, a team project can quickly spiral into chaos. Just imagine several developers all pushing their changes directly to the main branch with no process. You’d end up with overwritten work, broken features, and a tangled mess of commits that are a nightmare to track or revert. Merging brings order to that chaos.
A controlled merging process is fundamental for a few key reasons:
*   **It Preserves Your Project's History:** Every merge commit is like a historical marker, showing exactly when and where a new feature was integrated.
*   **It Enables Parallel Development:** Teams can crank out multiple features at once without stepping on each other's toes.
*   **It Facilitates Code Reviews:** Merging is almost always done through pull requests, which gives your team a chance to review the code before it ever touches the main branch.
Merging isn't just a technical command; it's a communication tool. A merge signals that a piece of work is complete, tested, and ready to go, forming the backbone of modern development workflows.
Mastering this skill is non-negotiable. In fact, a whopping 87% of Git users report having to deal with merge conflicts, which just goes to show how common—and sometimes tricky—integrating branches can be. You can learn more about how teams handle these challenges in these Git development statistics.
Ultimately, getting good at merging branches is a fundamental skill that will directly help to improve developer productivity and keep your projects moving forward.
The Essential Commands for a Standard Merge
To successfully git merge one branch into another, you need a clear, repeatable process. This isn't about memorizing complex options; it's about a simple sequence of commands that ensures a smooth integration of your work. The goal is to bring changes from a feature branch (like feature/new-auth) into a primary branch (like develop).
First things first, you need to prep the receiving branch. You never want to merge into an outdated local copy, as this can hide potential conflicts and cause headaches later. Your initial move should always be to get the latest changes from the remote repository.
Preparing Your Local Repository
Before you can even think about merging, you have to switch to the branch that will receive the new code. Let's assume this is your develop branch. You'll want to check it out and then immediately pull the latest updates to make sure it's perfectly in sync.
Run these two commands in your terminal:
*   `git switch develop`
*   `git pull origin develop`
The switch command (or checkout, its older sibling) changes your active working directory to the develop branch. Following up with pull fetches any new commits from the remote server and merges them into your local copy. Now you have the most current version, and you're ready for the main event. For an even deeper dive, our guide on how to merge GitHub branches offers more context.
This simple workflow visualizes how code moves from an isolated feature branch back into the main development line.
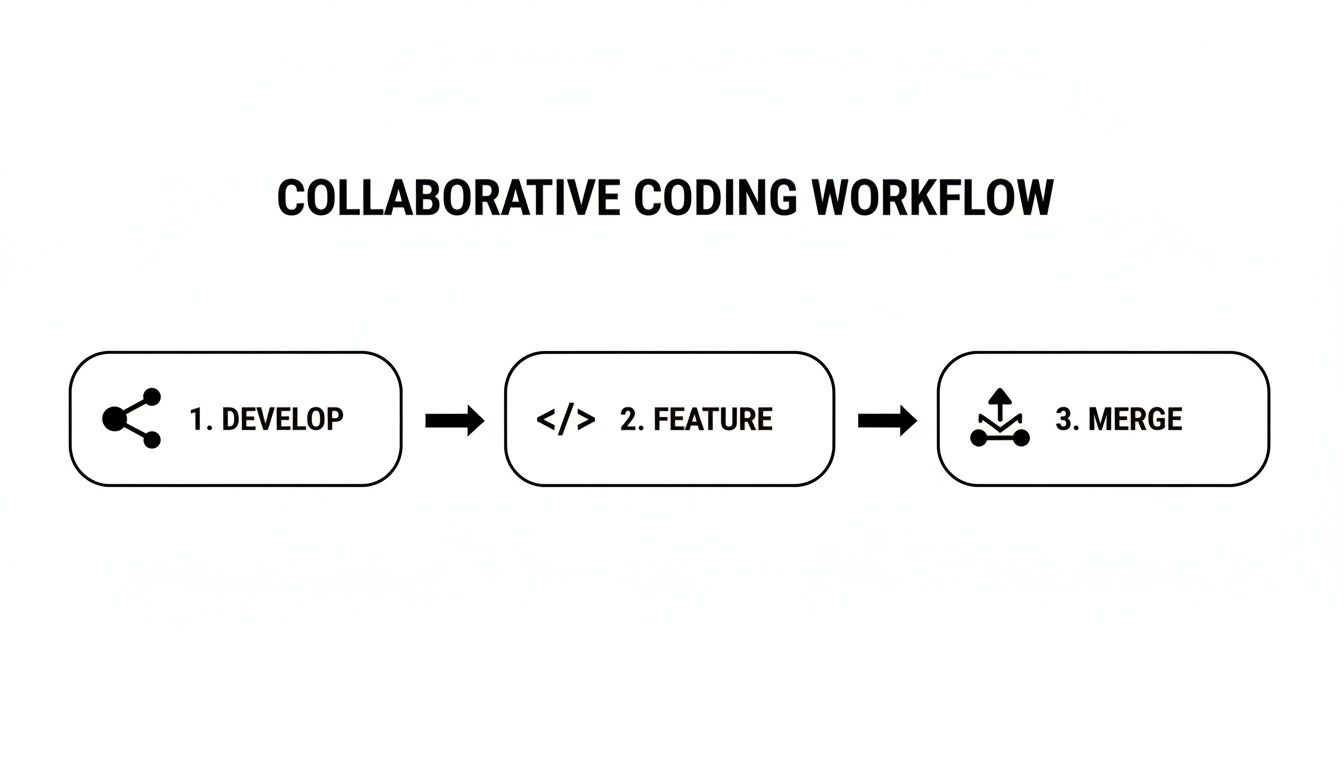
As the graphic shows, merging is the key action that integrates isolated feature development back into the collaborative develop branch.
Executing the Merge Command
With your develop branch updated and active, it's time to run the core command. This single line tells Git to take all the commits from your feature branch and weave them into your current branch (develop).
Type this into your terminal:
git merge feature/new-auth
After you hit enter, Git gets to work. If there are no conflicting changes between the branches, Git will open your default text editor, prompting you for a merge commit message.
What is a Merge Commit? A merge commit is a special type of commit that has two parent commits. Think of it as a historical marker that ties together the histories of two separate branches, showing exactly where a feature was integrated.
The default message is usually fine (e.g., "Merge branch 'feature/new-auth' into develop"). Just save and close the editor to finalize the merge. Your terminal will then confirm it was successful and show you a summary of the changes. That's it—you've officially merged one branch into another.
Choosing Your Merge Strategy
When you git merge one branch into another, Git doesn’t just smash them together. It takes a look at their histories and picks a strategy. The two main ways it does this are with a fast-forward merge or a three-way merge, and knowing the difference is critical for keeping your project history clean and understandable.
By default, Git will try to do a fast-forward merge if it can. This happens when your receiving branch (let’s say, main) hasn't had any new commits since your feature branch was created. It's a straight line. Git just moves the main branch pointer up to the latest commit on your feature branch. It’s super clean, efficient, and makes it look like the feature branch never even existed.

But that tidiness comes at a cost—it erases the context of where a feature was actually developed. For that reason, many teams deliberately avoid it.
Forcing a Merge Commit With --no-ff
Sometimes a fast-forward merge can feel too clean, almost like you're hiding the fact that a separate branch ever existed. To make sure you preserve that history and clearly mark where a feature was integrated, you can force Git to create a full merge commit using the --no-ff (no-fast-forward) flag.
git merge --no-ff feature/user-profile
This command essentially tells Git, "Hey, even if you can fast-forward, I want you to create a proper merge commit instead." This creates a clear diamond shape in your Git log, which shows exactly where a branch split off and where it was brought back in. That little piece of history can be a lifesaver when you're trying to figure out how the project evolved, track down bugs, or pinpoint when a specific set of changes was introduced.
For teams that value a clear, auditable history, using
--no-ffis a non-negotiable best practice. It turns your commit log from a simple timeline into a rich story of your project's development.
The two main merge strategies in Git each have their own impact on your project's history. Understanding them helps you decide which one best fits your team's workflow.
Merge Strategy Comparison: Fast-Forward vs No-Fast-Forward (--no-ff)
| Attribute | Fast-Forward Merge | No-Fast-Forward Merge (--no-ff) |
|---|---|---|
| Commit History | Creates a linear history. | Creates a diamond shape, preserving branch context. |
| Merge Commit | No new merge commit is created. | Always creates a new merge commit. |
| Traceability | Loses the context of the original feature branch. | Clearly shows where a branch was merged in. |
| When to Use | Small, trivial fixes; personal projects. | Major features; team environments where history matters. |
| Command | git merge <branch> (default behavior) | git merge --no-ff <branch> |
Choosing between these strategies isn't just a technical decision—it shapes how your team understands and interacts with the codebase over time.
When to Choose Each Strategy
So, which one is right for you? It really boils down to your team's workflow and what you value in your project history.
*   **Go with Fast-Forward Merges for:**
    *   Tiny bug fixes or small tweaks where the branch context isn't all that important.
    *   Personal projects where you just want a simple, linear history that’s easy to follow.
*   **Opt for No-Fast-Forward (`--no-ff`) Merges for:**
    *   Bringing in significant features where you absolutely want to keep the full context of the branch.
    *   Team environments where it's vital to see who merged what and when.
    *   Workflows that rely on explicit markers for things like releases or major integrations.
In the end, it’s a trade-off between simplicity and historical detail. A fast-forward merge gives you a cleaner log, but the --no-ff approach provides a more complete story, which is often essential for collaborative projects. Agreeing on a consistent strategy is a fundamental part of building effective monorepo branching strategies for teams and making sure your project stays manageable in the long run.
How to Confidently Resolve Merge Conflicts
Sooner or later, it happens to every developer. You go to merge a branch and are greeted with the dreaded CONFLICT message. It can be intimidating, but it’s not an error. A merge conflict is just Git's way of saying, "I can't figure out which change is correct on my own, so I need your help."
When a conflict pops up, Git pauses the merge and flags the files that need attention. Your terminal will show something like Automatic merge failed; fix conflicts and then commit the result. This is your cue to step in and act as the referee between two competing versions of your code.
This is a totally normal part of working on a team, not a sign you did something wrong. The key is to have a clear, systematic process instead of panicking.
Decoding the Conflict Markers
When you open a file with a conflict, you’ll find that Git has inserted special markers to show you exactly where the trouble is. These markers visually fence off the conflicting code blocks from each branch.
*   `<<<<<<< HEAD`: Everything below this line and before `=======` is the version from your current branch (the one you are merging *into*).
*   `=======`: This simple line separates the two conflicting versions.
*   `>>>>>>> feature/new-login`: Everything between the separator and this line is the version from the incoming branch (the one you are merging *from*).
Your job is to jump into the file, remove all these markers, and leave behind only the code you want to keep. Sometimes you'll pick one version over the other, and other times you might need to blend elements from both.
The Resolution Workflow
Once you know how to read the markers, fixing the conflict is a pretty straightforward process. You just need to clean up the file and then tell Git that you're done.
- Edit the File: Open each conflicted file in your favorite editor. You'll manually remove the
<<<<<<<,=======, and>>>>>>>markers and edit the code until it's in its final, correct state. - Stage the Resolved File: After you save your changes, you have to let Git know the conflict is resolved. You do this with the familiar
git addcommand. For a file namedstyles.css, you'd rungit add styles.css. This stages the file and marks it as resolved. - Complete the Merge: Once all conflicted files have been staged, you can finalize the merge by running
git commit. Git will pop open your editor with a pre-filled commit message like "Merge branch 'feature/new-login' into develop," which you can usually just save and close.
Don't be afraid of merge conflicts. View them as a structured conversation between different lines of work. Your role is to make the final decision and integrate the best of both contributions.
For engineering managers, minimizing friction here is key. The mean time to merge—the average duration from PR creation to merge—averages 2-5 days but can inflate quickly. With 80% of developers using external tools to resolve conflicts, an efficient process is vital to keep this metric low.
Many modern code editors, like VS Code, offer powerful built-in tools that make this even easier. They give you a side-by-side view of the changes and offer simple buttons like "Accept Current Change" or "Accept Incoming Change," turning a potentially stressful task into just a few clicks. For a more detailed walkthrough, check out our developer's guide to Git conflict resolution.
Going Beyond the Basic Merge
Once you're comfortable with the standard git merge workflow, it's time to level up. There are a couple of more advanced techniques that give you much finer control over your project’s history. Keeping a clean, readable commit log is a lifesaver for long-term project health, and these tools are how you do it.
We're mainly talking about two power-user commands: the --squash merge and the rebase.
These aren't just for showing off. In large-scale projects, managing a high volume of commits is a daily reality. Think about massive enterprise monorepos where hundreds of pull requests might get merged every day—in markets like India (2.5 million GitHub users) and China (1.2 million), this is common. In those environments, keeping the main branch history clean isn't just nice; it's essential for survival and can slash integration errors by up to 40%. You can dig deeper into Git usage patterns and statistics to see how different strategies play out at scale.
Condensing History with Squash Merging
Let's be honest, your feature branch probably has a few commits you're not proud of. Things like "fix typo," "add console log," and the inevitable "remove console log." While those are part of the development journey, they don't add much value to the main branch's history.
This is exactly where a squash merge comes in handy.
The git merge --squash command is a little different. It takes all the changes from your feature branch and bundles them up into a single, unified change that's staged in your working directory. Crucially, it doesn't create a merge commit for you. Instead, it pauses and lets you create one clean, descriptive commit yourself.
Here’s how that looks in practice:
- First, hop over to the branch you're merging into:
git switch main - Then, run the squash merge:
git merge --squash feature/user-profile - Finally, create your own clean commit:
git commit -m "feat: Implement user profile page"
This approach keeps your main branch history tidy and focused on meaningful features, not all the tiny steps it took to get there.
Pro Tip: Use
--squashwhen you want the result of a feature branch without the messy history that came with it. It’s perfect for integrating experimental work or cleaning up a chaotic branch before it hits your project's official log.
Using Rebase for a Linear History
Rebasing is the other major alternative to a standard merge. While merging creates a new commit that ties two branch histories together, git rebase actually rewrites history by replaying your feature branch's commits one-by-one on top of the target branch.
The result? A perfectly straight, linear history. It looks as if all your work happened in a single, uninterrupted line.
The command itself is simple enough. When you're on your feature branch, you just run: git rebase main
This command essentially picks up your entire feature branch and moves it so that it starts at the latest commit of main.
But this power comes with a huge warning: Never, ever rebase a branch that has been pushed and is being used by other developers. Because rebasing rewrites commit history (changing commit hashes), it can cause absolute chaos for collaborators who have based their work on the original, un-rebased branch.
Think of rebasing as a tool for cleaning up your own local, private branches before you share them with the team.
Best Practices for a Modern Merge Workflow
Effective merging has less to do with the specific commands you run and more to do with your team's process. If you want to git merge one branch into another without causing headaches, the single best thing you can do is move the process out of your local terminal and onto a collaborative platform like GitHub or GitLab.
This modern approach is all about Pull Requests (PRs) or Merge Requests (MRs). Instead of just merging on your machine and pushing the result, you open a PR. Think of it as a formal proposal to integrate your changes, and it creates a vital space for communication and quality control.
Embrace Pull Requests for Quality and Collaboration
A pull request is so much more than a merge request; it's a forum for discussion. It gives your teammates a chance to review your code, suggest improvements, and catch potential bugs before they ever touch the main branch. This review cycle is really the bedrock of a healthy development process.
PRs are also the perfect place to hook in automation. You can trigger Continuous Integration (CI) pipelines that automatically run tests, lint the code for style violations, and perform security scans on your proposed changes. This automation ensures every single merge meets your team's quality standards, making the entire workflow far safer and more reliable.
Think of a pull request as a quality gate. It transforms merging from a solitary, potentially risky action into a transparent, team-owned process that builds confidence in your codebase.
Tools like PullNotifier are a game-changer for teams that live on GitHub, where PRs drive the entire workflow. It consolidates PR status updates into clean Slack threads, which can dramatically cut down on review delays. Imagine shrinking your merge time from days to just hours—a huge win when you consider that 82% of companies using version control have formal code reviews around merges. You can find more details in these development statistics.
Got Questions About Merging in Git?
Even after you've got a handle on the basics, a few tricky questions always seem to come up around git merge. Let's clear the air on some of the most common ones so you can merge without a second thought.
Merge vs. Rebase: What's the Difference?
This is the big one. git merge and git rebase both integrate changes from one branch into another, but they do it in fundamentally different ways.
A merge takes the histories of two branches and ties them together with a brand-new commit—a "merge commit." This keeps a perfect, unaltered record of how and when a feature branch was integrated. It's safe and preserves the full context.
A rebase, on the other hand, rewrites history. It takes the commits from your feature branch and replays them, one by one, on top of the target branch. The result is a clean, straight-line history, as if all the work was done in sequence. It's beautiful but can be dangerous if you rewrite the history of a shared branch.
My rule of thumb: Merge shared branches like
mainordevelopto preserve history. Rebase your own local feature branches to clean them up before sharing them.
Can I Undo a Merge?
Yes, you can—but how you do it depends on whether you've pushed the changes yet.
If you just merged locally and haven't pushed, the easiest fix is git reset --hard HEAD~1. This command simply moves your branch pointer back one commit, effectively erasing the merge from existence. Quick and clean.
But if you've already pushed the merge to the remote repository, do not use reset. Rewriting shared history is a recipe for disaster. Instead, a safer option is git revert -m 1 <merge-commit-hash>. This creates a new commit that undoes all the changes introduced by the merge, keeping the project's history intact and safe for everyone else.
Should I Delete a Branch After Merging?
Absolutely. Once your feature branch is successfully merged into main (or whatever your target branch is), its job is done. Keeping it around just adds clutter to your repository.
Cleaning up is easy. Just run git branch -d <branch-name> to delete the local branch. It's good practice and keeps your list of branches tidy and relevant.
Tired of merge delays and chasing down code reviews? PullNotifier sends real-time, consolidated pull request updates from GitHub to Slack. Keep your team in sync and your review process moving without all the notification noise. Check it out at https://pullnotifier.com.