- Published on
How to Build a Home Server: Expert Step-by-Step Guide
- Authors

- Name
- Gabriel
- @gabriel__xyz
Building a home server is about taking back the reins of your digital life. It’s a rewarding project that lets you ditch those pesky monthly cloud subscription fees, create a killer private media hub, and put yourself in charge of your own data. This guide is your roadmap, designed to make the whole process feel less like a chore and more like the awesome tech adventure it is.
Why Build a Home Server in the First Place?
Jumping into the world of home servers might sound like something reserved for hardcore tech enthusiasts, but it's quickly going mainstream. The biggest draw? Gaining complete control and customization over your digital world. Instead of handing your files, media, and smart home data over to big tech companies, a home server brings all of it back under your own roof.
This isn't just a hunch; it's a real and growing trend. As our digital lives expand with more content and smart gadgets, so does the desire for personal infrastructure. The global home media server market was valued at a whopping USD 4.5 billion in 2023 and is expected to more than double by 2032. It's clear that people are shifting toward self-hosting.
Practical Reasons to Build Your Own Server
So, what can you actually do with a home server? The sky's the limit, but most people start with a few common goals. This isn't just about tinkering for the sake of it; it's about solving real problems and making your digital life a whole lot better.
Here are a few popular use cases to get you started:
- Create a Central Media Hub: Imagine all your movies, music, and photos instantly available on any device in your house—from the big-screen TV down to your phone. Apps like Plex or Jellyfin turn your server into your very own personal Netflix.
- Build a Private Cloud: Say goodbye to monthly fees from services like Google Drive or Dropbox. With a tool like Nextcloud, you can host a secure file-syncing service that keeps your data completely private and under your control.
- Automate Your Smart Home: Run a platform like Home Assistant to manage all your smart devices locally. This not only makes your automations faster and more reliable but also keeps your data off corporate servers, which is a huge win for privacy.
- Block Ads Network-Wide: Install Pi-hole to kill advertisements on every single device on your home network. Laptops, phones, even your smart fridge—all ad-free without needing to install a single browser extension.
A home server is the ultimate tech flex, but it's also incredibly practical. It transforms you from a passive consumer of digital services into an active creator of your own customized digital ecosystem.
Many people also find that building a server is a fantastic way to learn. You get hands-on experience with networking, operating systems, and security in a way that just can't be matched by reading about it. Once you're up and running, you can explore all sorts of other interesting home lab projects to see what else is possible.
To help you get started, let's break down the key decisions you'll be making. This table gives a quick overview of your main choices, from picking the hardware to deciding what your server will actually do.
Home Server Build at a Glance: Key Decisions
| Decision Area | Popular Options | Best For |
|---|---|---|
| Hardware | Raspberry Pi, Old PC, NAS Device, Custom Build | Budget-conscious beginners, repurposing old gear, simple storage, or max performance. |
| Operating System | Ubuntu Server, Debian, TrueNAS, Unraid | General-purpose use, stability, dedicated storage, or ease of use with Docker. |
| Primary Use Case | Media Server (Plex), NAS (Nextcloud), Ad-Blocking | Streaming media, private cloud storage, or improving network-wide browsing. |
| Access Method | SSH, Web Interface, Remote Desktop | Secure command-line access, easy management via browser, or a full graphical interface. |
These are the foundational choices that will shape your home server. As you go through this guide, we'll dive deeper into each one, giving you the practical advice you need to build a server that's perfect for you.
Choosing the Right Hardware for Your Build
This is where your server stops being just an idea and starts taking shape. Picking out hardware can feel like wading through a sea of acronyms and specs, but don't get overwhelmed. The goal isn't to become an expert overnight; it’s about matching the right parts to your project. A little planning here saves a ton of money and frustration later on.
Think about it: a machine built for 24/7 file storage and backups has completely different needs than one meant to transcode multiple 4K movie streams at once. The first needs to be reliable and sip power, while the second demands a beefy processor. Getting this right from the start is half the battle.
Repurpose, Buy New, or Go Tiny?
Your first big decision is what to build your server on. You've really got three main paths, and each has its pros and cons.
- Repurposing an Old PC: This is the cheapest way to get started, hands down. That old desktop or laptop collecting dust in a closet can often become a surprisingly capable server with little to no investment. It's a fantastic way to learn the ropes of building a home server without a big upfront cost.
- Buying a Dedicated Mini-PC or Refurbished Desktop: This is the sweet spot for a lot of people, balancing cost and performance. A refurbished office PC (like a Dell OptiPlex) or a new mini-PC gives you modern, energy-efficient parts in a small package, often for just a few hundred bucks.
- Using a Single-Board Computer (SBC): There's a reason devices like the Raspberry Pi are so popular. They use barely any electricity, are dead silent, and can fit in your hand. This makes them perfect for lightweight jobs like running a network-wide ad blocker or a smart home hub.
This graphic breaks down the main components you'll be looking at, no matter which path you choose.
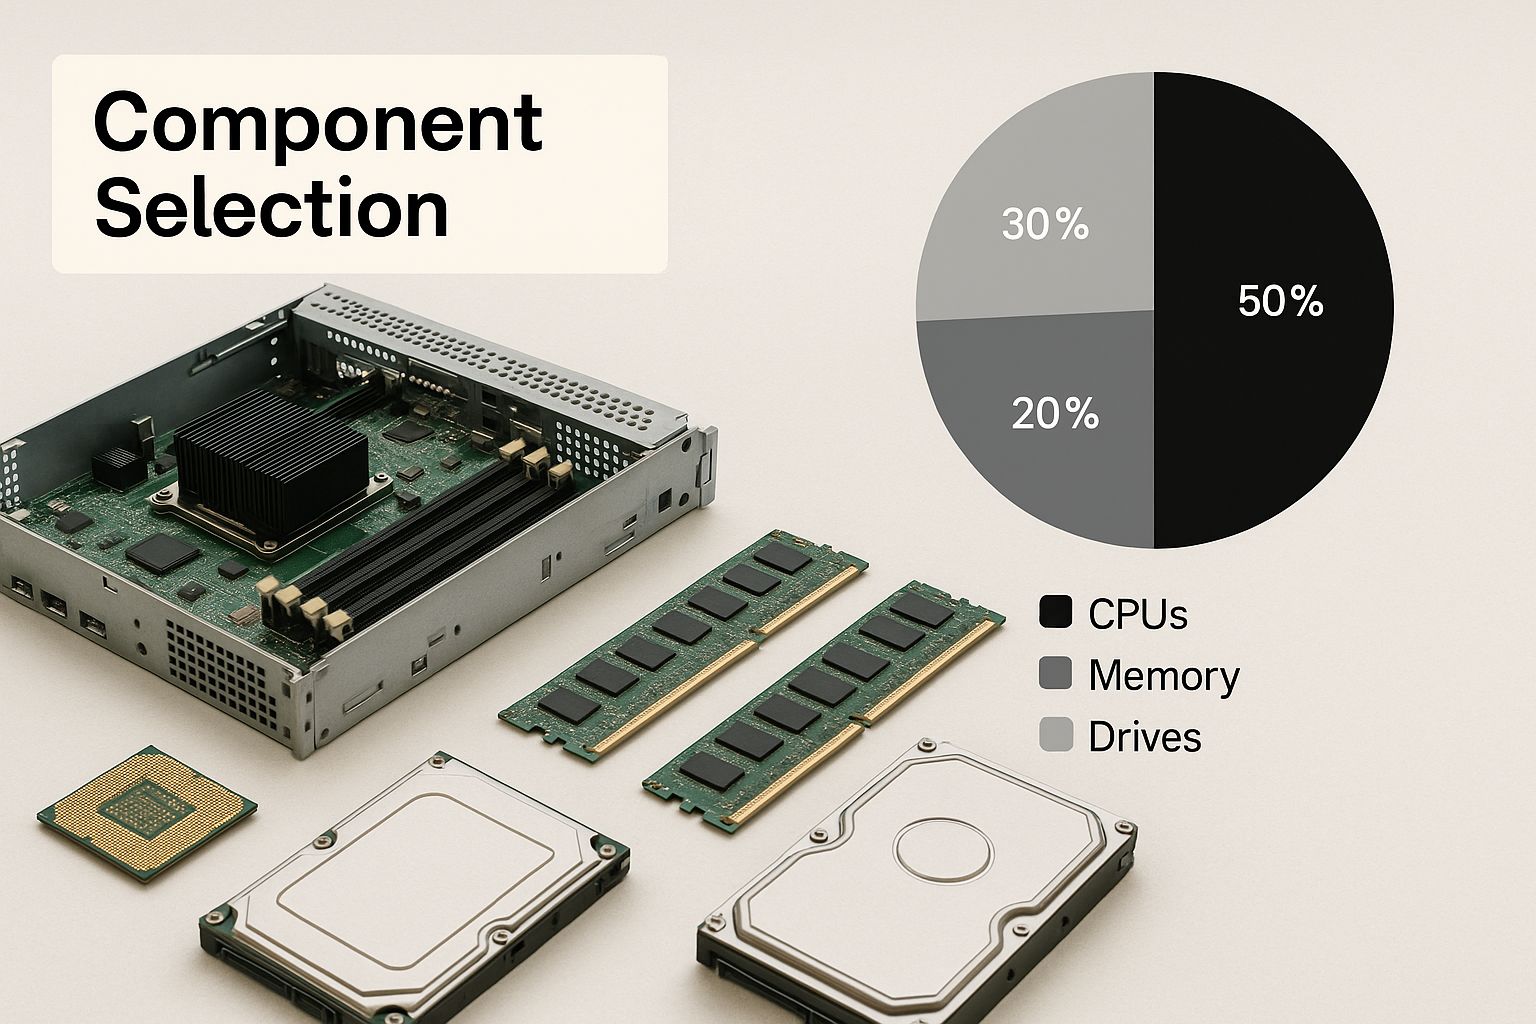
Seeing the core hardware laid out like this helps simplify things. It lets you focus on how the CPU, RAM, and storage work together to bring your project to life.
The Core Components That Matter Most
Once you've decided on the form factor, you can zero in on the three parts that truly define your server's power: the CPU, RAM, and storage. The trick is to aim for "good enough" for what you need, not the absolute best of everything.
It's also interesting to see how the broader market is shifting. ARM-based servers, built on the same kind of architecture as a Raspberry Pi or your smartphone, are exploding in popularity, with shipments expected to jump by 70%. At the same time, demand for servers with GPUs for AI-related tasks grew by nearly 47% year-over-year. You can read up on these server market trends to see where the industry is heading.
To make things a bit more concrete, I've put together a table with some common home server goals and what kind of hardware you might want to look for.
Hardware Scenarios for Common Home Server Uses
| Use Case | CPU Recommendation | RAM Suggestion | Storage Setup |
|---|---|---|---|
| Simple File & Backup Server | Low-power Intel Celeron/Pentium or older Core i3. Energy efficiency is key. | 4-8 GB is plenty for basic file management and backups. | Small SSD for the OS (120GB) and one or more large HDDs for data. |
| Plex Media Server (Direct Play) | Modern Intel Core i3 or AMD Ryzen 3. Enough for a few direct streams. | 8 GB should be comfortable. | Small SSD for OS/Plex metadata, large HDDs for media files. |
| Plex Media Server (4K Transcoding) | Intel Core i5/i7 (with Quick Sync) or AMD Ryzen 5. Needs horsepower. | 16 GB is the sweet spot for smooth transcoding and other tasks. | Fast SSD for OS/metadata, and a RAID array of HDDs for capacity and redundancy. |
| Virtualization & Container Lab | Modern Intel Core i5/i7 or AMD Ryzen 7 with multiple cores. | 32 GB or more. VMs and containers love RAM. | A large, fast SSD (1TB+) for running VMs, plus HDDs for bulk storage. |
This isn't an exhaustive list, of course, but it gives you a solid starting point for matching components to your ambitions.
The CPU: The Brain of the Operation
The processor does most of the heavy lifting.
For a simple file server or a personal cloud, a low-power Intel Celeron or an older Core i3 is more than enough. Their biggest win is low power draw, which keeps your electricity bill in check for a machine that's always on.
But if you want to run something like Plex that has to transcode video files on the fly for your phone or tablet, you'll need more muscle. A modern Intel Core i5 or AMD Ryzen 5 has the power to juggle multiple streams without stuttering.
RAM: The Server's Short-Term Memory
Random Access Memory, or RAM, is all about multitasking. The more services you plan to run at the same time, the more RAM you'll need.
- 4-8 GB: This is a great starting point for basic file storage, a network ad-blocker like Pi-hole, or a handful of lightweight applications.
- 16 GB: This is the gold standard for most home servers. It gives you plenty of breathing room for a media server, a private cloud, and several other apps running in containers.
- 32 GB or more: You're heading into power-user territory here. This much RAM is ideal for running multiple virtual machines or a dedicated gaming server.
Storage: Where Your Data Lives
How you set up your storage is probably the most personal choice you'll make. It’s a constant balancing act between raw capacity, speed, and data safety.
For the operating system itself, a small, zippy Solid-State Drive (SSD) is a no-brainer. A 120GB or 256GB SSD will make your server boot up in seconds and feel incredibly responsive.
Then, for your actual data—all your movies, photos, documents, and backups—traditional Hard Disk Drives (HDDs) still offer the most storage for your money. A popular and effective setup is to use one or more large HDDs for bulk storage, giving you plenty of space for your digital life to grow.
Selecting and Installing Your Server Operating System
With your hardware picked out, it's time for the next big decision: the operating system. The OS is the soul of your server. It dictates how you'll interact with it, what you can do, and how much tinkering you'll need to do along the way. Think of it as your server's personality—some are polished and graphical, while others are raw, powerful, and live in the command line.
There’s no single "best" OS, just the one that’s right for you. Your choice should really come down to your technical comfort level and what you plan to do with the server.
Understanding Your Main OS Options
For most home server builders, the choice boils down to two paths: a user-friendly NAS platform or a flexible, do-it-all Linux distribution.
- Dedicated NAS Operating Systems (Unraid, TrueNAS): These are purpose-built for one thing: storage. They come with beautiful web interfaces that make complicated tasks like setting up storage pools, creating file shares, and installing apps feel effortless. If your main goal is a rock-solid file server or media hub without the headache, these are fantastic choices.
- General-Purpose Linux Servers (Ubuntu Server, Debian): These are the blank canvases of the server world. They give you the ultimate freedom to build absolutely anything you can dream up. The learning curve is a bit steeper since you'll be spending most of your time on the command line, but the payoff is total control and access to a massive support community.
I actually started my home server journey with a dedicated NAS OS. It was a great way to learn the ropes. Eventually, though, I made the jump to Ubuntu Server. The control it gave me and the ability to run pretty much any software imaginable with Docker was a total game-changer for my home lab projects.
A Closer Look at Popular Choices
Let's break down the top contenders. Each has its own philosophy and is a better fit for different types of users and projects.
For the Beginner or Storage-Focused User
- TrueNAS CORE: Built on the legendary ZFS filesystem, TrueNAS is the gold standard for data integrity. It's a rock-solid choice for creating robust storage arrays and is perfect for anyone who puts data protection above all else. Its roots are in the enterprise world, so it can feel a bit rigid, but its reliability is second to none.
- Unraid: Unraid is all about flexibility. Its standout feature is the ability to mix and match hard drives of different sizes into a single, massive storage pool. This makes expanding your storage over time incredibly simple and cost-effective. It also has an amazing community and a super simple "app store" for deploying Docker containers and VMs.
For the Power User or Tinkerer
- Ubuntu Server: This is arguably the most popular choice for a general-purpose home server, and for good reason. It has a massive, well-documented support ecosystem, meaning you can find a guide for just about anything you want to do. It’s stable, secure, and offers Long-Term Support (LTS) releases, which are ideal for a set-it-and-forget-it server.
This screenshot shows the official Ubuntu Server homepage, which does a great job of showing its versatility for everything from cloud computing to edge devices.

The clean interface and clear messaging really highlight why so many developers and home labbers choose it as their starting point.
Installing Your Chosen Operating System
Alright, you've made your choice. Time to bring this machine to life. For this guide, we'll walk through the installation using Ubuntu Server, since it's such a versatile and common starting point. The general steps are pretty similar for other systems, too.
First, you'll need a few things:
- An empty USB flash drive (at least 8GB).
- Another computer to create the installer.
- An Ethernet cable to plug your server directly into your router.
Head over to the official website and download the latest LTS version of Ubuntu Server. LTS stands for Long-Term Support, which guarantees security updates for five years. That stability is exactly what you want for a server.
Next, you'll need to create a bootable USB drive. A free tool like BalenaEtcher makes this dead simple. Just open the app, select the Ubuntu Server ISO file you downloaded, pick your USB drive, and hit "Flash!". This will wipe the USB drive and copy the installation files onto it.
Now for the fun part. Plug the bootable USB drive into your new server, connect a keyboard and monitor, and turn it on. You'll probably need to mash a key like F2, F12, or DEL during startup to get into the BIOS or boot menu. From there, just tell the computer to boot from the USB drive.
The Ubuntu Server installer will take it from here, guiding you through the rest of the process. You'll set your language, keyboard layout, and network settings. One of the most important steps is storage setup. For a simple server, you can just tell it to use the entire OS drive.
During the setup, you'll create your user account and password. Write these down—you'll need them to log in! Toward the end, the installer might offer to install some popular software packages (like Docker). I'd recommend skipping this for now; we can handle applications later with more control.
Once the installation finishes, the system will ask you to remove the USB drive and reboot. And just like that, your home server is officially alive and running its new OS.
Alright, the server is built, the OS is running, and it's officially alive. Now comes the real fun: getting it talking to your network and making sure it's locked down tight. This isn't just a simple checkbox; it's about laying a solid foundation for every cool project you plan to run on this machine.
Getting this part right is more important than you might think. The global server market is absolutely exploding and is on track to hit around USD 109.31 billion. That's a huge number, and it shows just how much we rely on this kind of infrastructure. It also means that even for a home project, good security is non-negotiable. You can read more about the growing server market and its implications on Research Nester.
Making Your Server Accessible at Home
First things first, you need to make sure you can actually find and connect to your server from other devices on your network. Your router probably gave it an IP address automatically via DHCP, but that address can change without warning. Imagine trying to find your house if the street address changed every few days—that's what you're dealing with.
The fix is simple: assign a static IP address.
This tells your router to reserve a specific address just for your server, so it’s always in the same place. You can usually do this right from your router’s admin page. Just find your server in the list of connected devices and look for a button that says "reserve" or "make static."
And while you're thinking about connections, don't underestimate the power of a good old-fashioned wire. For a server, a stable physical connection is king. If you're setting up a more permanent lab, it might be worth looking into expert data cabling installation services to ensure rock-solid performance.
Pro Tip: When you set a static IP, pick one that's outside your router's normal DHCP pool to avoid any potential conflicts. For example, if your router hands out addresses between 192.168.1.100 and 192.168.1.200, assigning your server something like 192.168.1.50 is a smart move.
A Foundational Security Checklist
Security shouldn't be an afterthought you bolt on later. It needs to be part of the initial setup. Think of it like locking the doors and windows of a new house before you start moving furniture in. A few basic steps right now will dramatically beef up your server's defenses.
Here’s a practical checklist to get you started:
- Change All Default Passwords: This is the big one. If your OS or any software came with a default login like "admin" or "pi," change it immediately. Make it something strong and unique.
- Create a Non-Admin User: Get out of the habit of logging in as "root" or the main administrator for everyday tasks. Create a standard user account for yourself and use
sudo(in Linux) to elevate your permissions only when you absolutely have to. This one habit can save you from catastrophic mistakes. - Enable a Basic Firewall: Most modern operating systems include a firewall, but it's often off by default. For Linux users, Uncomplicated Firewall (UFW) is a godsend. It's incredibly easy to use. A great starting point is to block all incoming traffic and then poke holes only for the services you need, like SSH.
These three steps are your first line of defense. Don't skip them.
Upgrading to SSH Keys for Remote Login
If you plan to access your server remotely using Secure Shell (SSH), using a password is fine, but it leaves you vulnerable to brute-force attacks where bots try to guess your password over and over. A much, much better way is to use SSH keys.
SSH keys work as a pair: a public key that you put on the server and a private key that stays securely on your personal computer. When you try to log in, the server will only grant access if your computer can prove it has the matching private key. It’s basically impossible for an attacker to guess.
Setting this up is a quick, three-part process:
- Generate a key pair on your local machine.
- Copy the public key over to your new server.
- Disable password authentication on the server so it only accepts key-based logins.
Once this is done, you'll be able to log in securely without ever typing a password. It's a massive security upgrade for just a few minutes of work and easily one of the most impactful things you can do to harden your new server.
Bringing Your Server to Life with Real Applications
You've done the hard work—the server is built, the OS is humming along, and your network is buttoned up. You’ve officially laid the groundwork. Now for the fun part: making it actually do something. This is where that quiet box in the corner transforms into a media streaming powerhouse, a private cloud for your files, or a silent guardian that blocks ads for your entire network.
The old-school way of doing this was to install software directly onto the server's operating system. It works, sure, but it can get messy fast. Applications often have conflicting dependencies, and uninstalling something can leave behind a trail of forgotten configuration files, slowly cluttering up your pristine system.
The Modern Approach: Containerization with Docker
Thankfully, there’s a much cleaner, more powerful way to manage your applications today: Docker. Think of Docker as a system for packing an application and everything it needs—code, libraries, settings—into a neat, self-contained box called a container.
This container can run just about anywhere, completely isolated from the host OS and any other containers. The advantages here are massive:
- Cleanliness: Your base operating system stays untouched. You can spin up and tear down apps without leaving a single file behind.
- Simplicity: Forget dependency hell. If the container runs, the application runs. Period.
- Portability: You can move your applications to a completely different machine, and they’ll work exactly the same way.
Instead of wrestling with a dozen installation commands, you can often deploy an entire application stack with a single, simple configuration file. This is the power of containerization, and it's an essential skill for anyone serious about running a home server.
This image from Docker's official site gives you a great visual of what this looks like in Docker Desktop, a tool for managing your running containers.

While most of us running a home server will stick to the command-line version of Docker, this graphical interface perfectly illustrates the concept of isolated apps running side-by-side.
Deploying Your First Application with Docker Compose
Managing individual Docker containers is one thing, but the real magic happens when you use a tool called Docker Compose. It lets you define and run multi-container applications using a single configuration file, usually named docker-compose.yml.
This file is basically the blueprint for your application. It tells Docker which container "images" to download, how to connect them over a virtual network, and where to store their permanent data so it doesn't vanish when you restart them. With one command—docker-compose up—you can bring a whole stack of services online.
Think of Docker Compose as the ultimate shortcut. It turns what used to be an hour-long, error-prone installation marathon into a reliable, two-minute deployment. It’s the single most impactful tool I’ve learned for managing my home server.
Let's dive into a few popular, real-world examples to see what this looks like in practice.
Building Your Personal Netflix with Jellyfin
Jellyfin is a fantastic, open-source media server. It scans your movie, TV show, and music collections, organizes them into a beautiful, easy-to-navigate library, and lets you stream it all to any device you own.
A docker-compose.yml file for Jellyfin is incredibly straightforward. It defines a single service, tells Docker to use the official Jellyfin image, maps a port so you can access the web interface, and points to the folders on your server where your media files and Jellyfin's configuration data live. That's it.
Blocking Ads Network-Wide with Pi-hole
Pi-hole is a game-changer. It acts as a DNS sinkhole, intercepting and blocking ads on every single device connected to your home network. No more installing browser extensions on every computer.
Deploying Pi-hole with Docker Compose is just as simple. The configuration file specifies the Pi-hole container image, lets you set a password for the admin dashboard, and configures the necessary network settings so it can take over DNS duties for your entire home.
Creating a Private Cloud with Nextcloud
Nextcloud is a powerful, self-hosted alternative to services like Google Drive or Dropbox. It gives you a completely private platform for syncing files, managing calendars, storing contacts, and so much more. You own the data.
A Nextcloud setup is a bit more involved, usually requiring two containers to work in tandem: one for the Nextcloud application itself, and another for a database (like MariaDB or PostgreSQL) to store all its information. This is where Docker Compose really flexes its muscles. Your docker-compose.yml file defines both services, links them on a private virtual network, and handles all the complex configuration for you.
Once your server is up and running, a whole world of self-hosted applications opens up. For instance, if you're passionate about data privacy, you might be interested in setting up a self-hosted email server. Docker makes experimenting with services like this incredibly low-risk. If you try an application and don't like it, a single docker-compose down command removes it completely, leaving no trace behind.
This container-based workflow is the secret to a flexible, low-maintenance home server. For more ideas and community-vetted applications for your new setup, check out this list of https://pullnotifier.com/tools. Mastering Docker Compose will empower you to try new things, keep your system tidy, and unlock the true potential of the hardware you’ve built.
Got Questions About Building a Home Server?
Jumping into a home server project usually brings up a few practical questions that don't always get covered in the main tutorials. These are the "what-ifs" and "how-muches" that can trip you up. Let's tackle some of the most common ones.
The first question is always about the price tag. The honest answer? It's all over the place.
A home server can cost you less than 1,000 for a beast of a machine with tons of storage. The sweet spot for a great mid-range build with new, energy-efficient parts usually lands somewhere between 600.
Your primary use case is the best guide here. A simple file server just doesn't have the same financial footprint as a beefy virtualization lab.
How Much Upkeep Is Really Involved?
Another big one is maintenance. Are you basically signing up for a part-time IT job? Not really. The initial setup is definitely the biggest time sink.
Once your server is humming along, the ongoing upkeep is surprisingly light. You’ll mostly be applying software updates for the OS and your applications and maybe checking on your hard drive health every now and then.
If you go the container route with something like Docker, updating your apps becomes almost trivial. I probably spend no more than an hour or two a month on all my server maintenance combined.
Home Server vs. Commercial NAS
Ah, the classic debate: build it yourself or buy a pre-made Network Attached Storage (NAS) box from a company like Synology or QNAP?
A commercial NAS is a polished, user-friendly appliance. It’s built for simplicity, making it a fantastic entry point if you just want something that works out of the box. That convenience, however, often comes at a premium price with less flexibility.
- Commercial NAS: Super easy setup and great software, but you're locked into their ecosystem and often pay more for less powerful hardware.
- DIY Home Server: You get total control over hardware and software, often more power for the same money, and it’s an incredible learning experience. The catch? You are the tech support.
Choosing the DIY path is an investment in your skills, not just a product. As your needs change, so can your server—a level of freedom a pre-built box just can't offer. You're also in charge of your own quality control, so applying principles from a good code review checklist to your server configs and scripts is a great way to keep things solid.
What About the Electricity Bill?
Since your server will probably be running 24/7, its power draw is a totally valid concern. It all comes down to the hardware you pick.
A tiny single-board computer like a Raspberry Pi is ridiculously efficient, sipping only about 5-10 watts. A modern mini-PC with an energy-conscious CPU might idle around 20-40 watts. On the other hand, repurposing an old, powerful gaming PC could easily pull 100+ watts even when it's not doing much.
That might not sound like a huge difference, but over a year, it really adds up. Prioritizing energy-efficient components when you're buying parts will pay for itself on your power bill in the long run.
Ready to streamline your team's development workflow? PullNotifier integrates directly with GitHub and Slack to cut through the noise, delivering concise pull request updates that keep your projects moving. Reduce review delays and enhance collaboration by trying it out today. Learn more at https://pullnotifier.com.