- Published on
Making a Patch The Right Way With Git
- Authors

- Name
- Gabriel
- @gabriel__xyz
In a world of slick pull request interfaces on platforms like GitHub, the idea of creating a patch can feel a bit old-school. But don't let the simplicity fool you. This foundational skill is still surprisingly powerful and relevant, especially when you need a flexible, offline-friendly way to share your work.
So, what exactly is a patch? At its core, it's a simple text file—usually with a .patch or .diff extension—that contains only the differences between two versions of your code. It's not the code itself, but a portable, self-contained recipe for your changes. Anyone with the original code can take your patch file and apply it to their version, instantly turning their code into yours.
This method has deep roots in the open-source world, particularly in massive, long-running projects. The Linux kernel, for example, has relied on an email-based patch workflow for decades. This approach allows thousands of developers across the globe to contribute without needing centralized platform access. Learning how to create and apply patches plugs you directly into this enduring ecosystem.
When a Patch Is the Perfect Tool
Even if your daily life revolves around pull requests, knowing how to generate a patch gives you a versatile tool for specific situations. It's not about replacing PRs, but about knowing when a different tool is better for the job.
*   **Working Offline or with Spotty Internet:** If you're on a plane or dealing with a shaky connection, you can generate a patch file locally and send it whenever you're back online. No need to struggle with pushing branches.
*   **Contributing to Old-School Projects:** Many established open-source projects, especially in the C, C++, and systems programming communities, still manage all contributions through mailing lists. Patches are the currency of these communities.
*   **Sharing Quick Fixes:** Need to send a small, urgent fix to a colleague? Emailing a patch can be much faster than the whole ceremony of creating a branch, pushing it, and opening a formal pull request.
*   **Collaborating Across Repositories:** A patch can be easily applied to a completely different repository, even a private fork, without setting up complex Git remotes or wrestling with permissions.
A patch is more than just a diff; it's a unit of communication. A well-crafted patch tells a story—what changed, why it changed, and how it was tested—making it a powerful tool for clear, focused collaboration.
Ultimately, mastering patches is about understanding the fundamental mechanics of version control. It strips away the UI and forces you to think about changes in their purest form. This perspective will make you a better developer, whether you're submitting a formal pull request or just emailing a .diff file to a teammate across the room. It’s a classic skill that has more than earned its place in every developer's toolkit.
Creating Your First Patch With Git
Alright, now that we’ve covered the "why" behind making patches, it’s time to roll up our sleeves and get practical. Creating a patch in Git is pretty straightforward, but knowing which command to use in which situation is what separates the pros from the novices. We'll walk through the two main methods: the quick-and-dirty git diff and the more formal, robust git format-patch.
The basic idea is simple. You have your original code, you make some changes, and you bundle those differences into a single, portable patch file.
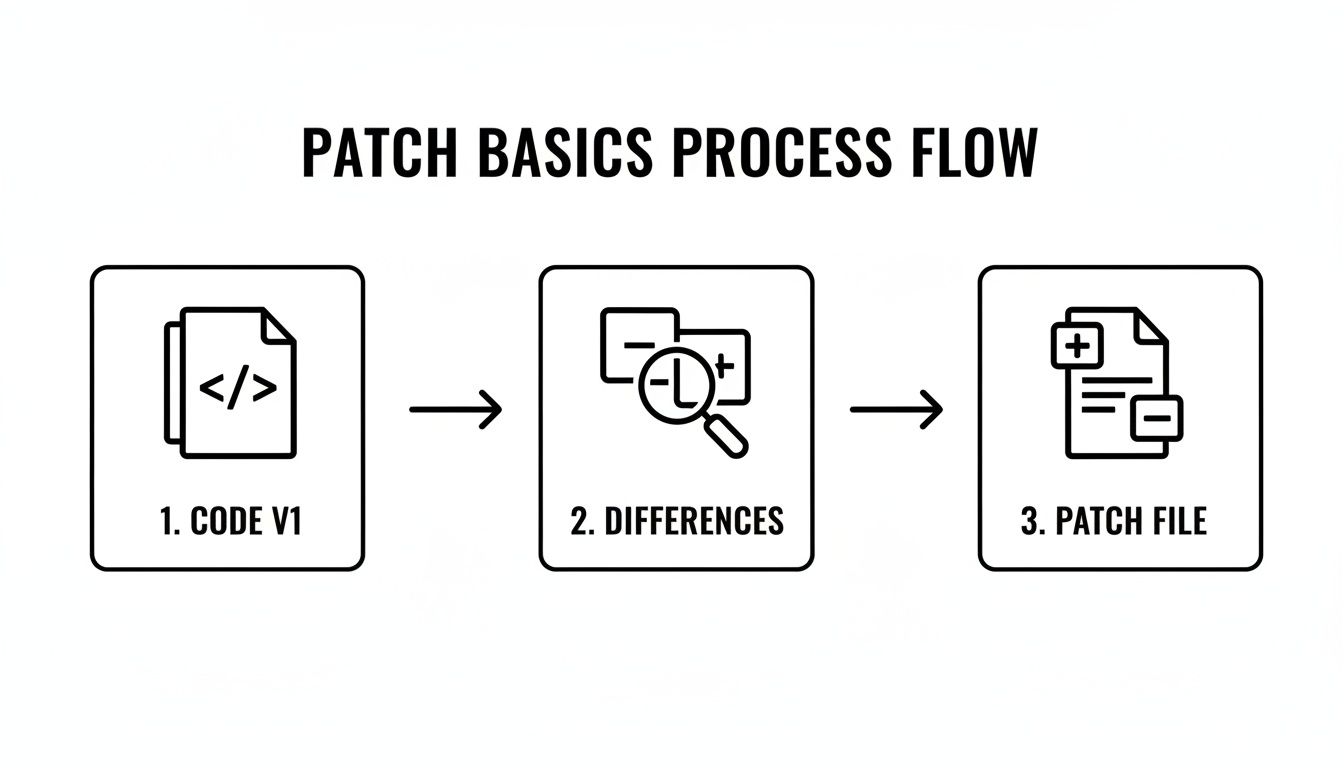
This visual really nails it: a patch is just a record of change that you can hand off to someone else to apply to their own codebase.
Making a Patch With Git Diff
The simplest way to create a patch is by using git diff and redirecting its output to a file. This is my go-to method for capturing uncommitted work-in-progress or quickly comparing two branches. It generates a clean, readable diff that's perfect for a quick peer review or just saving your changes before you switch contexts.
Let's say you've edited a file but haven't committed anything yet. To create a patch of just those staged or unstaged changes, you'd run:
git diff > fix-for-login-bug.patch
This command takes a snapshot of the differences between your current working directory and the last commit (HEAD) and dumps them into fix-for-login-bug.patch. Just like that, you have a portable file with all your modifications, ready to be shared or saved for later.
You can get more specific, too. For example, you can create a patch showing all the changes between your main branch and a feature branch:
git diff main...feature-branch > new-feature-summary.patch
This is super handy for creating a high-level summary of all the work done on a feature branch.
The Power of Git Format-Patch
When you need a more structured, professional approach, git format-patch is the tool for the job. Unlike the raw output from git diff, git format-patch creates individually numbered, email-ready patch files for each commit in a series.
Crucially, each file includes metadata like the author, date, and the full commit message. This is why it's the gold standard for contributing to projects that run on mailing lists, like the Linux kernel.
This command works with commits, not your uncommitted changes. So, to create a patch from your most recent commit, you'd use:
git format-patch -1 HEAD
Git will spit out a file named something like 0001-Fix-login-bug-with-better-validation.patch. The filename is automatically generated from the commit number and the subject line of your commit message—a neat touch that keeps things organized.
Key Takeaway: Use
git difffor quick, informal patches of uncommitted work. Switch togit format-patchwhen you need to create formal, commit-based patches that are ready for a proper submission process.
If your feature branch has several commits you want to share, you can generate a whole series of patches. To create patches for the last three commits on your current branch, for instance:
git format-patch -3 HEAD
This will produce three separate files (0001-..., 0002-..., 0003-...), one for each commit. This atomic approach is a core tenet of good patch hygiene, as it lets reviewers analyze each change independently.
You might be surprised how small most changes are. An analysis of over 10,000 GitHub pull requests found the median change involved just 1 commit, 3 files, and only 21 lines of code. This data, which you can dig into on packmind.com, really underscores that most contributions are small, focused fixes—the perfect use case for patches.
Git Diff vs Git Format-Patch for Making a Patch
Choosing between git diff and git format-patch really comes down to what you're trying to accomplish. git diff is fantastic for informal, quick snapshots of your work, while git format-patch is built for more formal, structured contribution workflows.
Here’s a quick breakdown to help you decide which one to reach for.
| Feature | git diff > my-patch.patch | git format-patch <commit-range> |
|---|---|---|
| Input | Uncommitted changes, branches, or commits. | A range of commits. |
| Output | A single raw diff file. | One or more numbered patch files. |
| Metadata | None. Just the code changes. | Includes commit author, date, and message. |
| Format | Standard diff format. | Email-ready (mbox) format. |
| Best For | Sharing work-in-progress, quick reviews, personal backups. | Formal project contributions, mailing lists, series of changes. |
| Example | git diff > fix.patch | git format-patch -1 HEAD |
Ultimately, both commands are incredibly useful. I find myself using git diff for quick sanity checks with teammates on Slack, but I always switch to git format-patch when I'm preparing a change for an open-source project. Mastering both will make you much more effective in different collaboration scenarios.
Applying Patches and Resolving Conflicts
So you’ve created a patch. That’s only half the battle. Now we need to flip the script and look at it from the receiving end: applying those changes to your own codebase. This is a crucial skill, because—let's be honest—things don't always merge as cleanly as we'd like. We'll start with the safest way to approach this.

Testing the Waters with Git Apply
Before you let any new changes touch your project's history, it's always a good idea to test the patch first. The git apply command is your best friend for this. It tries to apply the changes directly to your working directory without creating a new commit. This gives you a totally risk-free way to see if the patch is even compatible with your current code.
To check if a patch file named feature-update.patch will apply cleanly, you can run:
git apply --check feature-update.patch
If that command runs silently with no output, you're golden. The patch is good to go. If it spits out errors, you know you’ve got some conflicts to sort out. To actually apply the changes (after a successful check), just run the command again without the --check flag.
Committing Changes with Git Am
Once you’re confident the patch is solid, git am (which stands for "apply mail") is the command you’ll want to use. Unlike git apply, this command is built specifically for patches created with git format-patch. It doesn’t just slap the code changes on; it creates a brand-new commit while preserving the original author's information and commit message.
This is absolutely essential for giving proper credit where it's due and keeping a clean, accurate project history. Applying the patch is as simple as:
git am < 0001-add-user-authentication.patch
Git will read the patch file, apply the changes, and create a shiny new commit on your current branch.
Handling Patch Application Failures
But what happens when a patch doesn't apply? This happens all the time, especially if your main branch has drifted since the patch was created. The code the patch is trying to modify just isn't there anymore, and Git throws its hands up with a conflict.
When a patch fails, you have a few ways to figure out what went wrong:
*   **`git apply --reject`**: This is a great diagnostic tool. It will apply the parts of the patch that it can and create `.rej` (reject) files for the chunks that failed. These files show you exactly which pieces of code were rejected, giving you a clear map of the problem areas.
*   **`git apply --3way`**: This is my personal favorite and an incredibly useful option. It attempts a three-way merge, leaving the standard conflict markers (`<<<<<<<`, `=======`, `>>>>>>>`) right in the files where things went wrong. From there, you can open the files and resolve the conflicts manually, just like you would during a regular `git merge`.
Conflicts aren't errors; they're just Git’s way of asking for a little human intervention. Learning how to read and resolve them is a core skill for any developer on a team. For a deeper look, check out our practical guide on how to resolve conflicts in Git.
Once you’ve manually edited the files to fix the conflicts, you can stage them with git add and finalize the process. Managing conflicts is just part of the workflow when you're working with patches. Mastering these commands will help you handle these situations with confidence and keep your project moving forward.
Modern Workflows: Patches vs. Pull Requests
In most modern dev shops, the pull request (PR) is king. Platforms like GitHub have made it the undisputed standard for proposing changes, creating a space for rich code reviews, threaded discussions, and all sorts of automated checks.
So, with PRs being so dominant, where do old-school patches even fit in? It's a mistake to see them as competitors. They're just different tools for different jobs.
A pull request is a formal, platform-centric process. It shines in team projects where collaboration, process, and audit trails are non-negotiable. Everything lives in one central place: comments, CI/CD integrations, approvals, and change requests.
A patch, however, is just a simple, self-contained text file. Its power is in its portability and simplicity. It’s an offline-first, platform-agnostic tool that works beautifully in situations where a full-blown PR would just be overkill.
Choosing the Right Tool for the Job
So, patch or pull request? It all comes down to context. Each one has clear scenarios where it's the obvious winner. Think of it like deciding between sending a formal business proposal or just shooting over a quick email with an attachment—both get the job done, but the situation dictates which is better.
When a patch is more efficient:
*   **Offline Work:** You're on a flight with spotty Wi-Fi and need to get a change ready. You can generate patches locally and just fire them off later when you're back online.
*   **Email-Based Projects:** Believe it or not, many foundational open-source projects (like the Linux kernel) still run entirely on mailing lists. Patches aren't just an option here; they're the standard.
*   **Quick Fixes:** Need to share a one-line bug fix with a coworker? Emailing a tiny patch is way faster than the whole ceremony of creating a branch, pushing it, and opening a PR.
When a pull request is superior:
*   **In-Depth Code Reviews:** The UI on platforms like GitHub is built for detailed, line-by-line feedback and threaded conversations. It’s light-years ahead of trying to manage a complex review over a long email chain.
*   **CI/CD Integration:** PRs are the triggers for your automated build, test, and deployment pipelines. This is a cornerstone of modern software development.
*   **Team Collaboration:** For most teams, the visibility, structure, and formal process of a PR workflow is what keeps everyone aligned and maintains high standards for code quality. You can dive deeper by **[mastering the pull request GitHub workflow](https://blog.pullnotifier.com/blog/mastering-the-pull-request-github-workflow)**.
Managing Modern Workflow Noise
While PRs are fantastic for collaboration, they can create a ton of notification noise. The sheer volume of code being shipped today means developers are constantly bombarded with comments, status updates, and requests. This speed demands a smart notification system.
Without one, important reviews get buried, and merges get delayed. This is exactly where tools that cut through the noise become essential. For instance, PullNotifier solves this by turning chaotic GitHub PR notifications into clean, concise Slack threads. It routes them to the right channels and auto-mentions reviewers, which has been shown to cut down review delays by up to 90%. The growth in code collaboration is real, and you can discover more about this growth in code collaboration on the GitHub blog.
A pull request is a conversation about code. A patch is a statement of code. Knowing when you need a dialogue versus a declaration is key to an effective workflow.
Ultimately, the goal isn't to pick one and ditch the other. A modern developer's toolkit should have room for both. By understanding the unique strengths of creating a patch versus opening a pull request, you can make your workflow more efficient, whether you're contributing to a massive open-source project or just working with your immediate team.
Best Practices for Clean Patch Hygiene

A great patch is about more than just working code—it’s about clear communication and professional courtesy. Good "patch hygiene" ensures your contributions are easy for maintainers to review, understand, and merge. Ultimately, that means your work gets integrated faster.
Think of it as the difference between handing someone a clean, organized report versus a crumpled-up page of notes. Which one would you rather review?
The first rule is to keep your patches atomic. Each patch should tackle one specific issue. Don’t bundle a bug fix, a new feature, and a few typo corrections into a single, massive file. That just makes the review process a nightmare.
Creating focused, single-purpose patches lets reviewers assess each change on its own merits. It also makes your work much easier to revert or cherry-pick if something needs to be adjusted down the line.
Craft a Compelling Commit Message
Your commit message is the documentation for your patch. It’s the first thing a maintainer reads to understand the why behind your code. A vague message like "fixed bug" is a huge red flag; a high-quality message is a sign of a high-quality contribution.
A great commit message typically includes:
*   **A concise subject line:** Start with a capital letter and use the imperative mood (e.g., "Fix user login validation," not "Fixed user login validation"). Aim for **under 50 characters**.
*   **A detailed body:** Explain the problem you’re solving and why your approach makes sense. This is where you add context that isn’t immediately obvious from the code itself.
*   **Reference relevant issues:** If your patch resolves a specific ticket, mention its number (e.g., "Fixes #123").
This level of detail makes life so much easier for the person on the other end. To really level up, using a structured approach like our code review checklist can help ensure you’ve covered all your bases before you even think about creating the patch.
Keep Your Branch Clean and Current
Always start from a clean working directory. Uncommitted files or stray changes can accidentally get bundled into your patch, creating confusion and potential conflicts. Before running git format-patch, make sure your branch is up-to-date with the target branch by running a rebase.
A clean, rebased patch demonstrates respect for the project's history and the reviewer's time. It signals that you've done your due diligence to minimize merge conflicts and make the integration process as smooth as possible.
With the rise of AI-powered tools, the volume of code contributions is exploding. For example, GitHub Copilot users see an 84% boost in successful builds, which means more PRs and patches are being created every day. This increased velocity makes clean patch hygiene more critical than ever to maintain a project’s quality and sanity.
Common Questions About Making a Patch With Git
When you’re deep in Git workflows, a few common questions about patches always seem to pop up, especially when you're trying to figure out where they fit in a world dominated by platforms like GitHub. Let's clear up some of that confusion.
Patches vs. Pull Requests: When to Use Which?
The big one is always: patch or pull request? They both get code from A to B, but they’re built for different jobs.
A patch is your best friend in a few specific scenarios. Think low-connectivity environments where a full remote push is a pain, or old-school projects that still run on email workflows (like the Linux kernel). Patches are also fantastic for sending a quick, informal fix to a teammate without the whole ceremony of a formal PR.
Pull requests, on the other hand, are the standard for most modern, collaborative projects hosted on platforms like GitHub or GitLab. They’re designed for in-depth code reviews, automated CI/CD checks, and maintaining a clear, auditable history of changes.
Git Apply vs. Git Am: What's the Difference?
Another point that trips people up is the distinction between git apply and git am. It’s simpler than it sounds.
Think of git apply as a test run. It takes the changes from a patch file and slaps them onto your working directory, but it doesn't create a commit. This is perfect for when you want to see if a patch even works or if it causes any conflicts before you commit to it.
git am (which stands for "apply mail") is the real deal. It’s designed to work with patches created by git format-patch. It not only applies the changes but also creates a new commit, cleverly preserving the original author, date, and commit message from the patch file. This ensures everyone gets proper credit.
How to Patch Uncommitted Work
So, what if you have changes that aren't even committed yet? Maybe you’re spitballing an idea with a coworker and don’t want to create a messy commit just to share it. You can absolutely create a patch for that.
- To create a patch with only your staged changes, use this command:
git diff --cached > my-wip-changes.patch - To grab all uncommitted changes—both staged and unstaged—run this instead:
git diff HEAD > my-full-changes.patch
This is a brilliant way to share works-in-progress without cluttering up your branch history.
Patches for uncommitted work are a powerful way to share ideas without polluting your branch history. This flexibility is a key advantage of the patch workflow for quick collaboration and feedback.
Stop drowning in pull request notifications and start merging faster. PullNotifier integrates GitHub with Slack to deliver concise, real-time PR updates, cutting review delays and eliminating notification noise so your team can focus. Join over 10,000 engineers and see the difference at https://pullnotifier.com.