- Published on
Your Ultimate GitHub Pages Tutorial for Modern Web Development
- Authors

- Name
- Gabriel
- @gabriel__xyz
This guide will walk you through launching a free website directly from a GitHub repository. We’ll cover everything from creating the repo and adding your files to flipping the switch on GitHub Pages. You’ll have a site live in minutes at a username.github.io address.
Launching Your First Live Site on GitHub Pages
Getting a site live on GitHub Pages is surprisingly quick. We're not just going to talk theory—we're going to get your first site up and running right away. This hands-on approach shows you just how simple static site hosting can be, even if you’re new to web development.
If you need a quick refresher on Git itself, our beginner's guide to Git is a great place to start.
First, it’s important to understand the two main types of sites you can build.
User/Organization Site: This is tied directly to your personal or organization account. You create one special repository named
username.github.io, and GitHub automatically publishes whatever is on themainbranch. It’s perfect for a personal portfolio or a central hub for an organization's open-source projects.Project Site: This is for a specific project, like a software library, a documentation portal, or a small web app. It lives inside a standard repository (like
my-awesome-project) and can be published from a specific branch or folder. This setup lets each of your projects have its own dedicated website.
Choosing Your Publishing Source
Once you know what kind of site you're building, you need to decide how you'll publish it. Think of this as telling GitHub where the "live" website code lives inside your repository.
This table gives a quick overview of the main methods, helping you choose the best starting point for your project.
Choosing Your GitHub Pages Publishing Source
| Publishing Source | Best For | Setup Complexity | Workflow |
|---|---|---|---|
| Branch | Separating source code from the live site (e.g., main for source, gh-pages for build). | Low | Push compiled static files to a dedicated branch. |
/docs Folder | Project sites where documentation is part of the main codebase. | Very Low | Keep docs in a /docs folder on your main branch. |
| GitHub Actions | Automated builds, complex deployments, and CI/CD pipelines. | Medium to High | Run a workflow to build and deploy the site automatically. |
Each option offers a different workflow, so picking the right one depends on how simple or complex your project is. You can always start with one method and switch to another as your needs change.
The entire process is beautifully simple. At a high level, it's just three steps.
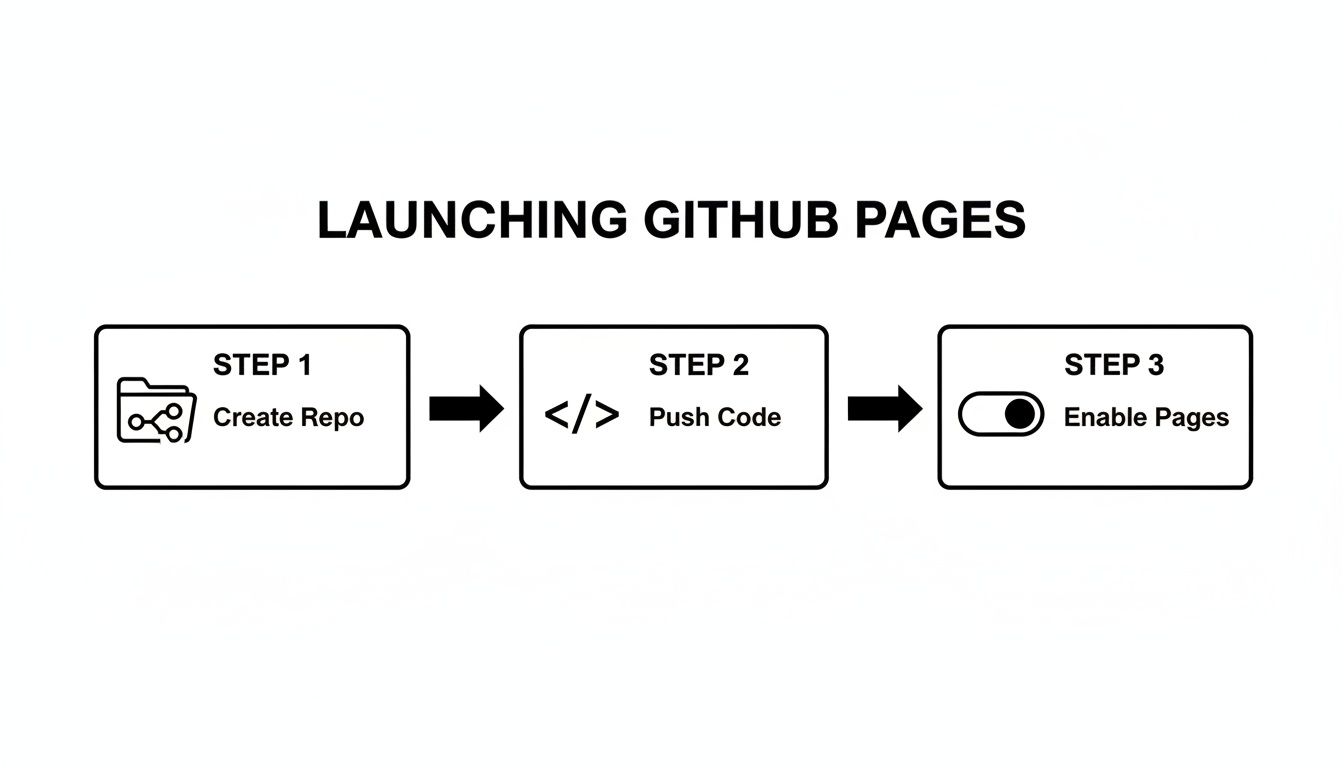
As you can see, it really just boils down to creating a space for your code, pushing your files, and flipping a switch in the settings.
Practical Scenarios For Publishing
Let's look at how these publishing sources work in the real world.
Deploying from a branch is the most common approach. You can dedicate a branch, like gh-pages, just for your compiled site files. This keeps your production-ready code neatly separated from your source code on the main branch. It’s a clean workflow that’s widely supported by static site generators and build tools.
Deploying from the /docs folder is another great option, especially for project documentation. Just keep your documentation files inside a /docs folder on your main branch, and GitHub Pages can serve it as a website. This simplifies your repository by keeping everything together in one branch.
Key Takeaway: The ability to deploy from different sources gives you a ton of flexibility. You can start simple with a
gh-pagesbranch and later adopt a more advanced CI/CD workflow using GitHub Actions, which we'll cover later in this guide.
Launched back in 2008, GitHub Pages has become a go-to for developers. It now powers an impressive 0.2% of all known content management systems on the web. Its dead-simple setup—push to a branch, enable in settings, and go live—has solidified its role for everything from portfolios to project documentation.
While this guide focuses on GitHub Pages, it's always good to be aware of other website hosting options for future projects that might have different needs.
Choosing the Right Static Site Generator
Sure, you can get a GitHub Pages site up and running with just plain HTML and CSS. But if you want to build something that's easy to maintain and can actually scale, a Static Site Generator (SSG) is where the real magic happens.
An SSG lets you write your content in a simple format like Markdown and then uses templates to churn out a complete, ready-to-deploy static website. It's way more organized and scalable than trying to manually wrangle dozens of individual HTML files.

This part of the guide is all about helping you pick the right tool for the job. We'll look at the most popular options so you can find one that matches your project's needs and your own technical comfort level.
Starting with Jekyll: The Native Choice
Jekyll is the OG of static site generators for GitHub Pages. For years, it was the only officially supported generator, and that deep integration is still its biggest selling point.
Because Jekyll is built right into the GitHub Pages platform, the workflow is incredibly simple. In many cases, you can just push your source files (like Markdown posts and HTML templates) directly to your repository, and GitHub will build and deploy the site for you. No complex CI/CD pipelines needed.
A typical Jekyll setup involves:
- Writing posts or pages as Markdown files in a
_postsdirectory. - Tweaking the site's look by editing HTML layouts and CSS files.
- Managing global settings like your site's title in a single
_config.ymlfile.
This simplicity makes Jekyll a fantastic choice for personal blogs, portfolios, or straightforward project documentation. You don't need to be a web dev wizard to get a slick, professional site online.
When to Graduate to Hugo
As great as Jekyll is for getting started, its performance can really start to drag as your site gets bigger. If you have a site with hundreds or thousands of pages, a Jekyll build can take several minutes. That’s where a modern powerhouse like Hugo comes in.
Written in Go, Hugo is famous for its absolutely blazing-fast build speeds. It can render a massive website in just a few seconds. I personally switched a large documentation project from Jekyll to Hugo, and our build time plummeted from over a minute to less than two seconds.
My Experience with Hugo: The speed isn't just a nice-to-have; it completely changes your workflow. Faster builds mean faster feedback, which makes for a much more fluid development process, especially when you're pushing frequent updates. It’s my go-to for any content-heavy project.
Hugo also ships with a rich feature set out of the box, like excellent multilingual support and image processing. It does have a slightly steeper learning curve than Jekyll, but the performance boost is more than worth it for any serious project.
Using Next.js for Interactive Sites
What if you need more than just static content? If you're building a portfolio with slick animations, fetching data from an API, or creating something that feels more like a web app, a JavaScript-based SSG is your best bet.
Next.js, a widely-used React framework, has a powerful static export feature that makes it a great fit for GitHub Pages. You can build your site with the full power of React and its massive library ecosystem, then run a single command (next export) to generate a fully static site that can be hosted anywhere.
This approach gives you the best of both worlds:
- A modern, component-based development experience with React.
- A fast, secure, and easily deployable static site.
Next.js is perfect for developers who are already comfortable with JavaScript and want to build a highly polished, interactive experience. It’s a bit more involved to set up than Jekyll or Hugo since you'll need to configure a GitHub Actions workflow to handle the build and deployment.
Jekyll vs Hugo vs Next.js for GitHub Pages
Choosing the right SSG comes down to balancing build speed, ease of use, and the features you need. There's no single "best" tool—the right choice is the one that best fits your project.
To help you decide, here's a quick comparison of our top three contenders.
| Feature | Jekyll | Hugo | Next.js (Static Export) |
|---|---|---|---|
| Primary Language | Ruby | Go | JavaScript (React) |
| Build Speed | Slower, especially for large sites. | Extremely fast, often sub-second. | Fast, but can depend on complexity. |
| Learning Curve | Low. Excellent for beginners. | Moderate. The template system is unique. | High. Requires knowledge of React. |
| Best For | Blogs, portfolios, simple docs. | Large docs sites, content-heavy blogs. | Interactive portfolios, small web apps. |
| Community | Mature and large, but less active. | Very active and growing rapidly. | Massive and extremely active. |
Ultimately, my advice is to start with what feels most comfortable. If you're new to all this, Jekyll is a fantastic and forgiving entry point. If site performance is your number one priority, Hugo is an unbeatable choice. And if you're a React developer looking to build something interactive, Next.js is the clear winner.
Manually building your site and pushing it to a gh-pages branch gets the job done, but it's tedious and prone to human error. For any serious project, that's just not sustainable. The real power comes from handing off that repetitive work to automation.
This is where GitHub Actions, GitHub’s built-in CI/CD tool, completely changes the game. With a properly configured workflow, every push to your main branch can automatically build your site, run tests, and deploy the final static files. It saves you time and ensures a consistent, reliable deployment every single time.
The industry has clearly caught on. Developers now run over 5-6 million workflows on GitHub Actions daily, and we've seen a 55% growth in continuous deployment adoption. Automation isn't just a nice-to-have anymore; it's a core part of modern development. The ecosystem now has over 22,000 Marketplace actions, showing just how much you can automate.
Building Your First Deployment Workflow
Let's get started. You'll need to create a YAML file inside a special directory in your repository: .github/workflows/. We'll name our file deploy.yml, and this is where we'll tell GitHub Actions exactly what to do.
Here’s a complete, production-ready workflow for a Hugo site. We’ll break down what each part does right after the code.
name: Deploy GitHub Pages

on:
  push:
    branches:
      - main  # Trigger the workflow on pushes to the main branch
  pull_request: # Also trigger on pull requests for preview builds

jobs:
  build-deploy:
    runs-on: ubuntu-latest
    steps:
      - name: Check out repository
        uses: actions/checkout@v4
        with:
          submodules: true  # Fetch Hugo themes (or other submodules)

      - name: Setup Hugo
        uses: peaceiris/actions-hugo@v3
        with:
          hugo-version: 'latest'

      - name: Setup Node.js
        uses: actions/setup-node@v4
        with:
          node-version: '20'
          cache: 'npm' # Cache npm dependencies

      - name: Install Dependencies
        run: npm install

      - name: Build Site
        run: hugo # Or your site's build command (e.g., npm run build)

      - name: Deploy to GitHub Pages
        if: github.event_name == 'push' && github.ref == 'refs/heads/main'
        uses: peaceiris/actions-gh-pages@v4
        with:
          github_token: ${{ secrets.GITHUB_TOKEN }}
          publish_dir: ./public # The folder where your built site is
While it might look a little intimidating at first, this workflow is just a sequence of steps that mimics what you’d do manually on your own machine.
Understanding the Workflow Steps
Let's quickly dissect the deploy.yml file to see what’s happening under the hood.
name: This is just the display name for your workflow. You'll see this in your repository's "Actions" tab.on: This is the trigger. We've set our workflow to run on everypushto themainbranch and also for everypull_request.jobs: A workflow is made of one or more jobs. We have a single job here calledbuild-deploy.runs-on: ubuntu-latest: This tells GitHub to spin up a fresh virtual machine running the latest version of Ubuntu to execute our job.
The steps are where the real action happens. Each uses keyword pulls in a pre-built community action from the GitHub Marketplace, saving you from writing a ton of custom scripts.
Pro Tip: Using community actions like
actions/checkoutandpeaceiris/actions-hugois a huge time-saver. They are maintained by the community and handle complex tasks, like setting up the right software versions, with just a few lines of configuration. For a deeper dive into making your workflows more efficient, you might be interested in how to create reusable GitHub Actions in 2025.
Deploy Previews for Pull Requests
One of the most powerful features here is generating preview deployments. Notice our workflow also triggers on pull_request. When a team member opens a pull request, this workflow runs and builds the site but stops short of deploying to your main gh-pages branch.
Instead, many teams use another action to deploy this preview build to a unique URL. This is an absolute game-changer for collaboration.
Why is this so effective?
- Visual Reviews: Your team sees exactly how changes will look on the live site. No more guessing if a CSS tweak broke the layout.
- Faster Feedback: Reviewers can interact with the changes directly, which leads to much faster and more accurate feedback cycles.
- Reduces Risk: It catches visual bugs and content errors before they get merged into the
mainbranch and deployed to production.
Implementing pull request previews transforms code review from an abstract process into a concrete, visual one. It’s a practice that directly speeds up development and improves the final quality of your site, fitting perfectly into a modern CI/CD pipeline.
Connecting a Custom Domain and Securing Your Site
Your site is live and your deployment pipeline is humming along. Now it’s time for the final, professional touch. The default username.github.io URL is fine for getting started, but a custom domain like www.yourproject.com gives your project legitimacy and reinforces your brand. This is the step that turns your project from a page on GitHub to your page on the web.
Getting this set up involves two main parts. First, you'll need to tweak some settings with your domain registrar (the company where you bought your domain). After that, you'll head back to your GitHub repo to tell it about the new domain.

Configuring Your Domain
The first job is to point your domain name to GitHub's servers. You’ll do this by adding a few specific DNS records where you manage your domain. The interface for this will look different depending on your registrar, but the concepts are always the same.
You have two main paths you can take, depending on whether you want to use an apex domain (like yourproject.com) or a subdomain (like www.yourproject.com).
- For an apex domain, you’ll create
Arecords that point directly to GitHub's specific IP addresses. - For a
wwwsubdomain, you’ll create aCNAMErecord that points to your default GitHub Pages URL,username.github.io.
In my experience, it’s often much easier to use the www subdomain as your main URL. You can then set up your apex domain to simply redirect to it.
Once you’ve saved those records, go to your repository's Settings, find the "Pages" section, and type your new custom domain into the field. GitHub will then perform a check on your DNS settings to make sure everything is pointing to the right place.
A Quick Tip on DNS: DNS changes aren’t always instant. They can take some time to propagate across the internet, sometimes up to 24 hours. If your custom domain isn't working right away, just give it some time. You can use a free DNS checker tool online to see if your new records are visible around the world.
Securing Your Site with HTTPS
Once GitHub confirms your domain is connected, it automatically handles the next critical step: enabling HTTPS. In your "Pages" settings, you'll find an option to "Enforce HTTPS," which should be checked by default.
This is absolutely non-negotiable for any modern website. GitHub uses Let's Encrypt to provide a free SSL/TLS certificate for your domain, which encrypts all the traffic between your site and its visitors.
Why does this matter so much?
- Trust: Browsers will flag any site without HTTPS as "Not Secure." That’s a surefire way to scare visitors away.
- Security: It encrypts all data, which is crucial for protecting your users, even if you don't have logins or forms.
- SEO: Search engines like Google give a ranking boost to secure sites. An unsecured site simply won't rank as well.
After your domain is connected and secured, it's a good idea to make sure you're following general website security best practices. This goes beyond just HTTPS and is a fundamental part of running any site.
Managing Different Environments
A professional workflow always separates development from production. You might have analytics scripts you only want running on the live site, not while you're testing on your local machine. Static site generators make this incredibly easy to manage.
Take Jekyll, for instance. It uses a _config.yml file for all its global settings. But you can actually use multiple configuration files to handle different environments.
Here’s a real-world scenario: Let’s say you want to use Google Analytics, but only on the production site. You can create a second config file, maybe called _config_dev.yml, just for local development.
In your main _config.yml, you'd put your production settings:
# _config.yml
title: My Awesome Project
url: "https://www.yourproject.com"
google_analytics: "UA-12345678-1"
Then, in _config_dev.yml, you can override or blank out those settings:
# _config_dev.yml
url: "http://localhost:4000"
google_analytics: "" # Empty for local
When you run Jekyll locally, you just tell it to use both files, with the dev-specific one overriding the production one: jekyll serve --config _config.yml,_config_dev.yml.
Your GitHub Actions workflow, on the other hand, would only use the default _config.yml. This simple trick ensures your production build always gets the correct settings and prevents your local development variables from ever leaking into your live site.
Solving Common GitHub Pages Problems

Sooner or later, it happens to everyone. Your site looks perfect on your local machine, but the moment you push it to GitHub Pages, it's a mess. This is a normal part of the development process, not a sign you did something wrong.
This section is my personal field guide to fixing the most common headaches I've seen pop up with GitHub Pages. We'll walk through real-world solutions for everything from broken CSS and mysterious build failures to updates that just refuse to show up.
Fixing Broken CSS and Image Paths
This is, without a doubt, the number one issue people run into. Your site works flawlessly on your computer, but the live version is a jumble of unstyled text and broken image icons.
The culprit is almost always how your site is handling file paths.
Locally, your site runs at the root of a server (like localhost:4000/). A GitHub Pages project site, however, lives in a subdirectory named after your repo, like username.github.io/my-project/. This simple difference breaks any absolute paths starting with a /.
For instance, a path like /assets/css/style.css is looking for the file at username.github.io/assets/css/style.css—completely skipping your /my-project/ subdirectory.
The fix is to use relative paths that are correctly configured for your site's base URL. Luckily, most static site generators have a built-in setting for this.
- In Jekyll or Hugo: You need to set the
baseurl(Jekyll) orbaseURL(Hugo) in your main configuration file (_config.ymlorhugo.toml). This tells the generator to automatically prepend the repository name to all your links during the build process. - When linking assets: Ditch hardcoded paths and use your SSG’s built-in helpers. For Jekyll, that means using
{{ '/assets/style.css' | relative_url }}. This simple tag ensures the correct path is generated every single time, whether you're working locally or deploying live.
Making this one change to your config and templates will solve the vast majority of broken asset links.
Investigating GitHub Actions Build Failures
Seeing that red "X" next to your commit is another classic source of frustration. Your GitHub Actions workflow was running perfectly, but now it's failing, and the error logs look like gibberish.
Don't panic. The log file has all the clues you need.
Start by clicking into the failed workflow run and examining the job's output. Scroll through the logs until you find the very first error message. Most failures come from a few common culprits:
- Dependency Issues: A package got an update with a breaking change. Look for errors that happen during your
npm installorbundle installstep. Sometimes a cached dependency is the problem, so try re-running the job without the cache. - Command Failures: You might have a simple typo in a
runstep. I've seen builds fail just because of a typo likehugoinstead ofhugo --minify. - Authentication Errors: If your workflow needs to access other private repos or uses secrets, an expired token or a change in permissions can bring everything to a halt.
Key Takeaway: The secret to debugging workflow failures is to read the logs carefully from top to bottom. The real error is almost always stated clearly, even if it’s buried in a wall of text. Find the step that failed, and the lines immediately before it will usually tell you exactly what went wrong.
Sometimes, build issues are a symptom of bigger problems tangled up in your commit history. For those messy situations, you might find it helpful to learn how to resolve conflicts in Git.
Dealing with Caching and Delayed Updates
You've pushed a change, your Actions build is green, but the live site still shows the old content. This is a classic caching problem. Either your browser or GitHub's own content delivery network (CDN) is serving you a stale version of your site.
First, try the simple fix: a hard refresh in your browser (Ctrl+Shift+R or Cmd+Shift+R) to bypass its local cache.
If that doesn't do the trick, the issue is likely with the CDN. While you can't manually tell GitHub's CDN to clear its cache, updates usually propagate within a few minutes. If you consistently face long delays, the problem often lies in how your build process names your asset files.
The best long-term solution is a technique called cache busting. This is where your build tool automatically renames asset files with a unique hash on each build (e.g., style.a1b2c3d4.css). This forces browsers to download the new version every single time. Many modern build tools and SSG plugins can handle this for you automatically.
Frequently Asked Questions About GitHub Pages
Once you've got your first GitHub Pages site live, a new set of questions always pops up. It's a natural part of the process. Let's tackle some of the most common ones developers run into after the initial setup.
Can I Use a Private Repository for GitHub Pages
Absolutely, but there's a catch depending on your plan. By default, enabling GitHub Pages on a private repository creates a private site. Only people with at least read access to that repo can view it.
This is perfect for things like:
- Internal team docs and wikis
- Project staging environments
- Client demos not yet ready for the public eye
Want to make that site public? You'll need a GitHub Pro, Team, or Enterprise Cloud plan. The setup is identical, but the free plan only allows you to build public sites from public repositories.
How Do I Add a Contact Form or Other Dynamic Features
GitHub Pages is all about static files—HTML, CSS, and JavaScript. You can't run server-side code like PHP or Python directly. But that doesn't mean your site has to feel static.
You can easily add dynamic features using client-side JavaScript and third-party services. To add a contact form, for instance, you can use a service like Formspree or Netlify Forms. They give you a URL endpoint for your form's action attribute, and they'll handle the submissions for you.
The JAMstack Approach: This is the core idea behind the JAMstack (JavaScript, APIs, and Markup). You build a fast, secure static site and then pull in dynamic functionality through APIs. For a comments section, you can embed services like Disqus or Commento, outsourcing the heavy lifting to specialized providers.
What Are the Limits and Usage Policies for GitHub Pages
GitHub Pages is incredibly generous, but it's not meant to run a high-traffic e-commerce business. It's designed for personal, project, and open-source sites. There are a few soft limits to keep in mind.
Here are the key usage guidelines:
- Repository Size: Try to keep your source repo under 1 GB.
- Site Size: Your published site should not exceed 1 GB.
- Bandwidth: There's a soft limit of 100 GB per month.
- Builds: You're limited to 10 builds per hour.
If your site starts consistently blowing past these numbers, GitHub will likely send you a friendly email suggesting you might be better served by a different hosting solution.
How Does GitHub Pages Compare to Netlify or Vercel
GitHub Pages is the king of simplicity. If your code is already on GitHub and you just need to get a static site online, it's the fastest and most integrated option out there. The no-fuss setup is its biggest strength.
Netlify and Vercel, on the other hand, are powerful, purpose-built platforms for modern web development. They go far beyond what GitHub Pages offers, with features like serverless functions, A/B testing, advanced analytics, and fine-grained control over the build process.
So, what's the verdict? Use GitHub Pages when simplicity is your top priority. Choose Netlify or Vercel when you need a more advanced build pipeline, backend functionality, or a richer set of deployment tools.
Stop drowning in noisy GitHub notifications. PullNotifier sends concise, real-time pull request updates directly to your Slack channels, cutting through the clutter and accelerating your team's code review process. Get started for free at https://pullnotifier.com.