- Published on
A Developer's Guide to Git Merge Branch Into Another Branch
- Authors

- Name
- Gabriel
- @gabriel__xyz
When you're ready to bring a feature, bug fix, or any set of changes into your main line of development, git merge is your go-to command. While the command itself is straightforward, sticking to a consistent workflow is the key to preventing common headaches, like merging into the wrong branch or dealing with gnarly, unexpected conflicts.
A disciplined approach keeps your project's history clean and collaborations humming along.
The Core Workflow for Merging Branches in Git
This process becomes second nature and is pretty much the backbone of daily development work for most teams. Before you even think about typing git merge, you need to run through a quick pre-flight check.
Your Pre-Merge Checklist
First things first, make sure you're on the right receiving branch. Let's say you want to merge your new-feature branch into main. You absolutely must check out main first. This is easily the most common mistake developers make, and it's just as easily avoided.
Next up, you have to ensure your local version of the receiving branch is current. If your teammates have pushed updates to the remote main branch while you were working, you need to pull those changes down. Trust me, merging into an outdated branch is a recipe for immediate and often confusing conflicts.
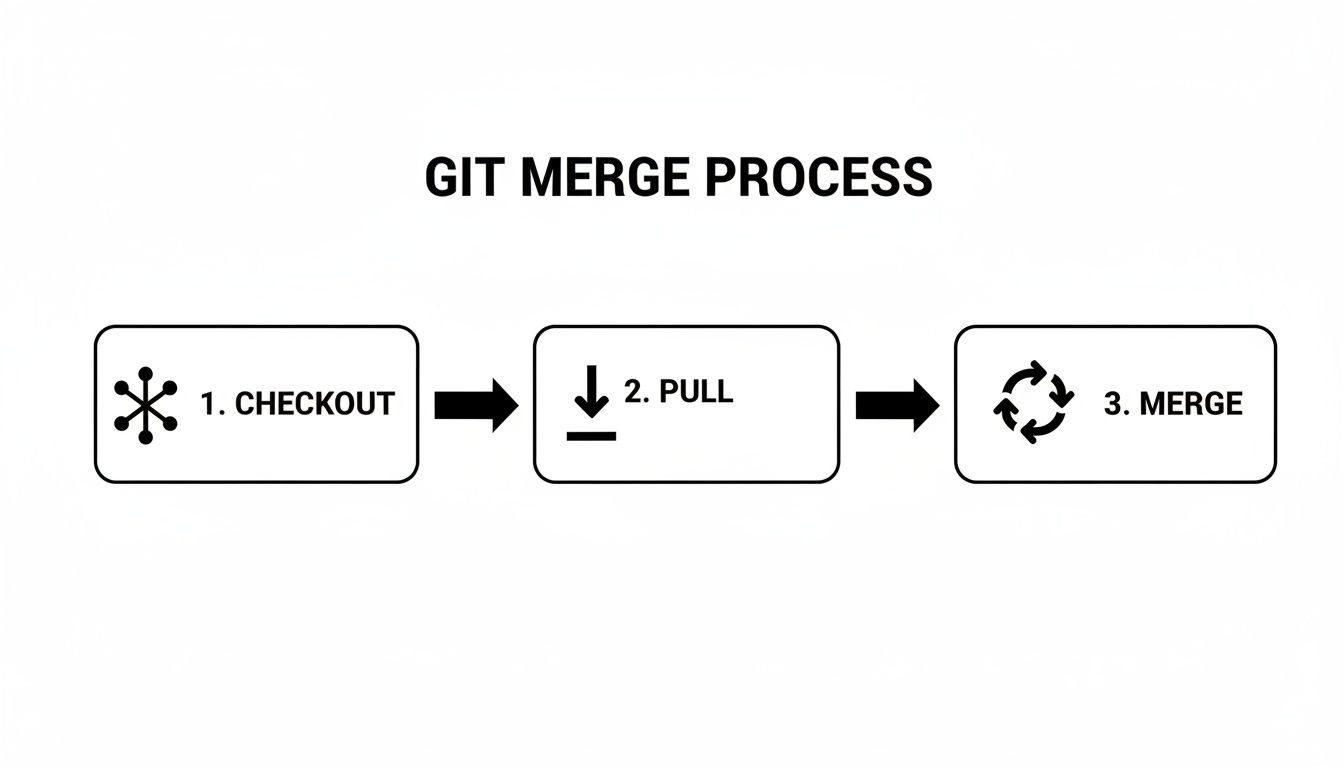
This simple, three-step dance—checkout, pull, and merge—forms a reliable foundation for any Git workflow. It's all about positioning yourself on the correct branch, syncing with the remote, and only then executing the merge.
Before every merge, running a few key commands can save you from a world of hurt. Think of it as your quick-reference safety check to ensure everything is lined up for a smooth integration.
Essential Pre-Merge Command Checklist
| Command | Purpose | Why It's Critical |
|---|---|---|
git status | Check current branch & uncommitted changes | Prevents you from merging on the wrong branch or with a dirty working directory. A classic mistake. |
git checkout <target-branch> | Switch to the branch you want to merge into | Ensures you're not accidentally merging main into your feature branch instead of the other way around. |
git pull origin <target-branch> | Fetch and integrate the latest remote changes | Avoids creating unnecessary merge conflicts by ensuring your local branch is perfectly in sync with the remote. |
Sticking to this checklist turns a potentially chaotic process into a predictable, error-free routine.
Understanding the Merge Outcome
Once you run the git merge command, Git usually takes one of two paths.
If the target branch's tip is a direct ancestor of your feature branch—meaning no new commits have landed on main since you branched off—Git performs a fast-forward merge. It simply scoots the main branch pointer forward to the latest commit of your feature branch. The result is a clean, linear history. Easy.
However, if commits have been added to main while you were off working on your feature, Git has to perform a three-way merge. This creates a brand new "merge commit" that has two parents: one from main and one from your feature branch. This new commit explicitly records the integration point in your project's history. This is the more common scenario, and it’s designed to preserve the historical context of both lines of development. You can find more details on this model in the official Git documentation.
Choosing Your Merge Strategy Fast-Forward vs No-FF
When you merge one branch into another, Git will often try to take the easy way out with a "fast-forward" merge. This happens when the branch you're merging into (say, main) hasn't had any new commits since you created your feature branch. Git sees a straight, linear path and just moves the main branch's pointer up to the latest commit on your feature branch.
It's clean, simple, and leaves no trace of a separate branch ever existing. For a quick hotfix or a tiny typo correction, this is perfect. Your Git history looks like a single, straight line of development, which is incredibly easy to follow.
But that simplicity comes with a major tradeoff: you lose all context. The history is so clean that it erases the fact that those commits were developed as part of a distinct feature. You can no longer tell, just by looking at the log, when a specific set of changes was actually integrated.
The Power of the No-FF Merge
This is exactly where the non-fast-forward merge, using the --no-ff flag, becomes your best friend. When you run git merge --no-ff <branch-name>, you're telling Git to create a merge commit, even if it could have just fast-forwarded.
Why add an extra commit? Because that commit acts as a permanent, historical marker. It's a single point in your history that explicitly says, "Right here, we brought in all the work from the 'user-authentication' feature." It preserves the integrity and context of your branch, making it far easier to understand the project's evolution down the line.
For any feature branch that lives for more than a few hours or involves multiple developers, creating this explicit merge commit is a must. As Atlassian points out, that commit becomes a “symbolic join” that documents the moment a feature was officially integrated. In larger organizations with strict compliance needs, these merge commits are invaluable for traceability, often tied to ticket numbers or change requests, making sense of thousands of merges each quarter.
A
--no-ffmerge creates a commit that says, "Right here, at this exact point, we integrated the user authentication feature." This is invaluable for code archaeology, debugging, and understanding how a project grew over time.
When to Use Each Strategy
So, which one should you use? The answer really depends on the context of your work. The best approach is to establish a clear policy with your team to keep the Git history consistent and readable for everyone.
Deciding between a fast-forward merge and a --no-ff merge is a common challenge for development teams. The right choice depends on the specific scenario, balancing the need for a clean history with the importance of preserving contextual information. The table below offers guidance on when to use each strategy.
Merge Strategy Comparison Fast-Forward vs No-FF
| Scenario | Recommended Strategy | Reasoning |
|---|---|---|
| Quick, single-commit hotfix | Fast-Forward | Keeps the history linear and clean for minor, self-contained fixes. |
| Integrating a new feature | --no-ff | Creates an explicit merge commit, preserving the feature's branch history and context. |
| Personal, short-lived branch | Fast-Forward | Simplifies your personal commit history without cluttering it with unnecessary merge commits. |
| Releasing a version | --no-ff | The merge commit serves as a clear marker for the release, making it easy to see what went into it. |
| Post-rebase merge | Fast-Forward | After rebasing, the branch history is already linear, so a fast-forward is a clean way to integrate. |
| Long-running team branch | --no-ff | Essential for tracking when a large body of work from multiple contributors was merged. |
Ultimately, having a clear and consistent team policy is the most effective way to maintain a useful and readable Git history.
Here’s a quick breakdown to help you decide on the fly:
*   **Go with Fast-Forward Merges for:**
    *   **Tiny Bug Fixes:** A single-commit fix that needs to be integrated quickly without ceremony.
    *   **Personal Branches:** Merging small, private updates into your main work branch.
    *   **Rebasing:** After you've rebased a feature branch onto the latest `main`, a fast-forward merge is a clean way to complete the integration.

*   **Insist on No-FF Merges for:**
    *   **Feature Branches:** Any branch that contains a distinct piece of functionality, no matter the size.
    *   **Team Collaboration:** Whenever multiple developers have contributed to a single branch.
    *   **Code Reviews:** The merge commit is solid proof that a feature passed review and was approved.
    *   **Rollbacks:** Reverting an entire feature is a breeze when you can just revert the single merge commit.
How to Navigate and Resolve Merge Conflicts
Sooner or later, you're going to merge a branch and Git will just stop in its tracks. This is what's known as a merge conflict, and it happens when you and another developer have edited the same lines in the same file. It's a completely normal part of working on a team, not a sign that someone messed up. The key is knowing how to handle it without breaking a sweat.
When Git can’t figure out which change to keep, it hits pause on the merge process. It then flags the problem files for you to sort out, injecting special markers right into the code to show you exactly where the competing changes are.

You’ll see sections of your code bracketed by these conflict markers:
*   `<<<<<<< HEAD`: This points to the start of the changes from your current branch (the one you're merging *into*).
*   `=======`: This is the divider between the two conflicting versions.
*   `>>>>>>> <branch-name>`: This marks the end of the changes from the branch you're trying to merge in.
Your job is to step in and play editor. You’ll need to open the file, look at both versions, and decide what the final code should look like.
A Step-By-Step Guide to Resolving Conflicts
The moment you see that CONFLICT message in your terminal, just stay calm and follow the process. The first thing you should always run is git status. It’ll give you a clear list of the files that need your attention under the "Unmerged paths" section.
Next, open up each conflicted file in your editor. You'll have to manually edit the file to fix the differences. Sometimes you'll keep your version, sometimes you'll take the incoming one, and other times you might write something new that combines the best of both. Once you’re happy with it, you have to remove all the Git conflict markers (<<<<<<<, =======, >>>>>>>).
After you've edited and saved a file, you need to let Git know you've resolved that specific conflict. You do this with a familiar command: git add.
git add path/to/your/resolved-file.js
Adding the file stages the corrected version, officially marking its conflict as resolved. Once you've done this for all the files that were in conflict, git status will show them under "Changes to be committed."
The final step is to complete the merge by running
git commit. You don't even need to write a message; Git will pop open an editor with a pre-filled message like "Merge branch 'feature-branch' into 'main'." Just save and close it to finalize everything.
Proactive Measures to Minimize Conflicts
While you can't avoid conflicts forever, a disciplined workflow can make them a lot less frequent. A solid approach is to always make sure your receiving branch is current before you even think about merging.
Run git checkout main (or whatever your target branch is), then use git fetch and git pull to get it completely up-to-date. Then you can switch back to your feature branch and run the merge. This simple sequence is a lifesaver on busy teams and can dramatically cut down on those frustrating interruptions.
And hey, if you ever find yourself staring at a merge that feels way too messy to untangle, there's an easy escape hatch: git merge --abort. This command instantly stops the merge and puts your project right back to how it was before you started.
For a deeper dive, check out our complete guide on how to resolve conflicts in Git: https://blog.pullnotifier.com/blog/how-to-resolve-conflicts-in-git-a-practical-guide
Merging Remote Branches and Using Pull Requests
So far, we've only talked about merging branches on your own machine. But let's be real—in any team setting, the actual collaboration happens on a shared remote repository, usually hosted on platforms like GitHub or GitLab. Merging stops being a solo task and becomes the very heart of how teams build software together.
You'll constantly find yourself needing to pull in changes from a teammate's remote branch. Maybe they just finished a feature you were waiting for, or they squashed a bug that was holding you back. Knowing how to git merge a branch into another branch from a remote is a skill you'll use daily.
Syncing with Your Team
Before you can even think about merging a remote branch, you need to get your local repository up to speed. The first command you should always run is git fetch, which contacts your remote (typically named origin) for the latest updates.
git fetch origin
This command is safe—it downloads all the new commits and branch information from the remote but doesn't touch any of your local files. Think of it as updating your local "map" of what everyone else has been working on.
Once you’ve fetched the updates, you can merge. The process is almost identical to a local merge. First, check out the branch you want to merge into.
Get on your main branch
git checkout main
Merge the remote feature branch right into your local main
git merge origin/new-feature-branch
This tells Git to take everything from the new-feature-branch on the origin remote and merge it into your current local main branch. It's a quick and direct way to integrate a colleague's work.
From Command Line Merge to Collaborative Pull Request
While a command-line merge is fast and efficient, modern software development is built around Pull Requests (PRs)—or Merge Requests if you're on GitLab. A PR is so much more than just a merge. It's a formal request to integrate your code, but it's wrapped in a process built for collaboration and quality control.
This picture perfectly captures what a pull request is all about: a conversation, a code review, and a safety net, all rolled into one. The PR workflow gives your team a dedicated space to review code, offer suggestions, and run automated checks before the merge ever happens. For a deep dive into this entire process, check out our guide on mastering the pull request GitHub workflow.
Switching to a PR-based workflow gives you some massive advantages over just merging on the command line:
*   **Code Review:** It’s a chance for other developers to look over your changes, spot potential bugs, and make sure everything meets the team's quality standards.
*   **Automated Checks:** PRs can trigger CI/CD pipelines to run tests, linters, and other checks automatically, acting as a gatekeeper to prevent broken code from getting in.
*   **Discussion and Traceability:** It creates a lasting record of the conversation around a set of changes, which is incredibly valuable for future context.
This structured process is exactly why 90% of development teams use PRs to manage their code.
Pull Requests transform merging from a solitary, mechanical action into a transparent, collaborative event. They are the primary mechanism for ensuring code quality and shared ownership in modern software development.
Of course, the constant stream of PR notifications can turn an inbox into a nightmare, leading to review bottlenecks. To keep things moving, teams need a way to surface important updates without all the noise.
This is where a tool like PullNotifier comes in. It cuts through the chaos by sending real-time, consolidated PR updates directly into Slack. Instead of drowning in emails, your team sees new PRs, comments, and approvals in a dedicated channel. This focused visibility slashes review delays and keeps your whole development cycle flowing.
Advanced Merging Techniques for a Clean History
Once you get past the basics of merging, the real goal becomes keeping your project history clean. A good Git history isn't just a log of changes; it’s a clear, readable story of how your project has evolved. Advanced techniques are all about making that story easy to follow, mostly by tidying up your commits before you git merge a branch into another branch.
A popular strategy for this is the squash and merge. It’s a powerful option that lets you take all the messy commits from your feature branch—the initial setup, the quick fixes, and the "oops, forgot a file" commits—and bundle them into a single, clean commit on your main branch.
What you're left with is a beautiful, linear history on your main development line. Instead of a dozen small, confusing commits, another developer just sees one simple entry: "Implemented User Authentication Feature." Clean and simple.
The Trade-Offs of a Squash Merge
Of course, that tidiness comes with a trade-off. When you squash, you erase the granular, step-by-step history of how the feature was built. The incremental development process, the fixes, and the small iterations are all gone. This can make it a lot harder to debug a feature later if a subtle bug pops up.
Squash and merge prioritizes a clean, high-level project history over a detailed development log. It's a strategic choice: Is it more important to understand the feature's journey or to see a simple, linear project timeline? For many teams, the answer is the latter.
Merging vs. Rebasing: A Critical Distinction
Another powerful tool for cleaning up history is git rebase. Rebasing is like rewriting history. It takes your feature branch's commits and replays them, one by one, on top of the latest version of the main branch. The result is a perfectly linear history, as if you did all your work on the most up-to-date code, and it avoids creating a merge commit entirely.
It's fantastic for cleaning up your own local commits before you push them. But here's a huge word of caution: never rebase a branch that is shared with other developers. Rebasing changes commit hashes, effectively creating a brand-new history. If someone else has already pulled the old branch and based their work on it, you’re in for a world of confusion and repository chaos.
Best Practices for Team Workflows
No matter which merge strategy you choose, it won't work unless your whole team is on the same page and follows a consistent workflow. These practices help cut down on conflicts and keep the history clean.
*   **Keep Branches Short-Lived:** The longer a feature branch exists, the more it drifts away from `main`. This inevitably leads to bigger, scarier merges. Try to get features integrated within days, not weeks.
*   **Pull from `main` Often:** Regularly update your feature branch with the latest from `main` (`git pull origin main`). This brings in changes in small, manageable chunks and lets you spot potential conflicts early.
*   **Write Descriptive Commits:** A clean history is useless without good commit messages. A great message explains the *why*, not just the *what*.
These habits, paired with a smart branching strategy, are what separate smooth projects from messy ones. As projects get bigger, especially in complex setups like monorepos, having clear guidelines is non-negotiable. If you want to dive deeper, you can explore some effective monorepo branching strategies for teams that build on these core ideas.
Common Questions About Merging in Git
Even with a solid workflow, some questions about merging seem to pop up time and again. Let's dig into a few of the most common sticking points developers run into when they need to git merge a branch into another branch.
How Can I Undo a Git Merge
It’s a classic scenario: you just ran the merge command, only to realize you’ve made a mistake. If you haven't pushed the changes yet, the fix is pretty straightforward.
Just use git reset --hard HEAD~1. This command moves the branch pointer back by one commit, effectively wiping the merge from existence. But be careful—it will also discard any uncommitted work you have sitting in your directory.
If you’ve already pushed the merge to a shared remote, you should never use git reset. Doing so rewrites public history, which can cause serious problems for your teammates. The safer approach is git revert -m 1 <merge-commit-hash>. This creates a brand new commit that simply reverses the changes from the merge, keeping the project history intact and everyone on your team happy.
What Is the Difference Between Git Merge and Git Rebase
Ah, the age-old debate. The distinction between git merge and git rebase is crucial for any team.
git merge is all about joining two development histories. It does this by creating a new "merge commit" that has two parents, preserving the exact history of both branches. Your Git log will clearly show the moment the two branches came together.
On the other hand, git rebase rewrites history. It takes all the commits from one branch and replays them, one by one, on top of another. This gives you a clean, perfectly linear commit history without any extra merge commits. The big catch? Because it alters commit hashes, the golden rule is to never rebase a branch that others are working on. It can create a huge mess in the repository.
Rebase is best for tidying up your own local feature branches before you share them with the team.
git mergepreserves history with a dedicated merge commit.git rebaserewrites history for a linear log. Use merge for shared branches and rebase for your own local cleanup.
Can I Merge Without Checking Out the Target Branch
Nope, not with the standard command. The git merge command is designed to prevent this very action.
The correct and safest workflow is to always run git checkout <target-branch> first, followed by git merge <source-branch>. This explicit step forces you to be deliberate and ensures you're merging into the right destination.
While there might be some complex, multi-step Git commands that offer technical workarounds, sticking to the standard procedure is the way to go. This design choice in Git helps prevent one of the most common and disruptive mistakes a developer can make.
Managing pull requests and merges across a busy team can feel like chaos. PullNotifier cuts through the noise by sending real-time, consolidated PR updates directly to Slack, slashing review delays. Keep your team in sync and your development cycle flowing smoothly by visiting https://pullnotifier.com to get started for free.