- Published on
A Practical Guide to Git with Jira for Seamless Development
- Authors

- Name
- Gabriel
- @gabriel__xyz
Connecting Git with Jira does more than just link two tools—it merges your development workflow with your project management, creating a single source of truth for both code and tasks. Forget about manual ticket updates and the endless back-and-forth between developers and project managers. This integration gives everyone a clear, real-time view of the entire development lifecycle.
Why Connecting Git with Jira Is a Game Changer

Let's be real: context switching is a productivity killer. Before a proper integration, a developer’s day is a frustrating loop: write code in an IDE, push changes to a Git repository, then jump over to Jira to update the ticket status, log time, and add a comment. It’s tedious, inefficient, and practically invites human error.
This disconnected process creates a massive gap between the code being written and the status board everyone else is watching. Product managers and QA testers are left guessing which pull request is tied to a specific bug fix or feature. That lack of transparency leads straight to delays, misunderstandings, and a painfully slow feedback loop.
Creating a Single Source of Truth
The real magic of a git with jira integration is that development activity automatically drives project status. When a developer pushes a commit or opens a pull request, the right Jira ticket updates instantly with all the relevant details. This one connection delivers huge value.
*   **Complete Traceability:** You can trace every single line of code back to a specific Jira issue. This creates a bulletproof audit trail for compliance and makes debugging so much easier.
*   **Real-Time Visibility:** Non-technical stakeholders can see progress directly in Jira without ever needing to poke around in a Git repo.
*   **Reduced Administrative Overhead:** Developers get to spend less time on busywork and more time doing what they do best: writing great code.
It's no surprise that the market for these integrations is growing fast. Getint, for example, saw its Jira GitHub Connector installations jump by 19% in just one month. This shows a clear shift toward consolidating toolchains to kill manual data entry and reduce friction. You can dig into more data on this trend to see just how quickly teams are adopting integrated workflows.
By linking code repositories directly to project tasks, teams bridge the critical gap between engineering work and business objectives. This alignment ensures that every commit serves a clear purpose, moving the project forward in a measurable way.
Connecting Your Git Repository to Jira Cloud
Alright, now that you know why this connection is so powerful, let's get into the nuts and bolts of making it happen. This is where you’ll physically link your code repositories—whether they're on GitHub, GitLab, or Bitbucket—to your Jira Cloud instance. Getting this part right is the foundation for all the slick workflows we'll build on later.
The journey starts in the Atlassian Marketplace. If you’re using Bitbucket Cloud, you’re in luck—the integration is native since they’re both Atlassian products. But for GitHub or GitLab, you’ll need to grab an app.
Just head to Apps > Explore more apps in your Jira navigation bar and search for the official connector for your provider, like "GitHub for Jira."
Finding Your Way in the Atlassian Marketplace
Once you spot the right app, installation is usually just a couple of clicks. The real meat of the setup is authorizing the connection between the two platforms. This is where you’ll configure which repositories or entire organizations Jira can actually see and talk to.
You'll need to choose an authentication method, and you'll typically see two options: OAuth or a personal access token (PAT).
*   **OAuth (Recommended):** This is the modern, secure way to do it. It grants permissions directly to the application itself. It's far more manageable for teams because the connection isn't tied to a single person's account.
*   **Personal Access Token (PAT):** This method links the connection to a specific user's credentials. It can be fine for a personal project or a quick test, but it’s a ticking time bomb in a team environment. What happens when that person leaves the company or their permissions get revoked? The integration breaks.
Pro Tip: In any professional team setting, always choose OAuth. It saves you from the inevitable headache of the integration suddenly failing because someone’s account was deactivated. It keeps your Git-Jira workflow stable and secure.
Configuring Your Repositories
After you’ve authorized the app, you’ll be prompted to select which repositories to link. A common hurdle here is dealing with organization-level permissions. In GitHub, for instance, you might need an organization owner to approve the app before it can even see your team's repos. Be ready to ping your admin to get the green light.
Once connected, you can dial in which repositories are linked to specific Jira projects. This granular control is a lifesaver in large companies where you definitely don't want the marketing team’s Jira project seeing the core platform’s source code.
The infrastructure behind these integrations has become incredibly solid, built to handle huge enterprise needs. Performance benchmarks for Jira Data Center show that well-designed apps can manage massive loads, but it also means you have to be smart about the setup. Misconfigured integrations can flood your Git provider's servers with API requests. You can dive deeper into the technicals of managing large-scale Jira integrations if you're curious.
This initial setup might feel a bit administrative, but it’s a one-and-done deal. Taking a few extra minutes to get permissions right and choose the best authentication method will pay off big time down the road. With your repositories now visible inside Jira, you’re officially ready to unlock the real magic.
Git Provider Integration Features in Jira Cloud
Not all Git integrations are created equal. Since Bitbucket is an Atlassian product, its native connection offers the tightest integration. However, the Marketplace apps for GitHub and GitLab are incredibly powerful and often close the gap. Here’s a quick comparison to help you understand what you get with each provider.
| Feature | Bitbucket Cloud (Native) | GitHub (Marketplace App) | GitLab (Marketplace App) |
|---|---|---|---|
| View Branches, Commits, PRs | Yes, fully integrated development panel. | Yes, rich development panel with deep linking. | Yes, comprehensive development panel view. |
| Create Branches from Jira | Yes, seamless in-context branch creation. | Yes, allows creating branches directly from a Jira issue. | Yes, supports creating branches from within a Jira issue. |
| Smart Commits | Yes, native support for commands in commit messages. | Yes, full Smart Commit functionality is available. | Yes, Smart Commits are fully supported. |
| CI/CD Build & Deploy Info | Yes, via Bitbucket Pipelines integration. | Yes, through GitHub Actions and other CI/CD tool integrations. | Yes, via GitLab CI/CD integration. |
| Automation Triggers | Yes, extensive triggers for builds, PRs, and commits. | Yes, triggers for commits, PRs, and branch events. | Yes, triggers for commits, PRs, and branch events. |
| Security Info | Yes, via Bitbucket Code Insights and Snyk integration. | Yes, via GitHub code scanning and Dependabot alerts. | Yes, via GitLab security scanning and vulnerability reporting. |
Ultimately, the best choice depends on where your team's code already lives. The good news is that no matter which provider you use, the core functionality for a powerful Git-Jira workflow is there. The key is to get it connected and start building those automated processes.
Alright, once you've got the technical connection sorted, it's time to actually make it useful. The real magic of integrating git with jira isn't just seeing commits on a ticket; it's about building small, consistent habits that pay off big in clarity and speed.
And it all starts with how you name your branches.
A simple, structured approach to branch naming forges an instant, unbreakable link between your code and the Jira ticket. When you embed the Jira issue key right into the branch name, you give context to every single line of code that follows. This tiny bit of discipline makes your repository history incredibly easy to parse.
The Power of a Good Branch Name
Instead of something generic like fix-login-bug, switch to a convention that includes the issue key. A solid format that many teams swear by is type/TICKET-ID-short-description.
*   **Feature:** `feature/PROJ-123-new-auth-flow`
*   **Bugfix:** `bugfix/PROJ-245-fix-null-pointer`
*   **Hotfix:** `hotfix/PROJ-301-critical-api-patch`
This structure immediately tells anyone looking at your branches what the work is about and which Jira ticket holds the details. It's a foundational practice for the whole integrated workflow. For teams in more complex setups, like monorepos, getting branch naming right is even more critical. In fact, exploring different monorepo branching strategies can reveal some great patterns that pair perfectly with a Jira-driven process.
The goal here is to make your intent obvious right from the command line. When a branch name tells the full story, you eliminate guesswork for your entire team and create a development process that practically documents itself.
Supercharge Your Commits with Jira Smart Commits
While branch names give your work a home, Jira Smart Commits are how you actively drive your workflow straight from the terminal. Smart Commits are special commands you sneak into your commit messages that tell Jira to do things—add a comment, log some work time, or even push an issue to the next status.
This means you can stop jumping between your IDE and Jira. You can update a ticket's status from "In Progress" to "In Review" the exact moment you push the code. It’s a game-changer for staying in the zone.
Key Smart Commit Commands and Examples
The syntax is dead simple: TICKET-ID #command <value>. Let's look at the most useful commands with some real-world examples.
1. Adding Comments (#comment) Use this to drop updates, technical notes, or questions right onto the Jira ticket without breaking your flow.
git commit -m "PROJ-123 #comment Added new validation logic for the email field."
2. Logging Time (#time) Perfect for teams that track hours. The format is flexible, supporting weeks (w), days (d), hours (h), and minutes (m).
git commit -m "PROJ-245 #time 2h 30m Refactored the data service to fix the memory leak."
3. Transitioning Issues (#transition) This is easily the most powerful command of the bunch. You can move a ticket through its workflow stages directly from your commit. Just make sure the transition name matches what's set up in your Jira project's workflow (like "Start Progress," "Send to Review," or "Done").
git commit -m "PROJ-123 #in-review Ready for code review. All acceptance criteria met."
In this example, in-review is the name of the transition. That one command pushes your code and slides the Jira ticket to the next column on the board, letting QA or other reviewers know it's ready for them.
By weaving these simple practices—structured branch names and Smart Commits—into your daily routine, you turn your Git history into a dynamic, living record of your project. Every git push becomes a meaningful update that keeps the entire team perfectly in sync.
Putting Your Development Pipeline on Autopilot
Smart Commits and disciplined branch naming are great for keeping everything in sync, but the real magic of a Git with Jira integration happens when you bring in automation. This is the point where you stop manually updating tickets and start letting your tools do the heavy lifting for you.
By setting up a few simple automation rules, you can put your entire development pipeline on autopilot.
This shift moves your team from being reactive to proactive. Instead of developers having to remember to drag tickets across the board, the board just updates itself based on what's happening in the code. It’s a small change that pays off big in efficiency and accuracy.
The goal here is to make your Git activity the single source of truth that drives your Jira workflow. This flow chart breaks down how simple yet powerful the connection is between your code and your project updates.
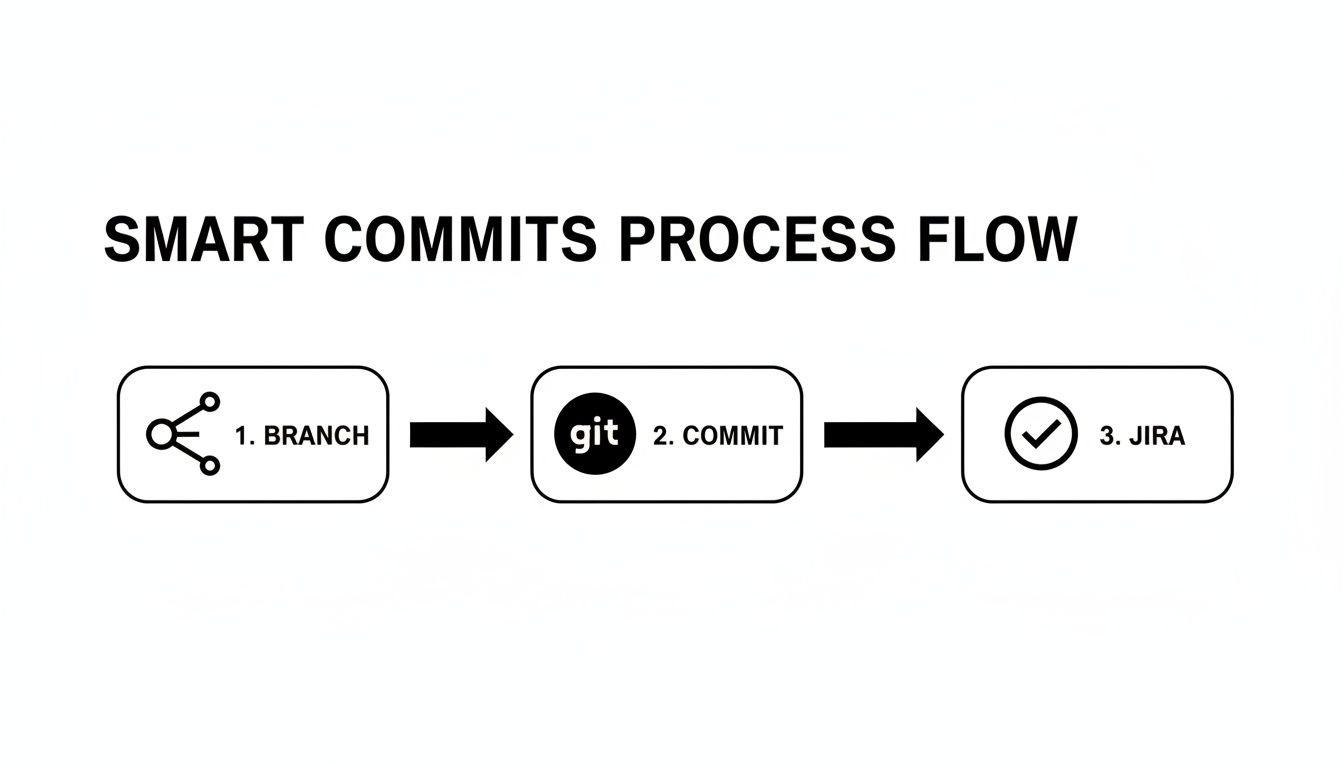
As you can see, a developer's action in Git—like creating a branch or making a commit—directly translates into a meaningful update in Jira. It closes the loop between what’s being built and what’s being tracked.
Building Your First Automation Rules
Jira Automation gives you a straightforward "when/if/then" framework to build rules. Let's walk through a couple of the most valuable automations that pretty much every development team should have in place.
Automation 1: Move to "In Review" When a Pull Request is Opened This is the classic example, and for good reason. It removes the most common friction point: letting everyone know that a piece of code is ready for review.
*   **When:** `Pull request created`
*   **Then:** `Transition the issue to: In Review`
With this rule, the moment a developer opens a PR, the linked Jira ticket automatically slides into the "In Review" column. Your QA team and fellow developers immediately know it's time to take a look, with zero manual updates needed.
Automation 2: Move to "Done" When a Pull Request is Merged Closing the loop is just as important. When code gets merged into your main branch, the work for that ticket is usually finished.
*   **When:** `Pull request merged`
*   **Then:** `Transition the issue to: Done`
This keeps your board honest and always reflecting the true state of your codebase. Merged code means a finished task, and your Jira board will show it instantly.
When Jira and GitHub are properly integrated, teams can automatically sync issues and track progress at the code level, eliminating the inefficiencies of manual context-switching. This unified system allows teams to identify when work goes off-track and detect release risks much earlier. Discover more insights about the benefits of a unified system on zigiwave.com.
Integrating CI/CD Build Status
You can take things even further by piping information from your Continuous Integration/Continuous Deployment (CI/CD) pipeline directly into Jira. This gives stakeholders like product managers and QA engineers a window into the deployment lifecycle without ever having to leave the familiar comfort of Jira.
Imagine a build in GitHub Actions fails. An automation rule can immediately flag the corresponding Jira ticket.
*   **When:** `Build status changed`
*   **If:** `Build status = FAILED`
*   **Then:** `Add comment to issue: "⚠️ Build failed! Check the latest commit."`
This level of integration is incredibly powerful. For teams looking to tighten up their CI/CD game, it's worth checking out how to create reusable GitHub Actions in 2025, which makes these automations even more robust. By connecting these systems, you create a transparent, self-updating workflow that saves everyone time and keeps the entire team on the same page.
Improving Team Communication with Smart Notifications
While your git with jira integration creates a perfect system of record, let's be honest—day-to-day team conversations are happening in Slack. A truly efficient workflow has to bridge that final gap, piping crucial development updates directly into your team's communication hub without creating a storm of notification noise.
The secret is to move beyond those basic, spammy webhooks. What you really want are targeted, actionable alerts that give you context and prompt immediate action. This is where specialized tools really shine, closing the loop between your code, your project board, and your team's real-time discussions.
Creating a Tight Feedback Loop
Picture this very common scenario: a developer opens a pull request. Your Jira automation rule correctly moves the ticket to "In Review." At the exact same moment, a smart notification tool sends a clean, concise alert to a specific Slack channel.
This alert can do a lot more than just announce the PR. It can:
*   Directly tag the required reviewers, pulling them in immediately.
*   Include a link to both the PR and the associated Jira ticket.
*   Show CI/CD build statuses as they happen, right in the thread.
This simple process eliminates the lag where a PR just sits idle, waiting for someone to notice it. I've seen review cycles shrink dramatically because the right people are notified at the exact moment their input is needed, right where they're already communicating.
By bringing targeted Git events into your team's primary communication channel, you convert passive project updates into active conversations. This shift ensures critical tasks like code reviews don't fall through the cracks, maintaining momentum and accelerating the entire delivery pipeline.
For teams using GitHub and Slack, this kind of focused communication is a game-changer. Tools like PullNotifier are designed specifically for this purpose, cutting through the noise to deliver only the alerts that matter.
If you want to see just how quickly you can get this running, our guide on how to get GitHub PR notifications in under a minute shows just how simple it is to build a cleaner, more effective workflow. This final connection is what makes your integrated system truly seamless.
Untangling Common Git-Jira Integration Questions
Even with a slick Git-Jira setup, your team is bound to hit a few snags. It’s just part of the process. Getting ahead of these common questions will keep your workflow humming and prevent minor issues from turning into major frustrations.
Let's walk through some of the most frequent hiccups we see teams run into, from disappearing commits to finicky Smart Commits.
Why Are My Commits or Pull Requests Not Showing Up in Jira?
This is easily the #1 issue teams face, and it almost always comes down to one of two things: permissions or mismatched emails.
The email address you use for your Git commits must be an email address tied to your user account in Jira. If there's no match, Jira has no idea who you are, so it just ignores the commit. It’s that simple. Make sure your git config user.email aligns with your Jira profile.
My Smart Commits Aren't Working. What's Wrong?
If your Smart Commits are failing to trigger actions in Jira, the problem is usually syntax or a workflow restriction.
First off, double-check your command. The format is picky: TICKET-ID #command <value>. A super common mistake is mashing the ticket ID and the command together, like PROJ-123#in-review, when it should be PROJ-123 #in-review with a space.
Second, your Jira project’s workflow might be blocking the transition. For instance, you can't use #done if the ticket is sitting in "To Do" and needs to pass through "In Progress" first. The transition has to be a valid next step in your board's configured workflow.
Pro Tip: Your Smart Commit commands (
#in-review,#qa-ready, etc.) have to exactly match the transition names set up in your Jira project’s workflow. If you're not sure what they are, ask a Jira admin to look them up for you.
Can I Link Multiple Commits to One Jira Issue?
Absolutely. In fact, that's how it's designed to work. It’s rare for a single commit to close out an entire feature or bug fix.
Every single commit that includes the Jira issue key in its message will automatically link to that ticket. This creates a running history of all the work right inside Jira's development panel, which is incredibly useful for tracking progress.
For example, a typical sequence might look like this:
*   `git commit -m "PROJ-456 Initial setup for API endpoint"`
*   `git commit -m "PROJ-456 Added validation logic"`
*   `git commit -m "PROJ-456 #comment Refactored for performance"`
All three of these commits would pop up on the PROJ-456 ticket. This gives anyone looking at the ticket a crystal-clear narrative of how the feature was built, which is a lifesaver for code reviews and future debugging.
Tired of noisy, cluttered Slack channels? PullNotifier cleans up your code review process with clean, actionable alerts, making sure pull requests get seen and merged faster. Give PullNotifier a try with a free trial and see how much smoother your workflow can be.