- Published on
A Practical Guide to Mastering Linux Bash Commands
- Authors

- Name
- Gabriel
- @gabriel__xyz
Even with all the slick graphical interfaces out there, Linux Bash commands remain a developer's most powerful tool for pure efficiency, automation, and direct system control. Getting good at the command line isn't about nostalgia; it’s about shipping, deploying, and debugging code faster than you could with a mouse.
Why Bash Commands Are Still Essential for Developers

Sure, modern IDEs are great, but they also hide what's really happening under the hood. Getting comfortable in Bash strips away that abstraction, giving you raw, unfiltered access to your system. For any serious developer, that direct line of control is non-negotiable for optimizing workflows and just plain knowing your tools.
The command line is also the native home for so many of the tools we use every day. From version control with Git to containerization with Docker, true mastery means knowing their command-line interfaces inside and out. Relying only on a GUI will eventually limit you when it's time to script a complex task or fix something that breaks outside the IDE.
Unlocking Developer Productivity
The real payoff for learning Linux Bash commands is a massive boost in productivity. Repetitive tasks that take a dozen clicks in a GUI can be done with a single, simple script.
That’s exactly what this guide is for. It’s not a book you read from start to finish—it's a categorized cheat sheet built for quick lookups and real-world use. Each section breaks down the essential commands with clear syntax, common flags, and practical examples you’ll actually use.
Embracing the command line is an investment in a skill that pays off on every single project. It's the difference between just using your tools and truly commanding them.
Whether you're wrangling files, digging through log data, or automating your deployment pipeline, Bash is the glue that holds it all together. This resource will help you:
- Streamline Workflows: Automate your builds, Git commands, and server admin tasks.
- Improve Debugging: Search huge log files in an instant and monitor system processes in real-time.
- Gain Deeper Control: Manage file permissions, users, and system resources with precision.
Think of this article as your personal command-line field guide. Use the table of contents to jump straight to what you need, or browse a section to discover new ways to level up your skills.
Fundamental File and Directory Management

If you want to get comfortable on the command line, you have to start with the filesystem. These fundamental Linux Bash commands are what you'll use every single day to navigate your projects, create files, and keep everything organized. Think of them as the absolute basics for talking directly to your system.
Your terminal always has a "current location" inside the filesystem. To figure out exactly where you are, use the pwd (print working directory) command.
pwd
Example Output: /home/username/projects/my-app
This is your compass. It's the first thing you should run when you open a new terminal, just to get your bearings before you start moving things around.
Navigating and Viewing Your Filesystem
Once you know where you are, the next step is to look around. The ls (list) command shows you what’s inside your current directory. It’s simple on its own, but its real power comes from its flags.
ls -l: This gives you a "long" listing, showing permissions, owner, file size, and last modification date. It’s perfect for getting a detailed view.ls -a: This shows all files, including the hidden ones that start with a dot, like your.gitdirectory or.envfiles.ls -h: Use this with-lto make file sizes "human-readable" (e.g.,4.0Kinstead of4096). Much easier on the eyes.
Most developers combine these into a single, go-to command: ls -lha. It gives you all the information you need in a clean, readable format.
To actually move between directories, you'll use the cd (change directory) command. This is your main navigation tool.
Jump into the 'src' subdirectory
cd src
Go back up one level to the parent directory
cd ..
Go straight to your home directory from anywhere
cd ~
Pro Tip: Typing
cd -takes you back to the exact directory you were just in. It’s a lifesaver for toggling between two locations.
Creating and Organizing Content
Setting up a new project structure is a breeze with a few key commands. To make a new directory, just use mkdir.
mkdir new-project
Even better, you can create a whole nested directory tree in one shot with the -p (parents) flag. This is a massive time-saver.
Creates 'public' and then 'assets', 'css', and 'js' inside it
mkdir -p public/assets/css public/assets/js
For a quick summary of the commands you'll use to move, copy, and delete files, here’s a handy table.
Essential File Management Commands at a Glance
| Command | Purpose | Common Example |
|---|---|---|
mv | Move or rename a file or directory. | mv old-name.txt new-name.txt |
cp | Copy a file or directory. | cp source-file.log backup-file.log |
rm | Remove (delete) a file. | rm temporary-file.tmp |
To copy or remove an entire directory—and everything inside it—you have to add the -r (recursive) flag. For instance, cp -r project-a/ project-b/ will duplicate the entire project-a folder.
Likewise, rm -r directory-to-delete/ gets rid of a directory and all its contents. You need to be extremely careful with this command. When you combine it with the -f (force) flag (rm -rf), it will delete everything without asking for confirmation, and it is irreversible.
Always, always double-check your pwd before running a recursive rm. It’s a classic mistake that even seasoned developers make, and it can be catastrophic.
Powerful Text Processing and Data Manipulation
Once you get past managing files, you start to see where the command line really shines: manipulating text. The ability to search, filter, and transform data right from your terminal is a fundamental skill for any developer. It saves you countless hours you might otherwise waste digging through logs or sifting through code.
These Linux Bash commands are the building blocks for powerful, automated data workflows. Once you get the hang of them, you can build sophisticated one-liners that tear through massive files in seconds.
Searching and Filtering with Grep
The grep command (Global Regular Expression Print) is your first stop for searching through text. It scans files or input streams for lines matching a pattern. For developers, this is an absolute must for finding function definitions, error messages, or specific config settings.
Its real power comes from its flags, especially when you're searching an entire project:
grep -r 'functionName' .: This is a daily driver. It recursively searches for 'functionName' in all files within the current directory (.), making it perfect for finding where a function is defined or used.grep -i 'error': Performs a case-insensitive search, so it will match 'error', 'Error', or 'ERROR'.grep -v 'DEBUG': This inverts the search, showing you every line that does not contain 'DEBUG'. It’s fantastic for filtering noise out of logs.
You can also chain these flags together for more specific searches. For example, grep -ri 'api_key' /etc/ will recursively and case-insensitively hunt for API keys in your configuration directory.
Viewing and Combining Files
Sometimes you just need a quick peek at a file's contents or want to stitch a few files together. For that, cat, head, and tail are indispensable.
cat app.log: Short for "concatenate,"catprints the entire contents of a file to your screen. You can also use it to merge files:cat part1.txt part2.txt > full.txt.head -n 20 error.log: Shows you the first 20 lines of a file.tail -n 50 error.log: Displays the last 50 lines, which is perfect for checking the most recent log entries.tail -f development.log: The-f(follow) flag is a total game-changer. It outputs the end of a file and then just waits, streaming any new data as it's added. This gives you a live, real-time view of your logs.
Advanced Manipulation with Sed and Awk
For more complex jobs, sed and awk are your power tools. sed (Stream Editor) is built for find-and-replace operations. For instance, if you need to replace every instance of "old_variable" with "new_variable" in a file, you'd run:
sed -i 's/old_variable/new_variable/g' config.js
Here, the -i flag tells sed to modify the file in place. The s/ is for substitute, and the /g at the end means global, so it replaces every occurrence on each line, not just the first.
awk is a full-blown scripting language designed for pattern scanning and text processing. It’s brilliant at handling structured, column-based data like you’d find in CSVs or certain log formats. The reason so many data scientists and developers still swear by it is its ability to perform lightning-fast calculations on text. With 93.87% of developers globally on Git-heavy, Linux-based stacks, quick one-liners for analysis are incredibly valuable. Given a simple CSV file with data like 'Monday,1.1', awk can find the minimum value in an instant, an operation that would be clunky in a big IDE. You can find more examples of how Bash commands enable quick data analysis in this Linux Magazine article.
The core philosophy here is combining simple tools to handle complex tasks. By piping the output of one command into another (using the
|symbol), you create a data processing pipeline.
For example, to find the last 10 error messages in a huge application log, you could run this:
cat app.log | grep 'ERROR' | tail -n 10
This one-liner reads the log, filters it down to only the lines containing "ERROR", and then shows you just the last 10 results. It’s a workflow that's worlds more efficient than opening that file in a text editor and scrolling.
Managing System Processes and Performance
As a developer, you need to keep an eye on running applications, hunt down performance bottlenecks, and manage system resources. A good handle on Linux Bash commands is non-negotiable for keeping your development environment healthy and responsive. These commands are your real-time window into what's happening under the hood, letting you spot and squash issues fast.
Bash scripting isn't fading away; it’s the quiet hero of modern system orchestration. It comes standard on almost every Linux distro, and with 27.7% of developers using Ubuntu for both personal and professional work, commands like ps, top, and kill are part of the daily toolkit. Bash is still a productivity powerhouse, essential for wiring tools together and handling processes reliably. You can read more about Bash's place in the modern dev world at CoderLegion.com.
Identifying and Inspecting Running Processes
The first step in managing processes is simply seeing what’s running. The ps (process status) command gives you a snapshot of all current processes.
ps aux: This is the combo you'll use most often. It shows all processes (a), including those belonging to other users (u) and those not attached to a terminal (x).ps -ef: This gives you a similar full listing but in a different standard format. It's good to be familiar with both.
A common task is finding the Process ID (PID) for a specific app you need to debug or stop. The easiest way is to pipe the output of ps straight into grep.
Find the PID of a running Python script
ps aux | grep 'python' This command filters the process list to show only entries containing "python," making it easy to grab the PID you need for that specific script.
Monitoring Performance with Top and Htop
While ps gives you a static picture, top and htop offer a live, dynamic view of your system's performance.
top is the classic utility that comes pre-installed on most systems. It gives you a real-time list of processes, usually sorted by CPU usage. It's great for a quick look, but the interface can feel a bit clunky and outdated.
For a much more user-friendly experience, htop is a fantastic alternative. It presents the same core information but with colors, a visual tree view, and the ability to manage processes directly within its interface. It's particularly good for quickly spotting resource hogs. For a deeper look into this, check out our guide on how to check for memory leaks.
Terminating and Controlling Processes
Once you've found a misbehaving process, you need a way to shut it down. The kill command is your tool for this, sending a signal to a process to tell it what to do.
By default,
kill <PID>sends a TERM signal (15), which is a polite request for the process to shut down cleanly. If a process is totally frozen, though, you might need to be more forceful.
Here are the signals you'll use most:
kill -15 <PID>(SIGTERM): This is the default and safest option. It lets the program save its state and exit gracefully. Always try this first.kill -9 <PID>(SIGKILL): This is the last resort. It tells the kernel to terminate the process immediately, no questions asked. The process gets no chance to clean up, so use it with caution.killall <process_name>: This command is a real time-saver. It kills all processes that match a given name, so you don't have to find and kill each PID individually. For instance,killall nodewould stop all running Node.js processes at once.
Controlling File Permissions and Ownership
If you’ve ever run into a “permission denied” error, you know how crucial file permissions are in Linux. Getting them right is essential for security, collaboration, and even just making sure your scripts can run. The three commands you'll constantly rely on for this are chmod, chown, and chgrp.
Every file and directory has permissions set for three different user types:
- User (u): The person who owns the file.
- Group (g): The group assigned to the file, allowing team access.
- Others (o): Everyone else on the system.
For each of these, you can set three basic permissions: read (r), write (w), and execute (x). These are the rules that dictate who can see, change, or run a file.
The concepts of users and processes are deeply linked. A process always runs as a specific user, and its ability to interact with the system—including sending signals to other processes—is governed by permissions.
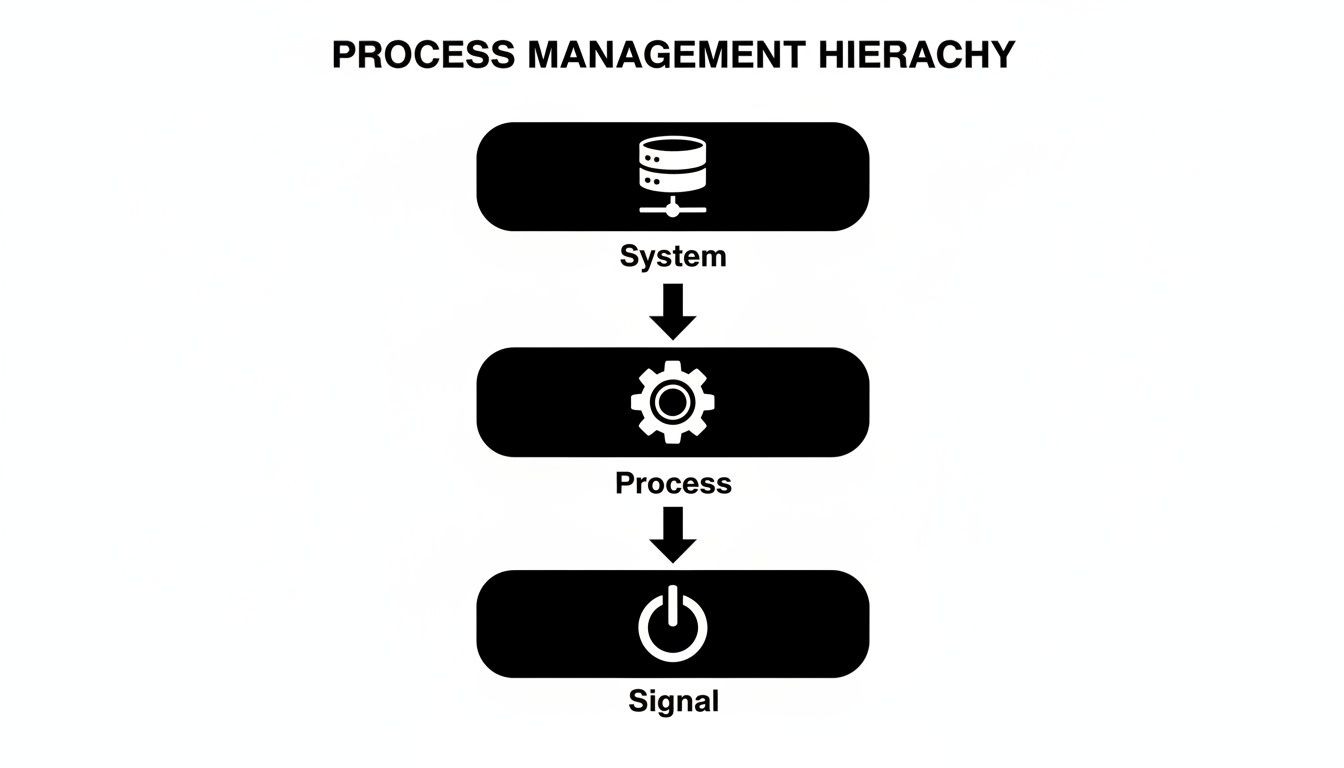
This diagram shows that signals are a core mechanism for process control, used by commands like kill. Your permissions determine whether you, as a user, are allowed to send those signals to a particular process.
Modifying Permissions with Chmod
The chmod (change mode) command is your tool for changing these permissions. You can do it in two ways: with symbolic notation or octal notation.
Symbolic notation is more descriptive and easier to read. It uses letters for users and permissions, along with operators like + to add, - to remove, and = to set permissions directly. It's perfect for making one-off adjustments.
Make a deployment script executable for just the owner
chmod u+x deploy.sh
Remove write access for the group and others from a config file
chmod go-w config.json
Octal notation is the go-to for setting all permissions at once. It uses a three-digit code where each number represents a permission set by summing these values:
- Read (r) = 4
- Write (w) = 2
- Execute (x) = 1
You combine these values for the user, group, and others. A common one you'll see is 755, which gives the user full permissions (4+2+1=7), while the group and others can read and execute (4+1=5).
Best Practice: Use
755for directories and executable scripts and644for regular files. This setup lets users access folders and run scripts while preventing others from modifying non-executable files, a secure standard especially for web servers.
Changing File Ownership
Just as important as permissions is ownership, especially when you're managing services or sharing files with a team. The chown (change owner) command lets you change both the user and group owner of a file or directory.
Change the owner of a file to 'newuser'
chown newuser data.csv
Change both the user and the group at the same time
chown newuser:developers data.csv
A classic developer headache is pulling code with git pull as the root user, only to find all the new files are owned by root. You'll need to run chown to switch ownership back to your own user before you can edit them.
If you only need to change the group, chgrp is the command for the job.
Change the group of a directory to 'web-admins'
chgrp web-admins /var/www/html
Mastering these commands ensures your files are secure, your scripts run when they're supposed to, and your team can work together without getting stuck on permission errors.
Automating Workflows with Shell Scripting and Aliases

Once you're comfortable with single Linux Bash commands, the real fun begins. Chaining commands together and writing small scripts is how you turn the command line from a simple tool into a serious automation partner, saving you a ton of time and cutting down on manual errors.
Command chaining is the most straightforward way to get started. Bash gives you logical operators that let you create simple, reliable sequences for everyday tasks like building and deploying your code.
&&(AND): This runs the second command only if the first one succeeds. It's perfect for dependent steps, like only running your tests after a successful build.||(OR): This runs the second command only if the first one fails. Think of it as a basic error-handling tool, like printing a failure message.
A classic example is creating a build-and-test sequence that won't waste your time.
npm run build && npm run test
With this, your tests will never run if the build fails, which saves you from deciphering confusing error logs. For more ideas on what to automate, you can check out our guide on how to automate repetitive tasks to boost productivity.
Getting Started with Bash Scripting
At its core, a Bash script is just a text file filled with a series of commands. Make the file executable, and you can run the whole sequence with a single command. Every script should kick off with a "shebang" line (#!/bin/bash) to tell the system exactly how to run it.
Let's put together a quick script that builds a project and then runs tests, but only if the build passes.
#!/bin/bash
echo "Starting project build..." npm run build
Check if the build command was successful
if [ $? -eq 0 ]; then echo "Build successful. Running tests..." npm run test else echo "Build failed. Aborting." exit 1 fi
echo "All tasks completed successfully."
The key here is if [ $? -eq 0 ]. It checks the exit code of the last command (npm run build). A 0 means success, so the script moves on to the tests. If the build fails and returns anything else, it prints an error and stops cold.
Creating Aliases for Frequent Commands
If you find yourself typing the same long commands over and over, you need to be using an alias. An alias is a custom shortcut that replaces a lengthy command with something short and easy to remember. It’s a huge productivity win.
You can create temporary aliases right in your terminal, but they'll disappear when you close the session. To make them stick around, add them to your shell's configuration file, which is usually ~/.bashrc or ~/.zshrc if you're on Zsh.
Here are a few aliases every developer should consider:
alias gs='git status': Instantly check your Git status.alias ga='git add .': Stage all changes in the current directory.alias gc='git commit -m': A shortcut for committing with a message.alias gp='git push': Push your committed changes up.
After adding aliases to your
.bashrcor.zshrcfile, you'll need to runsource ~/.bashrcor just open a new terminal for the changes to take effect.
With these shortcuts in place, your Git workflow becomes incredibly fast:
ga gc "feat: implement new user dashboard" gp
By combining simple scripts and a handful of custom aliases, you can start building a development environment that's built for speed and tailored perfectly to how you work.
Essential Git Commands in the Bash Terminal
For any developer, Git is part of the daily grind, and the command line is where you unlock its true power. While GUIs have their place, mastering Linux Bash commands for Git gives you a level of speed and control that graphical tools just can't match. A sharp command-line workflow is a hallmark of a seasoned developer.
The industry stats back this up. Git is the undisputed king of version control, with 93.87% of developers using it. On Ubuntu, which powers 27.7% of development environments, engineers lean on Bash scripts to automate everything from branch management to pulling updates. This is why knowing your way around command-line Git is non-negotiable for productivity, especially for teams using tools like PullNotifier to slash review delays by up to 90%. You can find more data on Git usage statistics on commandlinux.com.
The Core Development Workflow
The daily Git lifecycle really just boils down to a few key commands. This sequence is the backbone of how your code gets from your local machine into the shared remote repository. If you're brand new to this, our beginner's guide to getting started with Git is a great place to start.
git clone [repository-url]This is where it all begins. It pulls down a complete copy of a remote repository, including its entire history, and sets up a new directory for you to work in.git statusRun this command constantly. Seriously. It's your dashboard, showing you exactly what’s going on—which files you've modified, which are new (untracked), and which ones are staged for the next commit.git add [file-name]orgit add .Before you can save your work, you have to tell Git which changes you want to include. This "stages" them. Usegit add .as a shortcut to stage all modified files in your current directory.git commit -m "Your descriptive message"This command takes a snapshot of your staged changes and saves it to your local repository history. The commit message is everything—it explains the what and why behind your changes.
Always write clear, concise commit messages. They're a form of documentation for your teammates and your future self. A good message explains the purpose of the change, not just what it does.
Syncing with Remote Repositories
Once you've committed changes locally, the next step is to share them with your team and grab any updates they've made. This is all handled with pull and push.
git pull: This fetches the latest changes from the remote repository and tries to merge them into your current branch. You should pull often to stay up-to-date and avoid painful merge conflicts down the line.git push: This sends your locally committed changes up to the remote repository, making them visible and available to everyone else on the team.
Managing Your Work with Branches
Branches are a core concept in Git that let you work on features or fixes in an isolated environment without messing with the main codebase.
git branch: Lists all of the branches in your local repository and shows you which one you're currently on.git branch [new-branch-name]: Creates a new branch based on your current HEAD.git checkout [branch-name]: Switches your working directory over to the specified branch so you can start working on it.
Once you're comfortable with the basics, you'll want to learn how to keep your project history clean and linear. For that, you should Master Git Rebase and Squash.
Frequently Asked Questions About Linux Bash Commands
As you get more comfortable with the command line, a few common questions always pop up. Let's clear up some of the most frequent ones to help you build confidence and work more effectively.
What Is the Difference Between Bash and a Terminal
It’s easy to mix these two up, but they're distinct pieces of a puzzle that fit together perfectly.
A terminal, or terminal emulator, is the program that gives you a window with a text-based interface. It's the visual environment where you actually type your commands. Think of it as the console itself.
Bash (short for Bourne Again SHell) is the program running inside that terminal window. It’s a specific type of shell that interprets what you type, runs your commands, and manages your entire command-line session. While other shells like Zsh or Fish exist, Bash is the default on nearly all Linux systems, making it a universal standard for developers.
In short: The terminal is the window, and Bash is the brain inside it that processes your commands.
How Can I Find More Information About a Specific Command
The best way to learn about any command is to go straight to the source: the built-in manual pages. This is an essential skill for anyone serious about the command line.
Just type man followed by the command name. For example, to get a deep dive into the ls command, you'd run:
man ls
This opens up a comprehensive document covering the command's purpose, all of its flags, and even usage examples. If you just need a quick reminder of a command's options, you can usually use the --help flag for a summarized version.
<command_name> --help
This prints a brief overview right in your terminal, which is perfect when you just need a fast reminder of the syntax.
Are Bash Commands the Same on Linux macOS and Windows
For the most part, yes—and that’s a massive advantage. Both Linux and macOS are UNIX-like operating systems, so they use very similar, and often identical, Linux Bash commands. This consistency makes it seamless to switch between the two platforms.
Windows traditionally had its own command-line world (Command Prompt and PowerShell). However, the Windows Subsystem for Linux (WSL) changed everything. WSL lets you run a genuine Linux environment, complete with Bash, directly on your Windows machine.
This means the Bash skills you develop are now universally applicable across all three major platforms, making it a truly cross-platform skill.
Is It Still Worth Learning Bash Scripting
Absolutely. While you'll reach for languages like Python for complex software, Bash scripting is still the undisputed champ for system administration, build automation, and tying your developer tools together.
Its power lies in how quickly you can manipulate files, manage system processes, and chain commands together to automate the repetitive tasks every developer deals with. From managing Git repositories to deploying applications or configuring CI/CD pipelines, Bash is the glue that holds modern development workflows together. The time you invest in learning it pays off directly in productivity.
Stop drowning in pull request noise and start shipping faster. PullNotifier integrates GitHub with Slack to deliver quiet, real-time PR updates right where your team works. Cut through the chaos and slash your review delays by up to 90% with our smart, customizable notifications. Join over 10,000 developers and get started for free at PullNotifier.