- Published on
Create a Bot for Slack A Practical Developer's Guide
- Authors

- Name
- Gabriel
- @gabriel__xyz
If you want to truly automate your team's workflows and solve the specific problems you face every day, building a custom Slack bot is the way to go. It’s how you transform Slack from just a communication app into the central nervous system of your team's productivity. You get to build something that fits your needs perfectly, not just a generic, off-the-shelf solution.
Why Build a Custom Slack Bot?

A custom Slack bot isn't just a fun side project; it's a powerful tool for sharpening your team’s workflows, especially in a development environment. We’ve all seen what happens with generic integrations. The default GitHub app, for example, is great in theory but often just adds to the noise. Before you know it, your channels are flooded with so many notifications that the important updates get completely buried.
When you create your own bot for Slack, you’re back in the driver’s seat. You can build a tool that solves a real problem your team bumps into every single day. Think about a bot that can filter out noisy alerts, automate the daily stand-up nag, or turn complex deployment processes into a simple slash command. That’s the kind of targeted automation that makes a real difference.
Solving Real-World Problems with Automation
The real magic of a custom bot is its ability to zero in on your team's specific pain points. A classic bottleneck for many engineering teams is the pull request (PR) review process. A generic tool might just announce that a new PR has been opened, but a custom bot can be so much smarter about it.
This is the exact problem we set out to solve when we built PullNotifier. Our one and only goal was to crush code review delays. To do that, we designed a bot that could:
*   **Intelligently route notifications** to the right channel or the right people.
*   **Automatically ping reviewers** when a PR is waiting for their input.
*   **Consolidate all updates** into a single, tidy thread to kill channel spam.
By focusing on one high-impact problem, a custom bot can deliver tangible results. In our case, PullNotifier helps teams slash their review times by up to 90%, which directly boosts development speed. You can master Slack for developers by learning how to build these kinds of targeted solutions.
In the fast-paced world of modern work, Slack is where teams live, and custom bots have become a huge part of its success. As of 2026, there are over 750,000 custom bots and integrations running on Slack, handling everything from simple reminders to mission-critical business logic.
Setting Up Your Slack App and Permissions
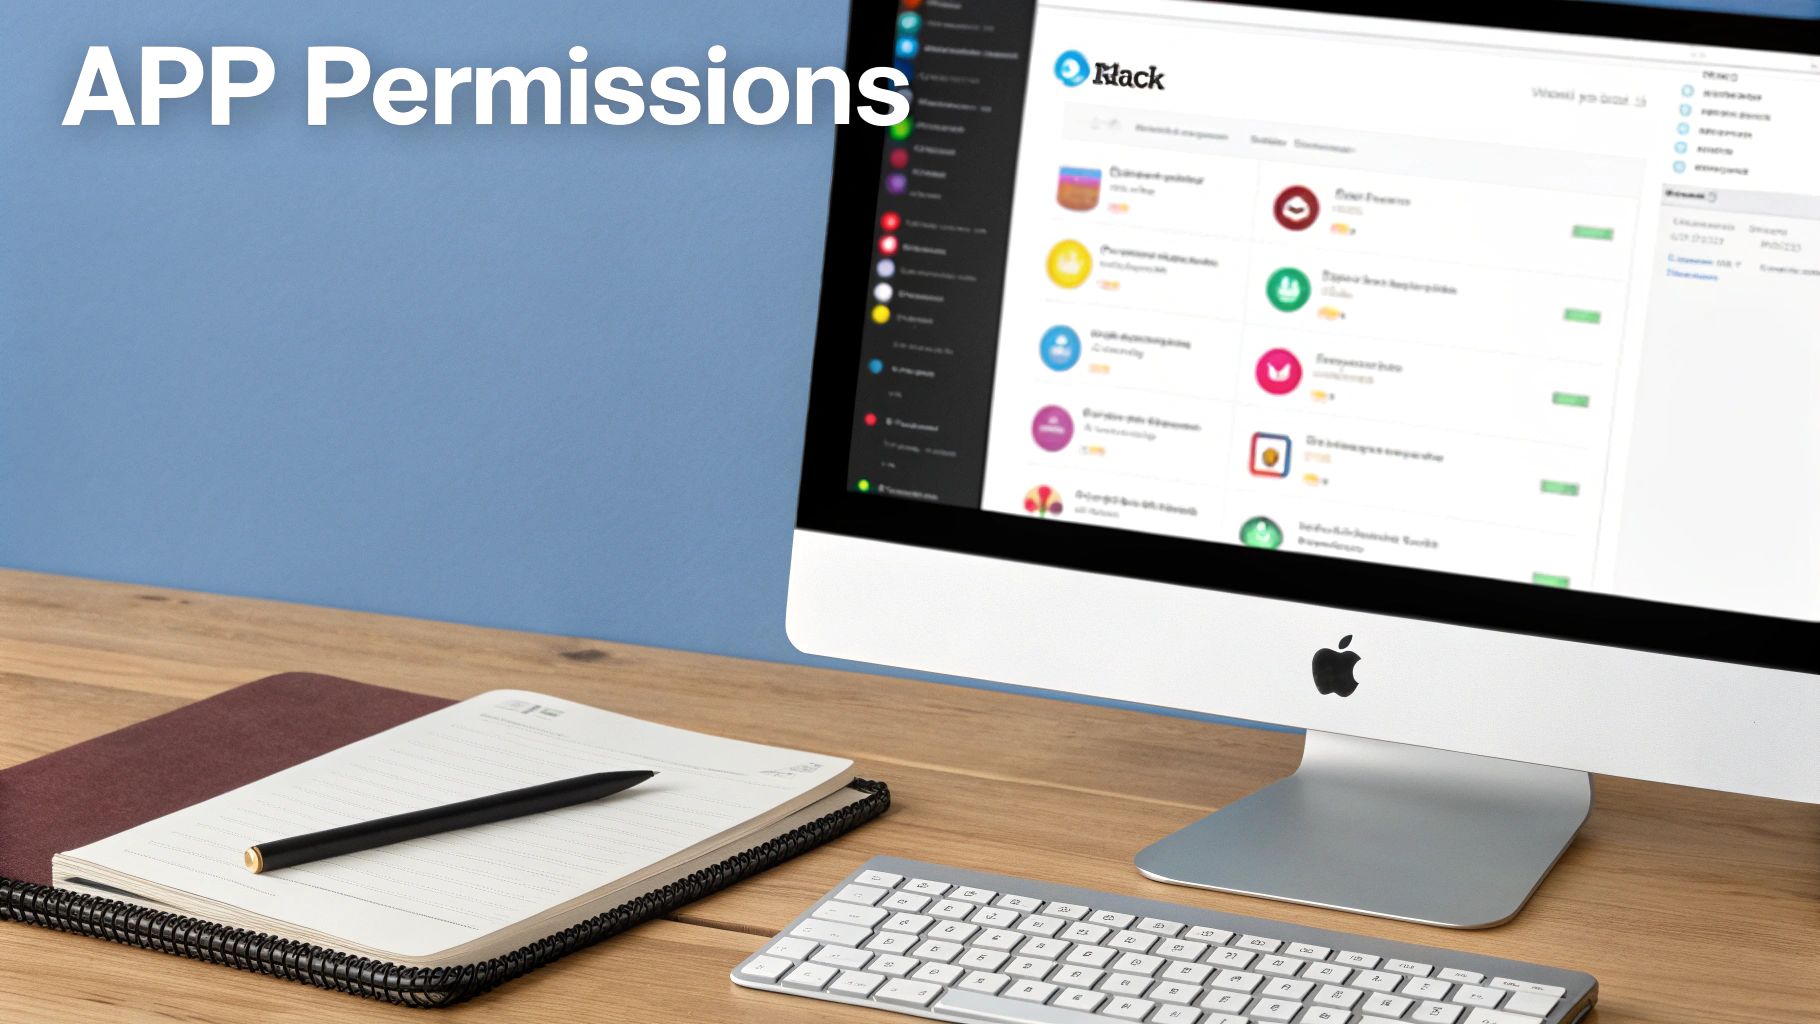
Before you write a single line of code, your bot needs a home within the Slack ecosystem. This starts with creating a new Slack app, which is essentially the container for your bot's identity, permissions, and features. You'll handle all of this directly from the Slack API dashboard.
Think of this step like getting a passport for your bot. Registering the app gives it an official presence in your workspace, and the permissions you grant are the visas that let it perform specific actions. Getting this configuration right is fundamental to your bot's security and functionality, ensuring it can do its job without overstepping its boundaries.
Getting Started on the Slack API Dashboard
Your journey begins on the Slack API website. Once you're logged in, click "Create an App" and choose to build it "From scratch." Give your app a memorable name—we'll use "PullNotifier" for our example—and pick the development workspace where you'll be testing it out.
Slack's dashboard is surprisingly intuitive. It lays out a menu of features you can add to your app, from slash commands to interactive components. For now, though, we're just focused on establishing the bot's core permissions.
The Principle of Least Privilege: Your Security North Star
When you're eager to get a bot running, it's tempting to grant it a bunch of permissions just to make things work. This is a common misstep that can open up security holes later on. Instead, you should always stick to the principle of least privilege.
This concept is simple: your bot should only have the absolute minimum permissions required to do its job. Nothing more. If your bot only needs to post messages, it shouldn't have permission to read conversation histories.
Key Takeaway: Start with zero permissions and add scopes one by one, testing as you go. This deliberate approach creates a secure, focused tool instead of a potential liability. It's a bit more work upfront but pays off big time in the long run.
For our PullNotifier bot, the main goal is to post messages in channels. To do that, it only needs the chat:write scope. This allows the bot to send messages but grants it no other powers. We can always add more scopes later if we want to add features like slash commands (commands) or the ability to react to messages (reactions:write).
Here's a quick look at some essential scopes you might need for your bot.
Essential Slack Bot Scopes Explained
Choosing the right OAuth scopes is crucial. Granting too few permissions will break your bot's functionality, while granting too many creates unnecessary security risks. The table below breaks down some of the most common scopes, what they do, and when you'd typically use them.
| Scope | What It Does | Example Use Case |
|---|---|---|
chat:write | Allows the bot to post messages to channels it's a member of. | Sending notifications, alerts, or automated reports to a specific channel. |
commands | Enables the bot to respond to slash commands entered by users. | Creating a /deploy command to trigger a build or a /poll command to start a team poll. |
users:read | Lets the bot view basic information about users in the workspace. | Mentioning a user by their handle (@username) or looking up their display name. |
channels:read | Allows the bot to get information about public channels in the workspace. | Listing available channels for a user to select from in a dropdown menu. |
im:write | Permits the bot to send direct messages to users. | Sending a private confirmation message to a user after they complete an action. |
reactions:write | Gives the bot permission to add emoji reactions to messages. | Automatically adding a :white_check_mark: reaction to a message once a task is completed. |
Always start with the bare minimum. As you add new features to your bot, you can revisit your app's configuration and add the necessary scopes. This keeps your bot secure and your workspace data safe.
The power of Slack's app model is clear when you see how widely it's used. Nearly 80% of Fortune 100 companies use Slack, and its app directory contains over 2,600 apps. This thriving ecosystem is built on a foundation of secure, permission-based integrations.
For a more detailed walkthrough, check out our complete guide on how to make a Slack app from scratch.
Coding Your Bot with the Bolt SDK
Okay, your Slack app is configured, permissions are set, and now it's time for the fun part: bringing your bot to life with code.
You could talk to the Slack API directly, but trust me, there's a much saner path. We're going to use Slack's Bolt SDK. Bolt is a modern framework for both JavaScript (Node.js) and Python that handles all the tedious, low-level stuff for you.
Think about it: instead of manually dealing with webhooks, verifying request signatures, and parsing event payloads, Bolt gives you a clean, event-driven way to build. It lets you focus on your bot's logic—what it actually does—rather than all the boilerplate plumbing. Honestly, it's the standard for building a robust Slack bot today.
Initializing Your Bolt Application
Getting started with Bolt is pretty painless. First, install the SDK (npm install @slack/bolt). From there, you just need to initialize the app using the tokens you generated earlier in the Slack API dashboard.
You'll need your Bot User OAuth Token and, if you're developing locally with Socket Mode, your App-Level Token.
Here’s what a basic initialization looks like for a Bolt app in Node.js:
const { App } = require('@slack/bolt');

// Initializes your app with your bot token and app token
const app = new App({
  token: process.env.SLACK_BOT_TOKEN,
  appToken: process.env.SLACK_APP_TOKEN,
  socketMode: true,
});

(async () => {
  // Start your app
  await app.start(process.env.PORT || 3000);
  console.log('⚡️ Bolt app is running!');
})();
Pro Tip: Please, please use environment variables (
process.env.VARIABLE_NAME) for your tokens. Hardcoding secrets directly into your source code is a huge security risk. Just don't do it.
With just that little bit of code, you've got an application that securely connects to Slack and is ready to start listening for activity.
Listening for Events and Commands
The real magic of a Slack bot is its ability to listen and react. Bolt makes this incredibly intuitive with its "listener" functions. These functions hook your code up to specific triggers—like a user mentioning your bot, someone firing a slash command, or a message popping up in a channel.
For instance, if you want your bot to respond whenever someone mentions it, you can use the app.event() listener.
// Listens for mentions and replies with a greeting
app.event('app_mention', async ({ event, say }) => {
  try {
    await say(`Hello, <@${event.user}>! How can I help you today?`);
  } catch (error) {
    console.error(error);
  }
});
This snippet listens for the app_mention event, grabs the user ID of whoever triggered it, and uses the handy say() function to send a reply right back to the channel. As you get deeper into coding, remember that solid error handling is non-negotiable for a reliable bot. Mastering techniques for handling JavaScript errors effectively will save you a ton of headaches down the road.
Building a Practical Slash Command
Let's build something a bit more useful: a /pr-status slash command. We'll use this as a simple placeholder to show how you can grab user input and format a nice, structured response.
First, you’ll use the app.command() listener to catch the command when a user types it.
// Listens for the /pr-status slash command
app.command('/pr-status', async ({ command, ack, respond }) => {
  // Acknowledge the command request immediately
  await ack();

  const prNumber = command.text; // User input, e.g., "123"

  // In a real app, you would fetch data from GitHub here
  const prStatus = "Open";
  const prTitle = "feat: Add new login flow";

  // Respond with a formatted message
  await respond({
    response_type: 'in_channel', // 'in_channel' or 'ephemeral'
    text: `Status for PR #${prNumber}: *${prStatus}* \nTitle: ${prTitle}`
  });
});
This code is doing three important things:
- It acknowledges the command with
ack(). This tells Slack "Yep, I got it!" within 3 seconds, which is a requirement. - It parses user input from
command.text. So if a user types/pr-status 123, theprNumbervariable will hold "123". - It sends a formatted reply using
respond(). This is how you create rich messages that are easy for users to read.
This example is really just the starting point. Imagine swapping out that placeholder logic with a real API call to GitHub. You could create a powerful bot that brings crucial, context-aware information right into the channels where your team is already working.
Integrating with GitHub for Real-Time Notifications
This is where your bot graduates from a simple command-line tool into a true productivity engine. By hooking it up to external services like GitHub, you can pipe crucial, real-time information directly to your team, saving everyone from constantly switching contexts. This kind of automated data integration is exactly what makes a bot indispensable.
We'll focus on one of the most powerful automations for any dev team: live pull request (PR) updates. The idea is to build a bot that automatically announces when a PR is opened, updated, or merged. This keeps everyone in the loop without spamming the channel.
Setting Up GitHub Webhooks
The magic behind this integration is a webhook. Think of it as a push notification system for servers. Instead of your bot constantly polling GitHub and asking, "Anything new yet?", GitHub will proactively ping your bot the instant something happens.
To get this going, head over to your repository on GitHub and navigate to Settings > Webhooks. From there, you'll create a new webhook with a few key pieces of information:
*   **Payload URL:** This is the public URL where your bot is listening for incoming data from GitHub. We’ll build this endpoint in our code.
*   **Content type:** Just set this to `application/json`. It's the standard for modern web APIs.
*   **Secret:** This is basically a password that GitHub uses to sign its requests. Your bot will use the same secret to verify that any incoming request is legit and not from some random actor on the internet.
*   **Events:** You get to choose which events trigger the webhook. For our purpose, we'll select "Pull requests" to capture actions like `opened`, `reopened`, `synchronize` (when a new commit is pushed), and `closed`.
With the webhook configured, GitHub will now fire off a detailed JSON payload to your bot's endpoint every time a PR event occurs. Now, we just need to get our bot ready to catch and process this information.
This simple, three-stage process is exactly how a bot handles incoming data.
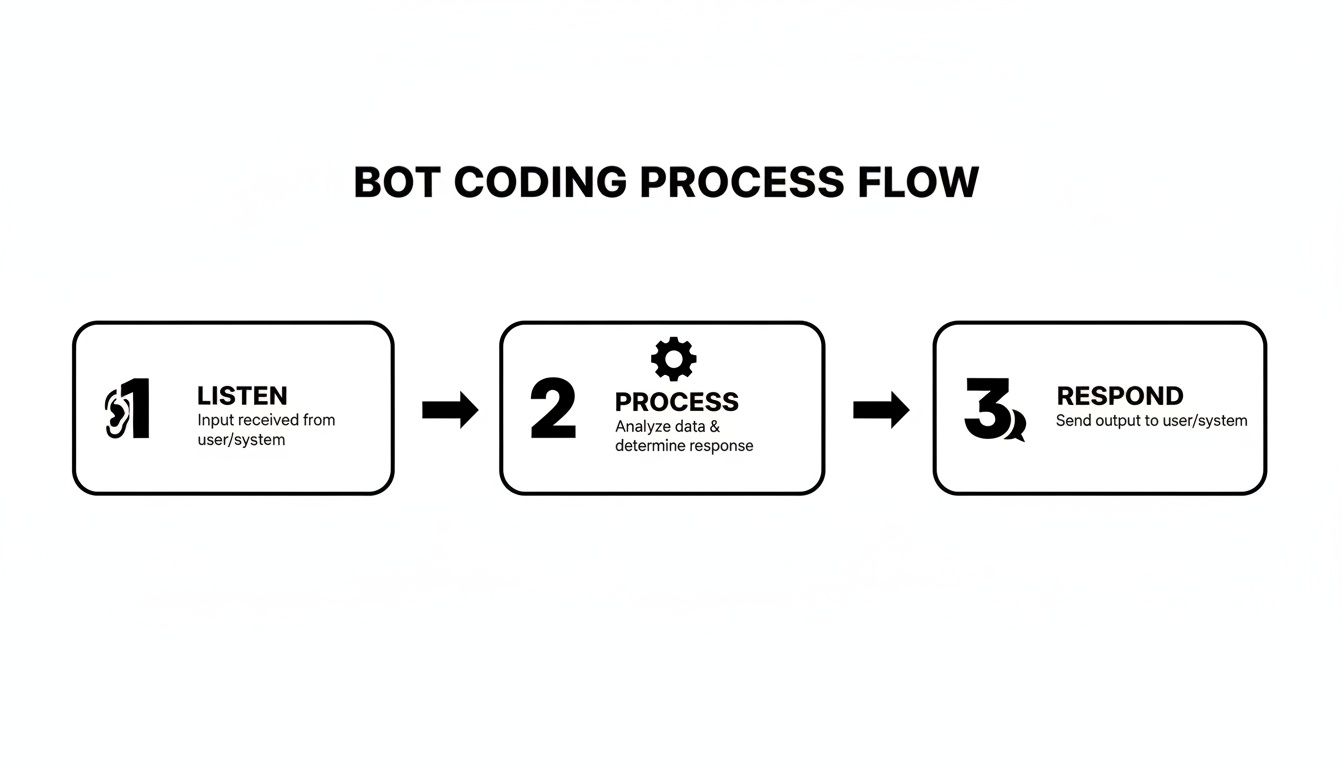
This "Listen, Process, and Respond" model is the fundamental loop for any interactive bot, and it's precisely what we'll implement for our GitHub integration.
Handling Webhook Payloads in Your Bot
Now for the fun part: creating an endpoint in your application that can receive these POST requests from GitHub. If you're using a web framework like Express.js alongside Bolt, this is pretty straightforward.
Your endpoint's job is simple:
- Verify the request signature using the secret you configured earlier.
- Parse the JSON payload to pull out the useful bits of information.
- Format that data into a clean, human-readable Slack message.
- Post the message to the right channel.
The GitHub payload is incredibly rich with data. You can pull out the PR title, the author's GitHub username, a direct link to the PR, the names of requested reviewers, and the specific action that triggered the event (like "opened").
Expert Tip: One of the most powerful features you can add is mapping GitHub usernames to Slack user IDs. By maintaining a simple map (in a JSON file or a database), your bot can automatically
@mentionthe correct reviewers in Slack. This ensures the notification grabs their attention immediately.
Using Slack's Block Kit, you can transform this raw data into rich, interactive messages with clear formatting, buttons, and context. For instance, you could build a message that includes the PR title as a clickable link, lists the reviewers, and shows the status with a colored bar. You can learn more about this in our full guide to Slack-GitHub integration.
The efficiency gains from this kind of targeted automation are huge. For example, Salesforce's upcoming Slackbot promises to make tasks 25% faster and save users up to 90 minutes daily by cutting down on context switching. This mirrors the impact of a well-designed tool like PullNotifier, which can cut PR review delays by up to 90%.
Deploying and Securing Your Slack Bot
Having a bot running on your local machine is great for development, but it's really just a prototype. To turn it into a reliable tool your team can actually use, you need to get it deployed to a live environment. This is where your bot graduates from being a personal project to a real, production-ready application.
Deploying just means moving your code to a cloud platform where it can run 24/7. Popular choices like Heroku, Render, or AWS Lambda are fantastic starting points. They handle all the messy infrastructure stuff, letting you focus on your bot's code instead of wrestling with server management. The goal here is simple: get your bot a stable, public-facing URL that Slack can send events to.
Safeguarding Your Bot's Credentials
The second your bot goes live, security has to be your top priority. Your Slack Bot Token and Signing Secret are the keys to your bot's kingdom. If those credentials fall into the wrong hands, someone could impersonate your bot, steal sensitive data, or just spam your entire workspace. It's a huge risk.
So, here’s the golden rule: Never, ever hardcode these secrets directly into your source code. Instead, you absolutely must use environment variables. Every single cloud hosting provider offers a secure way to store these values. Your code then simply reads them at runtime, which keeps them out of your Git repository and away from prying eyes.
Storing credentials as environment variables is the industry standard for a reason. It separates your configuration from your code, which is a fundamental security best practice when you create a bot for Slack or any other application.
This one simple practice is your first and most critical line of defense. It means that even if your codebase somehow gets compromised, your bot's access tokens will remain secure.
Verifying Requests from Slack
Just because a request hits your bot's public URL doesn't mean it's legitimate. Malicious actors are always out there, and they could try sending fake payloads to trick your bot into performing unauthorized actions. To prevent this, Slack signs every single request it sends with your unique Signing Secret.
Your application has a job to do: verify this signature on every incoming request, no exceptions. Here's a quick look at how that works:
- Slack sends a request containing a special timestamp and a unique signature in the HTTP headers.
- Your bot takes the raw request body, combines it with the timestamp and your Signing Secret, and generates its own signature.
- Then, you compare your generated signature to the one Slack sent. If they match, the request is authentic. If not, you reject it immediately.
Thankfully, you don't have to build this logic from scratch. Modern frameworks like the Bolt SDK handle this verification process for you automatically. All you have to do is provide your Signing Secret, and the library takes care of the rest, shielding your bot from spoofing attacks.
Finally, once you're deployed, it's a good idea to do a quick audit of your bot's permissions. Go back to your Slack app's configuration and make sure it's still following the principle of least privilege. If there are any scopes you added for testing but aren't actively using, remove them. This minimizes its potential attack surface and helps you maintain a secure, robust tool for your team.
When you start building more complex Slack bots, you’re bound to hit a few common roadblocks. Let’s walk through some of the typical challenges you'll face and how to tackle them like a pro.
Dealing with Rate Limits
One of the first hurdles you'll likely run into is rate limiting. Slack’s API has rules about how many requests your bot can fire off in a short period. This is to keep the platform stable for everyone, but it means a chatty bot can get temporarily blocked.
If your bot goes a little too wild with its requests, Slack will hit you back with a 429 Too Many Requests error. The standard way to handle this is to build a retry mechanism with exponential backoff. In plain English, if a request fails, you wait a moment before trying again. If it fails again, you double the wait time, and so on. This gives the API a chance to breathe and usually resolves the issue gracefully.
Building Interactive UIs with Block Kit
The real magic of modern Slack bots isn't just sending text—it's creating rich, interactive experiences. This is all thanks to Block Kit, Slack’s UI framework for crafting messages with cool elements like buttons, date pickers, dropdowns, and even pop-up modals.
When you start using Block Kit, you graduate from simple text responses. For instance, instead of just posting a plain notification about a new pull request, you could include buttons for "Approve," "Comment," or "Request Changes" right there in the message.
Block Kit is your ticket to building a truly interactive bot. It transforms your bot from a passive notifier into a dynamic tool that people can actually engage with, all without ever leaving Slack. Getting comfortable with it is a must for any serious Slack bot developer.
Managing State and Conversation Flow
Another puzzle you'll need to solve is managing state. What happens when your bot needs to remember what was said earlier in a conversation to make sense of a new request? This is super important for any multi-step workflow, like a bot that guides someone through filing an expense report.
- For short-lived conversations, a simple in-memory store might be all you need. Just hold the data in a variable while the conversation is active.
- For more persistent needs, you'll want to reach for a database like Redis or DynamoDB. A good strategy is to key your data with a combination of the user ID and channel ID to keep track of each conversation's context.
Tired of wrestling with noisy GitHub notifications and clunky scripts? PullNotifier delivers clean, consolidated PR updates straight to Slack, slashing code review delays by up to 90%. Learn more and try it for free.