- Published on
Creating Pull Request Mastery a 2026 Developer's Guide
- Authors

- Name
- Gabriel
- @gabriel__xyz
The pull request is the heart of modern software development, but it's no longer just a simple Git command. In an era of AI-assisted coding, a well-crafted PR is your team's most critical communication tool. It’s what separates a fast, collaborative review from a frustrating bottleneck.
Why Mastering the Pull Request Matters
In today's development environment, creating a pull request is more than a technical step; it’s a form of professional communication. A great PR tells a story, giving reviewers the context they need to understand not just what changed, but why it changed. That clarity is absolutely essential for keeping code quality high and your team moving fast.
A poorly executed PR, on the other hand, just creates friction. It forces reviewers to chase you down for answers, hunt for requirements, and piece together the intent behind your code. All that back-and-forth wastes time and delays features, turning a simple review into a major blocker.
The Impact of AI on Modern Workflows
The rise of AI coding assistants has completely changed the game. These tools generate code at an incredible rate, which makes the pull request more important than ever. It’s now the primary human checkpoint for quality, logic, and making sure the code aligns with project goals.
The data backs this up. Creating pull requests is a cornerstone of collaboration on GitHub, home to over 100 million active developers. Recent findings show that AI tools like GitHub Copilot can slash pull request cycle times from 9.6 days down to just 2.4 days—a 75% reduction. On top of that, these tools boost code review speed by 15% and increase the number of PRs per developer by 8.69%. You can dig into more of these trends in this comprehensive report on GitHub Copilot statistics.
A pull request is not just a request to merge code. It's an opportunity to document your changes, explain your reasoning, and get valuable feedback from your peers. Mastering this skill is a direct investment in your team's efficiency and your own career growth.
Key Pull Request Terminology
To navigate the PR process smoothly, you have to speak the language. Getting aligned on the vocabulary used throughout the pull request lifecycle is the first step to mastering your workflow.
This quick reference table will get you up to speed.
| Term | What It Means in Practice | Why It Matters for Your Workflow |
|---|---|---|
| Base Branch | The branch you want to merge your changes into, typically main or develop. | This is the target destination for your code; getting it wrong can cause major integration issues. |
| Head Branch | Your feature branch containing the new code you want to merge. | This is the source of your changes, isolated from the main codebase until approved. |
| Merge Conflict | When your changes and the base branch have competing edits to the same lines of code. | Conflicts block automatic merging and require you to fix them manually, which can slow everything down. |
| CI/CD | Automated checks (like tests and linting) that run against your pull request before it can be merged. | This is your safety net. It ensures your code meets quality standards and doesn't break existing functionality. |
Understanding these terms is fundamental. When everyone on the team knows what a base branch is or what a merge conflict implies, communication becomes a lot simpler and your entire process runs more efficiently.
Alright, let's break down how to create a pull request. Whether you live in the command line or prefer a visual interface, we’ll cover the three most common workflows: the Git CLI, the GitHub web UI, and the GitHub Desktop app.
We'll use a real-world example—adding a new user authentication feature—to walk through each method. This guide is your go-to, whether you're a junior dev shipping your first feature or a senior engineer just looking for a quick refresher on a different tool. The goal is to get your code from your local machine into a PR where your team can review and merge it.
Mastering this core workflow isn't just about process; it directly impacts your team's velocity. As the data shows, solid PR habits—especially when backed by the right tools—are a huge driver for improving key development metrics.
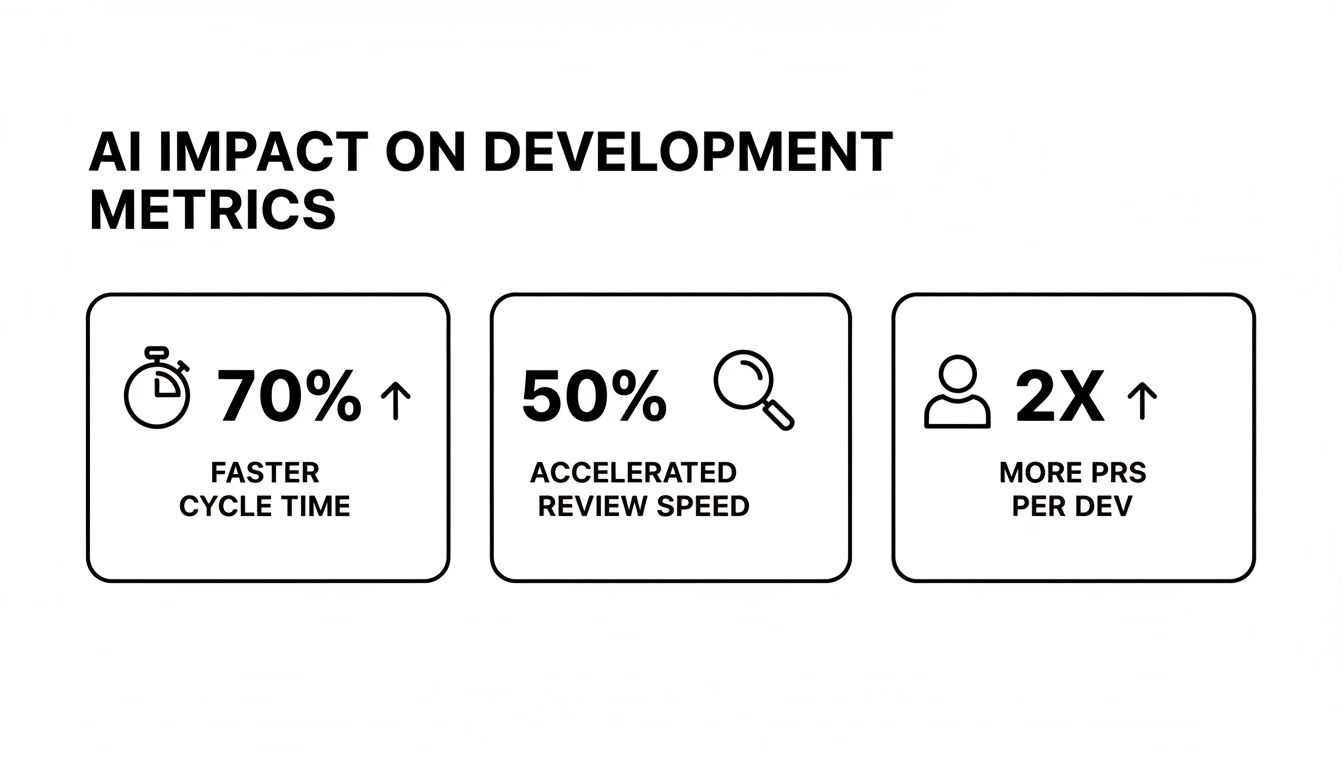
Faster cycle times, quicker reviews, and higher output all start with a well-crafted pull request. Every step you take, from branching to opening the PR, feeds into these results.
Using the Command Line Interface (CLI)
For many developers, the command line is home. It’s fast, powerful, and once you know the commands, it's incredibly efficient. Let’s assume you’ve already committed the changes for your new authentication feature. You're just a couple of commands away from opening a PR.
First, you have to push your new branch from your local machine to the remote repository on GitHub. If your branch is named feat/user-auth, the command looks like this:
git push -u origin feat/user-auth
That -u flag is a small but mighty timesaver. It sets your local branch to track the remote branch, which means you can just use git push and git pull from now on without specifying the origin and branch name again.
Once you run that command, Git itself will give you a hand. The output will include a direct link to create a pull request on GitHub. Just copy that URL, paste it into your browser, and you’ll land right on the "Open a pull request" page, with your branches already selected.
Opening a PR from the GitHub Web UI
If you’re more of a visual person, creating a pull request directly on the GitHub website is a great way to go. It’s perfect for beginners and anyone who likes to see the full context and file changes before hitting "create."
After you push your branch, head over to your repository on GitHub. Most of the time, you’ll see a handy yellow banner pop up for your recently pushed branch with a big green "Compare & pull request" button. Just click it.
If that banner doesn't show up for some reason, no problem. You can do it manually:
- Click the "Pull requests" tab in your repository.
- Hit the "New pull request" button.
- From the "compare" dropdown, select your
feat/user-authbranch.
GitHub will immediately show you a diff of all the changes between your feature branch and the base branch. It’s a great opportunity to give everything one final look before you open the PR for your team.
Working with GitHub Desktop
GitHub Desktop is a popular choice because it wraps Git's power in a friendly graphical interface, hiding the complex commands. Once you've committed your changes locally, the app makes opening a PR dead simple.
With your changes committed, just look for the "Publish branch" button at the top of the app. Clicking this pushes your code to the remote repository. Immediately after, that same button will change to "Create Pull Request." Click it, and GitHub Desktop will open the PR creation page for you in your default web browser.
Writing a Pull Request Description That Gets Approved Faster
A great pull request description is one of your best tools for getting code merged without a fuss. Think of it as the executive summary for your changes—it gives reviewers the vital context they need to turn a confusing code review into a quick, smooth approval.
Without a good description, you’re just asking for a long thread of questions and unnecessary delays. The goal is to make the reviewer's job as easy as possible. A solid description anticipates their questions and gives them everything they need to understand your work's purpose and impact.
The core principles are surprisingly similar to learning how to write effective executive summaries. You're providing a high-level overview that gets straight to the point.

The Anatomy of a Perfect Description
Move past generic templates and adopt a structure that gives your reviewer immediate clarity. A powerful description should clearly articulate the problem, your solution, and how to verify the fix.
Here’s a simple structure that works wonders:
- The Problem: Briefly explain the "why" behind your code. Is it fixing a bug? Adding a feature? Always link to the relevant Jira, Asana, or Linear ticket for the full story. For example: "Users on mobile could not access the new checkout page, causing a 40% drop in mobile conversions."
- The Solution: Describe "what" you did to solve the problem. Explain your approach at a high level, not line-by-line. For example: "I refactored the routing logic to correctly handle mobile viewports and added a responsive container to fix the layout."
- How to Test: Provide clear, step-by-step instructions for the reviewer to manually test your changes. This is non-negotiable for anything that touches the UI.
By framing your work this way, you shift the focus from just code to impact. The reviewer instantly understands the business value and can confirm your solution works as intended without having to reverse-engineer your logic from the code alone.
For complex changes, especially those touching the user interface, a picture (or GIF) is worth a thousand lines of code.
Pro Tips for Next-Level Descriptions
Want to make your PRs even easier to review? For large features, use checklists to break down the changes into smaller, reviewable chunks. This helps reviewers track their progress and ensures all sub-tasks are complete before the final merge.
And for any visual changes, record a short GIF or video showing the "before" and "after." This is incredibly helpful for demonstrating new animations, layout adjustments, or user flows that are hard to describe with words.
If you're looking for inspiration, check out our guide on pull request templates to get started with a solid foundation.
Getting a pull request created is one thing. Getting it merged without a headache is another story entirely. The real work starts after you hit that "Create Pull Request" button—guiding it through review quickly and smoothly.
This is where you can turn a potential bottleneck into a collaborative win. Your goal is to make it incredibly easy for your reviewers to say "yes."
The single most impactful habit you can build is keeping your pull requests small and focused. A PR should tackle just one logical change—a single bug fix, or one small part of a bigger feature.
When a reviewer opens a PR and sees hundreds of file changes, their first instinct is often to put it off for later. That's how delays happen. A small, atomic PR can be reviewed in one sitting, which not only encourages faster feedback but also reduces the risk of sneaking in new bugs.
Writing Self-Contained Commits
Think of your commit messages as the story of your PR. Instead of generic messages like "WIP" or "Fixes," write clean, self-contained commits that explain the "what" and the "why" behind each change.
This creates a valuable log that helps reviewers follow your thought process before they even look at a single line of code.
For instance, a clear series of commits tells a much better story:
feat: Add user ID to session cookierefactor: Simplify token validation logicfix: Prevent session hijacking via token reuse
This kind of structured history makes your PR far easier to understand. It shows professionalism and a respect for your teammates' time.
A pull request isn't a code dump; it's a conversation. By keeping PRs small and writing clear commits, you're preparing your side of the conversation and making it easy for others to jump in.
Choosing the Right Reviewers
Picking your reviewers strategically is key to a fast turnaround. Simply adding the whole team often backfires because of the bystander effect—everyone assumes someone else will get to it.
A better approach is to use the CODEOWNERS file in your repository. This automatically suggests the most relevant people who already have context on the code you've touched. If you need a hand with that, our guide on how to automatically assign reviewers in GitHub can walk you through the setup.
Pull request analytics show some interesting patterns here. While the average time to a first response can be quick, the full cycle time from open to merge often balloons to over 22 hours.
To tighten up that cycle and ensure code quality, consider integrating Continuous Integration (CI) workflows. These can automate checks and tests before a human ever needs to look at your code. Focusing on quality helps boost your "revision success rate" (approvals vs. total reviews), a key metric for high-performing teams. You can find more insights on these pull request analytics on GitHub.
Tame the Notification Chaos and Keep Your PRs Moving
 Once your pull request is out there, a new problem starts: the notification storm. If you’re using the default GitHub alerts, you know how noisy they are. Your inbox and Slack get spammed with a separate ping for every single comment, push, and status check.
This firehose of alerts leads to notification fatigue, and it’s a real productivity killer. Important updates get buried in the noise. A critical question from a senior dev or a failed CI check might sit unnoticed for hours, bringing the entire review cycle to a halt. In a busy dev environment, those little delays stack up and seriously drag down your team's velocity.
Get Your Focus Back with Consolidated Alerts
Now, imagine if every update for a single PR—new comments, code pushes, review approvals—was bundled into one clean, threaded message in Slack. That’s exactly what a dedicated tool like PullNotifier does. Instead of 10 separate pings, you get one organized conversation.
This simple change turns your notification channel from a constant distraction into a command center for your code reviews. Everyone involved can see the full context and current status of a PR at a glance, without trying to piece together a dozen different alerts.
By grouping all related notifications, you ensure every stakeholder has complete visibility. Reviewers can quickly catch up on conversations they've missed, and authors can respond to feedback faster, significantly cutting down the time a pull request sits idle.
This is a game-changer for teams that want to speed up their review process. When you organize the communication, you get rid of the guesswork and friction that slow down even the best-written PRs.
Fine-Tune Your Notification Strategy
A smart notification system does more than just cut down on noise; it gets the right information to the right people at the right time. You can accomplish this by setting up specific routing rules that make sense for your team.
Here are a few common examples:
- Repository-to-Channel Mapping: Automatically send PR notifications from specific repos (like
frontend-app) to their dedicated Slack channels (like#team-frontend). - Automatic Reviewer Mentions: When a PR is created or needs another look, the tool can automatically
@mentionthe assigned reviewers in Slack so they see it right away. - Clear Status Updates: Get instant alerts when CI/CD checks pass or fail, when a PR is approved, or when it’s successfully merged.
This kind of control makes sure every alert is actually relevant to the person who receives it. To see just how fast you can get this running, check out our guide on how to get GitHub PR notifications in under a minute. It's a small step that leads to a much more focused and efficient workflow.
Common Questions About Creating Pull Requests
Even after you've got the basics down, a few common questions always pop up when creating pull requests. These are the tricky scenarios every developer hits sooner or later.
Let's tackle them head-on so you can resolve them fast and keep things moving.
What Should I Do if My Pull Request Has Merge Conflicts?
Merge conflicts happen. It's just a normal part of working on a busy team when your branch and the base branch (like main) have both changed. Don't panic.
First, pull the latest changes from the base branch into your local feature branch with git pull origin main. Git will tell you which files have conflicts and mark them up for you.
Open those files in your editor and look for the conflict markers: <<<<<<<, =======, and >>>>>>>. These markers wrap the competing changes. Your job is to manually edit the file, decide which code to keep, and then delete the markers. Once you're happy with how you've resolved it, just stage the files with git add ., commit the merge with git commit, and push. Your PR on GitHub will update automatically, and that conflict warning will disappear.
How Small Should a Pull Request Be?
A pull request should focus on one single, logical piece of work. A great rule of thumb is that a reviewer should be able to get through it in under 30 minutes.
If a feature feels too big, it probably is. Break it down. Instead of one massive PR for a "new user profile page," you could split it into smaller, atomic PRs:
- The backend API endpoints.
- The database schema changes.
- The frontend UI components.
Small PRs get reviewed way faster, are less risky to merge, and lead to much better feedback. A PR touching hundreds of files is a 'monster PR'—a clear sign of a broken workflow that busy reviewers will almost always ignore.
Who Should I Add as a Reviewer to My Pull Request?
Choosing the right reviewers is key to getting good feedback quickly. It's tempting to add the whole team, but that usually backfires and causes the "bystander effect," where everyone assumes someone else will do it.
Be strategic instead. Add one or two developers who actually have context on the code you're changing. If your repo uses a CODEOWNERS file, GitHub will often suggest the right people for you. For anything complex or critical, it's always smart to loop in a senior engineer or a tech lead.
Can I Push More Commits After Opening a Pull Request?
Yes, absolutely. A pull request isn't set in stone—it's a living discussion. You can, and should, push new commits to your branch after the PR is open.
This is the standard way to address feedback from a review, fix a bug someone found, or add small improvements. Every new push to your branch will automatically show up in the PR's timeline on GitHub, letting your reviewers know you've made updates. This iterative loop is what collaborative development is all about.
Stop drowning in notification noise and start merging faster. PullNotifier consolidates all your GitHub updates into a single, clean Slack thread so you never miss critical feedback again. Get started for free at pullnotifier.com.