- Published on
How to Create a Bot for GitHub PRs in Slack
- Authors

- Name
- Gabriel
- @gabriel__xyz
Building a bot from scratch usually means defining its purpose, picking a platform, and then writing the code to handle events and fire off actions. For engineering teams, this often looks like a custom integration—say, a GitHub-to-Slack notifier—designed to filter out the noise and deliver only the most relevant updates. That’s exactly what this guide is about: building a smart, targeted bot that actually helps.
Why Build a Custom Notification Bot?
Before we jump into the code, let's talk about why a custom bot is such a game-changer for engineering teams. The standard, off-the-shelf integrations often take an all-or-nothing approach. They’ll happily flood your Slack channels with every single commit, comment, and status change, creating a constant, overwhelming stream of notifications.
This firehose of information inevitably leads to notification fatigue. Developers learn to tune out the channel, which means the really important updates—like a pull request needing an urgent review—get buried and missed. The very tool that was supposed to improve communication just becomes another source of ignored noise.
Cutting Through the Clutter
A custom bot completely flips this on its head. Instead of getting every single update, you get to control exactly what information gets sent, who sees it, and when. This targeted approach brings a few immediate wins for your development workflow:
*   **Reduced Noise:** You can filter out all the minor stuff and only get pinged for critical events like new PRs, specific review requests, or merge conflicts.
*   **Improved Focus:** Developers can stay in the zone, trusting that they'll be actively notified when their input is actually needed. No more constant channel-monitoring.
*   **Faster Review Cycles:** By directly pinging the right reviewers with clear, actionable messages, a custom bot ensures pull requests don't just sit there gathering dust. This can dramatically speed up your code review process.
A huge motivation for building a custom bot is to automate repetitive tasks that eat up valuable time. For any team struggling with slow PR cycles, a smarter bot can be a massive productivity booster. If you're looking for a faster solution, you can also check out our guide on how to get GitHub PR notifications in under a minute.
A Growing Industry Trend
The push for smarter automation isn't just something we're seeing anecdotally; it's a massive global trend. The chatbot market itself tells the story, growing from USD 7.76 billion and projected to hit nearly USD 11.5 billion by 2026. This growth is all about the demand for more efficient, customized communication tools in every industry. You can dig into more AI chatbot stats on thunderbit.com to see the bigger picture.
By building your own bot, you’re not just solving an immediate problem for your team—you're picking up a valuable skill that lines up with a major technological shift toward automated, intelligent systems.
Designing Your Bot's Architecture
Before you write a single line of code, you need a solid blueprint. A clear architecture isn't just a nice-to-have; it's what makes the difference between a bot that works and a bot that breaks under pressure. Sketching out how events will flow from GitHub to Slack helps you spot potential bottlenecks early.
Our pull-request notifier is built on a simple principle: separation of concerns. We'll break it down into three core modules: the webhook listener, the routing logic, and the Slack messenger. This keeps the codebase clean and makes it way easier to maintain and scale as your team grows.
The whole point is to cut through the noise so your team can focus and ship faster.
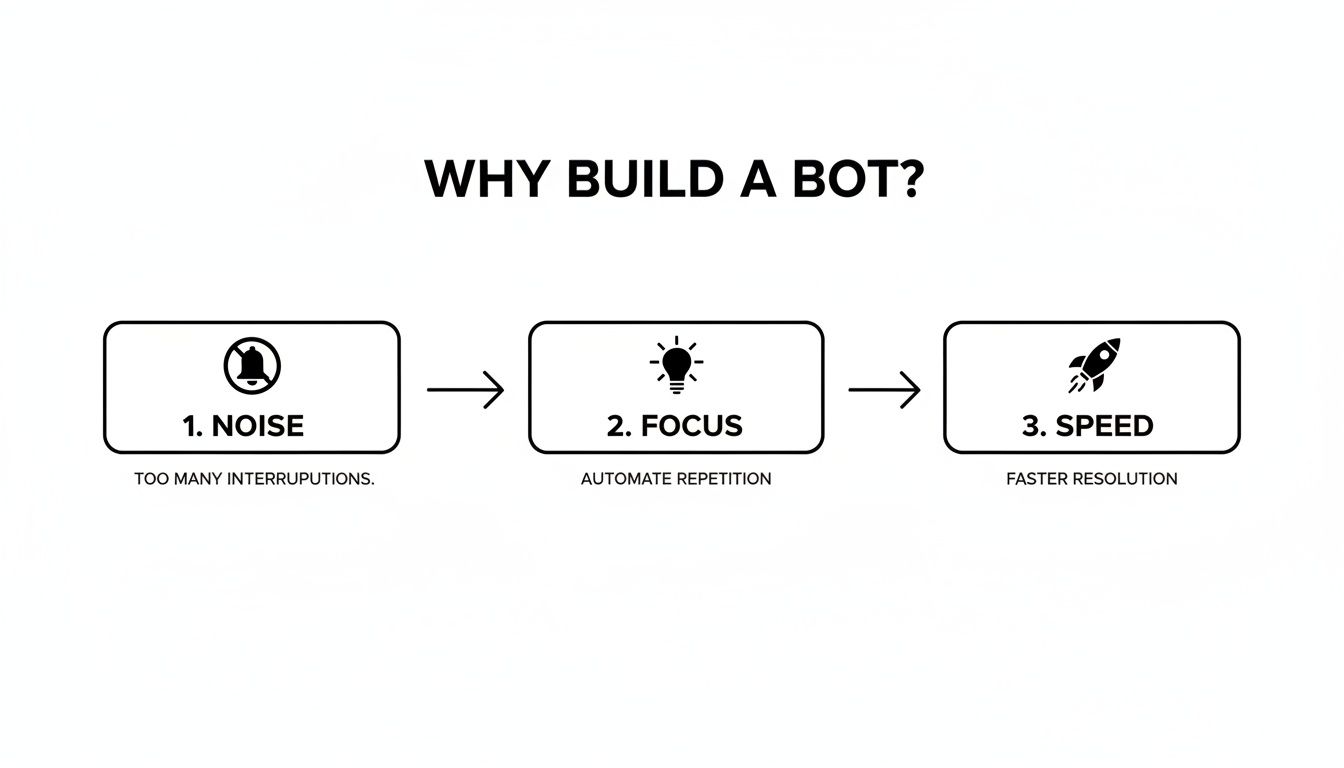
When you eliminate distractions, you get clearer signals. That clarity can lead to feedback loops that are up to 70% faster.
Core Bot Components and Their Functions
To make this tangible, let's break down the key pieces of our architecture. Each component has a specific job, and choosing the right tools for each one is crucial for building a bot that can scale without falling over.
| Component | Primary Function | Example Technology Stack |
|---|---|---|
| API Server | Receive and validate GitHub webhooks | Node.js, Express, webhook-secret |
| Routing Logic | Determine channel and message rules | JavaScript, custom rules engine |
| Slack Client | Format and post threaded notifications | @slack/web-api, Block Kit |
This setup gives you a reliable foundation. The API server handles the incoming traffic, the routing logic figures out where things need to go, and the Slack client makes sure the messages look good and land in the right thread.
Planning for Future Growth
Choosing a tech stack like Node.js with Express is a popular and solid choice for handling the bursty nature of webhook traffic. But it's not the only option. Something like Python with FastAPI would also give you great performance and is easy to scale.
The most important factor? Your team's expertise. Pick a language and ecosystem your team already knows well to avoid creating new bottlenecks in your development process.
As you plan, keep these design choices in mind:
- Language Ecosystem: Match it to your team’s existing skills.
- Load Handling: Think about using message queues or in-memory stores to buffer sudden traffic spikes.
- Scalability: Plan for horizontal scaling to handle hundreds of concurrent events down the line.
Building A Simple Router
A good routing system is the brains of the operation. It's what decides which Slack channel gets a notification based on things like repository name, team tags, or even file paths.
You can start simple by implementing a rule table that maps repo names to channel IDs.
- Load your routing rules from a JSON or YAML file when the bot starts.
- Match incoming webhook events against patterns using simple string checks or regex.
- Before sending, enrich the message with
@mentionsor custom emojis based on the rules.
Keeping your routing rules consistent and declarative can cut down troubleshooting time by as much as 50%. Everyone knows exactly why a message landed where it did.
A flexible router also makes it easy to add new features later, like user-specific pings or routing notifications to different channels based on the environment (e.g., staging vs. production).
For a different take on this, check out our guide on using GitHub Actions to send Slack notifications, which can extend your CI/CD pipeline.
Testing and Validation
You can't just build it and hope for the best. Solid testing is non-negotiable.
Unit tests are perfect for mocking GitHub events and validating your business logic without making any external calls. For the bigger picture, integration tests can spin up your API server and hit it with real HTTP requests carrying actual webhook payloads.
Here are a few tips to make your testing life easier:
- Use a tool like ngrok for secure local testing against real Slack endpoints.
- Create a library of seed JSON fixtures for common events, like opening a pull request or adding a comment.
- Automate replaying these events in your CI pipeline with mock secrets to validate your signature logic.
Monitoring and Alerts
Once your bot is live, you need to know if it's healthy. Monitoring and alerting are your safety nets.
Start with a simple /health endpoint that returns a 200 OK status. This gives you a quick way to check if the service is even alive. Logging key events and, more importantly, errors will help you spot issues before they become major problems.
- Set up a
/healthendpoint that returns 200 OK and basic usage stats. - Send error alerts to a dedicated Slack channel or email using a simple webhook integration.
- If you expect high volume, track API response times and queue lengths with tools like Prometheus and Grafana.
Future Enhancements
Once you have the basics down, the sky's the limit.
Think about adding interactive buttons to your Slack messages that can trigger actions like merging a PR or deploying a branch directly from the chat. As traffic grows, you might need to integrate a caching layer or a pub/sub system to handle spikes of over 500 events per minute without any lag.
Whatever you build next, remember to document your architectural changes and keep your configuration files under version control.
Enjoy those faster reviews.
Securing Webhooks and Authentication
Before your bot can fire off its first notification, you need to forge a secure, reliable link between GitHub and Slack. This isn't just a checkbox to tick; it's the bedrock of a bot your team can trust. An unsecured endpoint is basically an open door for spammers to flood your channels or, even worse, for malicious actors to start probing your network.
So, let's start by locking down the communication channels. We need to make sure every piece of data is authenticated and verified. This means setting up credentials on both platforms and, most importantly, implementing a signature validation process that proves every incoming request is genuinely from GitHub. Getting this right from day one will save you a world of pain later on.
Setting Up Your Slack App
Your bot's identity in your Slack workspace is its Slack App. This is where you'll configure its name, icon, and the permissions it needs to do its job. The principle of least privilege is your best friend here—only grant the permissions your bot absolutely needs to function.
For our pull request notifier, the main task is posting messages. So, the only permission you really need is the chat:write scope, which you can find under OAuth & Permissions. This lets the bot post messages to public channels it's been invited to. You won't need permissions to read messages or access user info, which keeps your bot's potential attack surface nice and small.
Once you've set the scope, Slack will hand you a Bot User OAuth Token. It'll start with xoxb-. Treat this token like a password. It should never be committed to your Git repository or exposed in any client-side code. The right way to handle it is to store it as an environment variable in your application.
Configuring the GitHub Webhook
With the Slack side ready, it's time to tell GitHub where to send updates about pull requests. You'll do this by creating a webhook in your repository's settings.
Here’s what you need to fill out:
*   **Payload URL:** This is the public URL of your bot's server endpoint that will listen for incoming events.
*   **Content type:** Set this to `application/json`. It's the standard format and the easiest to work with in Node.js.
*   **Secret:** This is your most critical security component. Generate a long, random string and paste it here. GitHub will use this secret to sign every payload it sends, which allows your bot to verify that the request is authentic.
*   **Events:** Don't just subscribe to everything. Choose "Let me select individual events" and then check the box for **Pull requests**. This makes sure you only get the data you actually care about.
After you save, GitHub will send a "ping" event to your Payload URL to make sure it can reach your server. It’s a great initial test to confirm your endpoint is live and accessible.
A classic mistake is thinking an obscure URL is enough for security. That's "security through obscurity," and it’s a flimsy defense at best. You absolutely must use a webhook secret to cryptographically verify the integrity and origin of every single payload.
Validating Incoming Payloads
Now for the most important part of securing your bot: validating the signature on every incoming request from GitHub. When GitHub sends a webhook, it includes a special header called X-Hub-Signature-2 crescente-digitais0. This header contains a hash of the request body, which was created using your secret key.
Your server's job is to do the exact same calculation on the raw request body it receives. If your calculated hash matches the one in the header, you can be 100% certain the request is authentic and hasn't been tampered with. If the hashes don't match, you must reject the request immediately.
Here’s a quick middleware example for Node.js and Express that handles this validation check:
const crypto = require('crypto');
const express = require('express');

const app = express();
const GITHUB_WEBHOOK_SECRET = process.env.GITHUB_WEBHOOK_SECRET;

// Middleware to parse raw body for signature verification
app.use(express.json({
  verify: (req, res, buf) => {
    req.rawBody = buf;
  }
}));

const verifyGitHubSignature = (req, res, next) => {
  const signature = req.get('X-Hub-Signature-256');
  if (!signature) {
    return res.status(401).send('Missing signature');
  }

  const hmac = crypto.createHmac('sha256', GITHUB_WEBHOOK_SECRET);
  const digest = `sha256=${hmac.update(req.rawBody).digest('hex')}`;

  if (!crypto.timingSafeEqual(Buffer.from(signature), Buffer.from(digest))) {
    return res.status(401).send('Invalid signature');
  }

  return next();
};

// Protect your webhook endpoint with the middleware
app.post('/webhook', verifyGitHubSignature, (req, res) => {
  // Signature is valid, process the event
  console.log('Received valid GitHub event:', req.body.action);
  res.status(200).send('Event received');
});
Pay close attention to the use of crypto.timingSafeEqual. This isn't just any comparison function; it's specifically designed to prevent timing attacks, where an attacker could analyze your server's response times to guess the secret one character at a time.
This level of security isn't negotiable, especially as bot technology becomes more integrated into our workflows. Enterprise adoption is huge, with 80 percent of companies either using or planning to use AI-powered chatbots. In retail alone, spending on this tech is projected to jump six-fold to USD 72 billion by 2028, which shows just how much businesses rely on bots for critical operations. You can discover more chatbot statistics on masterofcode.com that really drive this point home. By building a secure foundation, you're creating a tool worthy of that trust.
Crafting Smart and Actionable Slack Messages
Alright, we've got a secure pipeline connecting GitHub and Slack. Now for the fun part: making your bot genuinely useful. A raw JSON payload from a webhook is just noise. The real magic happens when you transform that data into a message that offers clarity, context, and a clear call to action.
The goal is to create notifications that developers actually want to see. A great message doesn't just say, "a pull request was opened." It tells the team who opened it, what it's for, who needs to review it, and gives them a one-click path straight to the code. This is how you build a bot that speeds up your workflow instead of just adding to the chaos.
Parsing the GitHub Payload
Every pull request event from GitHub is packed with information. Your first job is to cherry-pick the essential details from this JSON object. Think of it as mining for the key pieces of data that will form the backbone of your Slack notification.
Here’s a breakdown of the critical fields you'll want to grab from the pull request payload:
*   **`action`**: This tells you what happened (e.g., `opened`, `closed`, `review_requested`). It's the main trigger for your bot's logic.
*   **`pull_request.html_url`**: The direct link to the PR on GitHub—an absolute must-have.
*   **`pull_request.title`**: The title of the PR, giving everyone immediate context.
*   **`pull_request.user.login`**: The GitHub username of the author.
*   **`pull_request.requested_reviewers`**: An array of user objects for anyone assigned to review.
Extracting this data cleanly is the first step. If you're using Node.js, for example, you can access these values directly from the request body, like req.body.pull_request.title.
Building Rich Messages with Slack Block Kit
Plain text messages get the job done, but they're not engaging. If you want to create a bot that feels polished and professional, you need to use Slack's Block Kit. This is a UI framework that lets you build messages with rich layouts, text formatting, images, and interactive elements like buttons.
Instead of sending a simple string, you'll construct a JSON object that defines your message's layout and content. This gives you total control over the presentation, making your notifications far more scannable and useful.
Block Kit is what separates a simple script from a polished tool. A well-designed message can convey complex information in a fraction of the time it would take to read a dense paragraph, seriously cutting down the cognitive load on your team.
For our PR notifier, a solid message structure might include a header with the PR title, a section with key details, and an action block with a button to view the PR. To dive deeper into connecting these platforms, check out our complete guide to Slack GitHub integration.
Here’s a simple Block Kit example for a new pull request:
[
  {
    "type": "header",
    "text": {
      "type": "plain_text",
      "text": "🚀 New Pull Request Opened"
    }
  },
  {
    "type": "section",
    "text": {
      "type": "mrkdwn",
      "text": "*<https://github.com/org/repo/pull/123|#123 Add New Login Feature>*"
    }
  },
  {
    "type": "context",
    "elements": [
      {
        "type": "mrkdwn",
        "text": "Opened by *octocat*"
      }
    ]
  },
  {
    "type": "actions",
    "elements": [
      {
        "type": "button",
        "text": {
          "type": "plain_text",
          "text": "View Pull Request"
        },
        "url": "https://github.com/org/repo/pull/123",
        "style": "primary"
      }
    ]
  }
]
This JSON generates a clean, organized message with a bold, clickable title and a big "View Pull Request" button. It's instantly clear what the notification is for and what to do next.
Keeping Channels Clean with Threaded Messages
One of the biggest sins a bot can commit is spamming a channel. A single pull request can generate dozens of events: comments, review approvals, new commits, and eventually a merge. If each of these posted a new message, you'd quickly recreate the notification fatigue we're trying to escape.
The solution is message threading.
The strategy is simple but powerful: post one initial message when a PR is opened. Capture the timestamp of that parent message. Then, for every subsequent update related to that same PR, post it as a reply in a thread under the original.
This approach has a huge impact on your channel's usability:
- Reduces Clutter: All conversation and updates for a single PR are tucked away neatly, keeping the main channel clean and focused on new items.
- Maintains Context: Anyone can jump into the thread to see the full history of a PR—from creation to merge—without piecing together scattered messages.
- Preserves Focus: The team only gets notified of the initial event. All the follow-up chatter is available for those who need it, without interrupting everyone else.
To make this happen, you’ll need to store the ts (timestamp) value that the Slack API returns when you post the first message. When you post a reply, just include that ts value in the thread_ts field of your API call. Slack will handle the rest, attaching the new message to the correct thread.
Deploying and Monitoring Your Bot for Reliability

Writing the code is only half the battle. A bot that isn’t running is just a project on your hard drive; its real value comes from being consistently online and dependable for your team 24/7.
This final stage is all about getting your bot into a production environment. That means picking a hosting strategy, setting up a deployment pipeline, and—most importantly—implementing a monitoring system to make sure it stays healthy.
Without monitoring, you're flying blind. The first sign of trouble will likely be a silent Slack channel and confused engineers wondering where their notifications went.
Choosing Your Deployment Platform
Where your bot lives has a huge impact on how you manage it. You've got a few great options, each with its own trade-offs between simplicity and control.
*   **Platform as a Service (PaaS) like [Heroku](https://www.heroku.com/) or [Render](https://render.com/)**: These are often the fastest way to get started. You just connect your GitHub repository, and the platform handles all the heavy lifting—building, deploying, and running your application. They manage the servers and scaling, which is a massive time-saver.
*   **Containers with [Docker](https://www.docker.com/) on a Cloud Provider ([AWS](https://aws.amazon.com/), [GCP](https://cloud.google.com/), [Azure](https://azure.microsoft.com/))**: This approach gives you maximum flexibility. You package your bot and all its dependencies into a **Docker** image, which can then run absolutely anywhere. It takes a bit more setup, but you get fine-grained control over the environment and a solid foundation for scaling later.
For a simple bot, a PaaS is a fantastic choice. But as your bot handles more complex logic or higher traffic, learning how to containerize it with Docker becomes an invaluable skill.
Containerizing with a Dockerfile
A Dockerfile is essentially a recipe for building your bot's container image. It tells Docker what base environment to use, where to copy your code, how to install dependencies, and what command to run. This guarantees your bot runs the exact same way on your laptop as it does in the cloud.
Here's a pretty standard Dockerfile for a Node.js app:
Use an official Node.js runtime as a parent image
FROM node:18-alpine
Set the working directory in the container
WORKDIR /usr/src/app
Copy package.json and package-lock.json
COPY package*.json ./
Install app dependencies
RUN npm install
Bundle app source
COPY . .
Expose the port the app runs on
EXPOSE 3000
Define the command to run your app
CMD [ "node", "server.js" ]
This simple file creates a lightweight, portable image of your bot. You can build and run it locally to test, then push it to a container registry so it can be deployed on a service like AWS Elastic Container Service (ECS) or Google Cloud Run.
Implementing Essential Monitoring
Once your bot is live, you need to keep an eye on it. Good monitoring doesn't have to be complicated; a few key practices can catch over 90% of common production issues before your team even notices.
Start by setting up a dedicated health check endpoint. This is a simple route, like /health, that your application exposes. When requested, it should just return a 200 OK status code if the service is running correctly. Uptime monitoring services can then ping this endpoint every minute. If it ever fails to respond, they can automatically shoot an alert to your email or a dedicated Slack channel.
A bot is a service, and every service needs a pulse. A health check endpoint is the simplest, most effective way to confirm your bot is alive and responsive without waiting for a user to report a problem.
Beyond a simple ping, robust logging is your best friend for debugging. Make sure your bot logs every incoming webhook it receives, any errors it hits, and every message it sends to Slack. Using structured logging (like JSON format) makes these logs searchable and lets you build dashboards to visualize activity, track API rate limits, and spot unusual patterns.
That data is indispensable when you need to figure out why a specific PR notification never made it to the channel.
Diving into bot development, especially with platforms as powerful as GitHub and Slack, always brings up a few practical questions. You can have the perfect plan, but you'll still hit specific roadblocks with permissions, scaling, and handling those moments when things just don't work as expected.
Getting ahead of these common hurdles can save you a ton of debugging headaches later.
One of the first challenges is usually permissions. A bot with too much access is a security nightmare, but one with too little will just constantly fail. It's a tricky balance to get right.
How Do I Choose the Right Slack Permissions?
When you're setting up your Slack app, it’s so tempting to just grant a bunch of permissions to avoid API errors down the line. That's a classic mistake. You should always start with the absolute bare minimum your bot needs to do its job. For our pull request notifier, that’s just one scope: chat:write.
This single permission lets your bot post messages, but only in channels it has been explicitly invited to. It can't read channel history, snoop on user info, or change a thing. This approach, known as the "principle of least privilege," is a security best practice for any app you build.
If you later decide to add features that need more access, like mentioning users (which requires users:read), you can add those scopes one by one.
Key takeaway: Always start with the most restrictive permissions possible. Only add more when a new feature genuinely requires it. This keeps your bot's potential attack surface small and your workspace data safe.
What if My Bot Misses a Webhook Event?
Networks glitch. Servers go down. A deployment might take your bot offline for a few minutes. It happens. The good news is that GitHub is built for this reality and has a retry mechanism baked in. If your endpoint doesn't respond with a 200 OK status quickly enough, GitHub will try resending the webhook payload a few times with exponential backoff.
But you shouldn't rely on that alone. For notifications this important, you'll want a more robust system.
*   **Message Queues:** This is the pro move. Use a service like [RabbitMQ](https://www.rabbitmq.com/) or [AWS SQS](https://aws.amazon.com/sqs/). Your webhook endpoint’s only job is to catch the event and toss it onto a queue. A separate worker process then pulls events from the queue and handles them. This way, even if your processor crashes, the event is safe and won't be lost.
*   **Periodic Polling:** Think of this as a safety net. You could have your bot poll the GitHub API every **15** minutes or so, looking for recent pull requests that it hasn't processed yet. It’s less efficient than webhooks but provides a solid fallback against any missed events.
Can This Bot Work with Monorepos or Multiple Teams?
Absolutely, and this is where a smart routing system really shines. A simple bot might just hardcode a single Slack channel, but a truly useful, scalable solution needs to handle more complex workflows. The best way to do this is with a configuration file (think JSON or YAML) that maps different repositories or conditions to specific Slack channels.
For instance, you could route notifications based on all sorts of criteria:
*   **Repository Name:** All PRs from the `frontend-app` repo go to the `#frontend-dev` channel.
*   **Team Mentions:** If a PR description tags `@my-org/backend-team`, you can send a notification to the `#backend-devs` channel.
*   **File Paths:** A PR modifying files under `/services/payment-api/` could automatically ping the `#payments-engineering` channel.
Building your bot this way turns it into a central, adaptable tool for your entire engineering org, not just a one-off script for a single project.
Tired of building and maintaining custom scripts? PullNotifier offers a production-ready solution that sets up in minutes, providing reliable, threaded, and highly customizable GitHub notifications directly in Slack. Learn more at https://pullnotifier.com and cut your code review delays.