- Published on
how to create bot in slack: A Practical Guide to Building Your Bot
- Authors

- Name
- Gabriel
- @gabriel__xyz
So, you want to build a Slack bot. At its core, it's about registering a new app on the Slack API dashboard, setting up its permissions with OAuth scopes, and then bringing it to life with a framework like Slack Bolt. This is how your code connects to Slack’s platform, transforming it into a bot that can automate tasks right inside your workspace.
Why Building a Custom Slack Bot Is a Game Changer

Before we jump into the code, let's talk about why learning how to create a bot in Slack is so much more than a cool technical project. For countless teams, Slack is the central hub for daily operations. A custom bot turns this communication tool into an active player in your workflows, not just a place where messages sit.
Instead of just spitting out basic notifications, a thoughtfully designed bot can be a massive productivity booster. It can pull in alerts from all your different tools, saving everyone from the constant context-switching between apps. Imagine getting updates from Jira, your CI/CD pipeline, and customer support tickets all in one spot. That's the real value a bot delivers.
Unlocking True Automation
The real magic happens when your bot introduces interactive, automated workflows directly into your channels. We're talking about going way beyond simple alerts. Think about bots that can:
*   **Handle routine requests:** A bot can field common questions from the team, freeing up people to tackle more complex problems.
*   **Manage workflows:** It could kick off a build, triage a support ticket, or gather feedback using an interactive form (what Slack calls a "modal").
*   **Summarize information:** Some bots can even summarize long conversations or pull daily metric reports on demand.
By creating a bot tailored to your team's specific needs, you're not just building a tool; you're designing a more efficient way to work. It’s about reducing friction and giving your team back their most valuable resource: time.
This has become even more powerful with the rise of AI. Back in 2025, Slack even rebuilt its own Slackbot into a personalized AI companion that could summarize conversations and answer questions. It's a clear sign that organizations are leaning on bots to eliminate repetitive work and streamline everything.
To really see what’s possible, it helps to understand the wider world of virtual agents and AI-powered assistants. For some concrete ideas, you can also check out some of the best GitHub Slack integrations to see what others are building.
Setting Up Your First Slack Bot Environment

Before you write a single line of code, your bot needs an identity. The first step is to formally register your app with Slack, which gives it a place to live and a set of credentials to operate with. This is a non-negotiable first step, but thankfully, it’s a straightforward one.
Head over to the Slack API dashboard and create a new app "from scratch." You’ll give your bot a name and pick the Slack workspace where it will be installed. That’s it. This simple action creates a container for all your bot's settings, permissions, and tokens.
Navigating Permissions and Scopes
With your app created, the next and most critical part is defining what it's allowed to do. Slack handles this through OAuth scopes—think of them as individual keys that unlock specific abilities within the API.
The golden rule here is the principle of least privilege. It's tempting to grant your bot a wide range of permissions "just in case," but that’s a security risk waiting to happen. Only give your bot the permissions it absolutely needs to function.
For instance, if your bot's only job is to post messages, the chat:write scope is all you need. If it needs to listen for mentions, then you'll add app_mentions:read. Getting into the habit of starting small and adding scopes only when necessary is a mark of an experienced developer.
This is all managed from the "OAuth & Permissions" page in your app's dashboard. You'll be spending a fair bit of time here.
To help you get started, here's a quick rundown of some essential scopes you'll likely need.
Essential OAuth Scopes for a Starter Bot
| Scope Name | Permission Granted | Common Use Case |
|---|---|---|
chat:write | Post messages as the bot user | Sending notifications, alerts, or scheduled messages. |
commands | Add and respond to slash commands | Creating custom commands like /check-status or /new-ticket. |
app_mentions:read | Read messages that @mention the bot | Allowing users to interact directly with the bot in channels. |
channels:read | View basic info about public channels | Getting a list of public channels to post in or configure. |
im:read | Read direct messages to the bot | Handling private conversations between a user and the bot. |
users:read | View basic user information | Mentioning users by name or looking up user details. |
These scopes cover the basics for most bots that need to send messages and respond to simple commands. Always start with what you need and expand from there.
One common point of confusion is the difference between bot tokens and user tokens. A bot token, which starts with
xoxb-, lets your app act on its own behalf. A user token (xoxp-) lets your app act on behalf of the specific user who installed it. For almost all automated bot tasks, thexoxb-token is the one you want.
Preparing Your Local Development Tools
With the Slack-side configuration handled, it’s time to get your local coding environment ready. For this guide, we'll be using Node.js and the official Slack Bolt framework.
Bolt for JavaScript is an absolute lifesaver. It’s a library built by Slack that handles all the gnarly, boilerplate parts of the API for you—like verifying request signatures, routing events, and managing tokens. This lets you focus on your bot's logic instead of reinventing the wheel.
You can get it into your project with a single command: npm install @slack/bolt
Think of Bolt as the bridge between your code and the Slack API. Setting it up correctly from the start makes building powerful, interactive bots much more manageable. If you're looking for inspiration on how a polished integration works, checking out how to use the official GitHub Slack app can offer some great real-world examples.
Alright, let's get your bot listening and reacting. A bot that just sits there is pretty useless, so this is where we plug it into Slack's real-time systems and teach it how to respond when users start poking at it.
We'll be using the Slack Bolt framework to make our lives easier. Bolt handles a lot of the messy, behind-the-scenes work of dealing with incoming requests. This means you can skip the boilerplate and jump straight to writing the logic that makes your bot unique.
Listening for Events
The main way your bot knows what's happening around it is through the Slack Events API. Think of it as a notification system. Whenever something interesting happens in your workspace, Slack sends your bot a little heads-up in the form of a JSON payload. Your job is to tell Slack which events you actually care about.
A classic one to start with is app_mention. This event fires off any time someone types @your-bot-name in a channel. It’s the digital equivalent of someone tapping your bot on the shoulder—a clear signal that it needs to pay attention.
With Bolt, setting up a listener for this is surprisingly simple:
// Listen for mentions
app.event('app_mention', async ({ event, client, logger }) => {
  try {
    // Respond in a thread to keep the channel clean
    const result = await client.chat.postMessage({
channel: event.channel, thread_ts: event.ts, text: Hello <@${event.user}>! How can I help you today?
    });
  }
  catch (error) {
logger.error(error);
  }
});
This little chunk of code does a few smart things. It sees the mention, figures out who sent it, and replies directly in a thread. Replying in a thread is a small touch, but it makes a huge difference in keeping the main channel from getting cluttered. Your users will thank you.
Activating Workflows with Slash Commands
Mentions are perfect for conversational stuff, but for direct, on-demand actions, slash commands are the way to go. A command like /check-status or /new-ticket gives users a clear, predictable way to kick off a specific workflow.
You'll first need to register the slash command in your app's dashboard on the Slack API site. Once that's done, handling it in Bolt is just as straightforward as listening for an event. You just create a handler that springs into action when a user types your command.
Let’s imagine we have a /github-pr command. The handler might look something like this:
// Listen for the /github-pr slash command
app.command('/github-pr', async ({ ack, body, client, logger }) => {
  // Acknowledge the command request immediately
  await ack();

  try {
    // Open a modal (a popup form) to gather the PR link
    const result = await client.views.open({
      trigger_id: body.trigger_id,
      view: {
        type: 'modal',
        title: {
          type: 'plain_text',
          text: 'Submit a Pull Request'
        },
        // ... more modal configuration
      }
    });
  }
  catch (error) {
    logger.error(error);
  }
});
That
ack()function is non-negotiable. Slack gives you a tight 3-second window to acknowledge a command. If you don't, the user gets an ugly timeout error. Any heavy lifting or slow processing needs to happen after you've sent that acknowledgment.
Building Rich Interactions with Components
If you want to move beyond basic text replies, you need interactive components. We’re talking about buttons, select menus, date pickers, and modals that turn your bot’s messages into mini-applications. When a user clicks a button, it can trigger a whole new series of actions, guiding them through a workflow without them ever having to leave Slack.
This is a massive opportunity. Slack has an enormous, engaged user base, and a well-designed bot can seriously boost a team's productivity. As of 2024, Slack reported around 42 million daily active users, with projections hitting 48 million by late 2025. Plus, it’s used by nearly 80% of Fortune 100 companies. You can read more about Slack's impressive growth on Analyzify.
When a user clicks a button in one of your messages, your bot gets an action event. You can listen for these actions, check the action_id to see which specific button was clicked, and then kick off the next step—maybe you update the original message, post a confirmation, or open up another modal. This is how you build truly dynamic and helpful bot experiences.
Alright, theory's great, but let's build something that’s actually useful. We'll tie all these concepts together by creating a GitHub Pull Request (PR) notifier. This is a perfect real-world example of a Slack bot that solves a common pain point for developer teams. It’ll make abstract ideas like slash commands and interactive components feel much more concrete.
The goal is to build a /github-pr slash command. When a developer uses it to submit a PR link, our bot will spring into action. It'll fetch key details from the GitHub API and then post a slick, formatted message in the channel, complete with buttons for quick actions.
Defining the Core Interaction Flow
First, let's walk through the user's journey. It all starts when someone in a channel types /github-pr [link-to-pull-request]. Our bot needs to acknowledge this command immediately to prevent a timeout error from Slack, which is a common rookie mistake.
Behind the scenes, the bot parses the URL to pull out the repository and PR number. Then, it makes an authenticated call to the GitHub API. This part is critical, and you absolutely must handle your API credentials securely. Never hardcode tokens in your source code. Always use environment variables to store sensitive keys like your GitHub personal access token.
This diagram shows the basic pattern our bot will follow—from receiving an event to processing the logic and taking action.
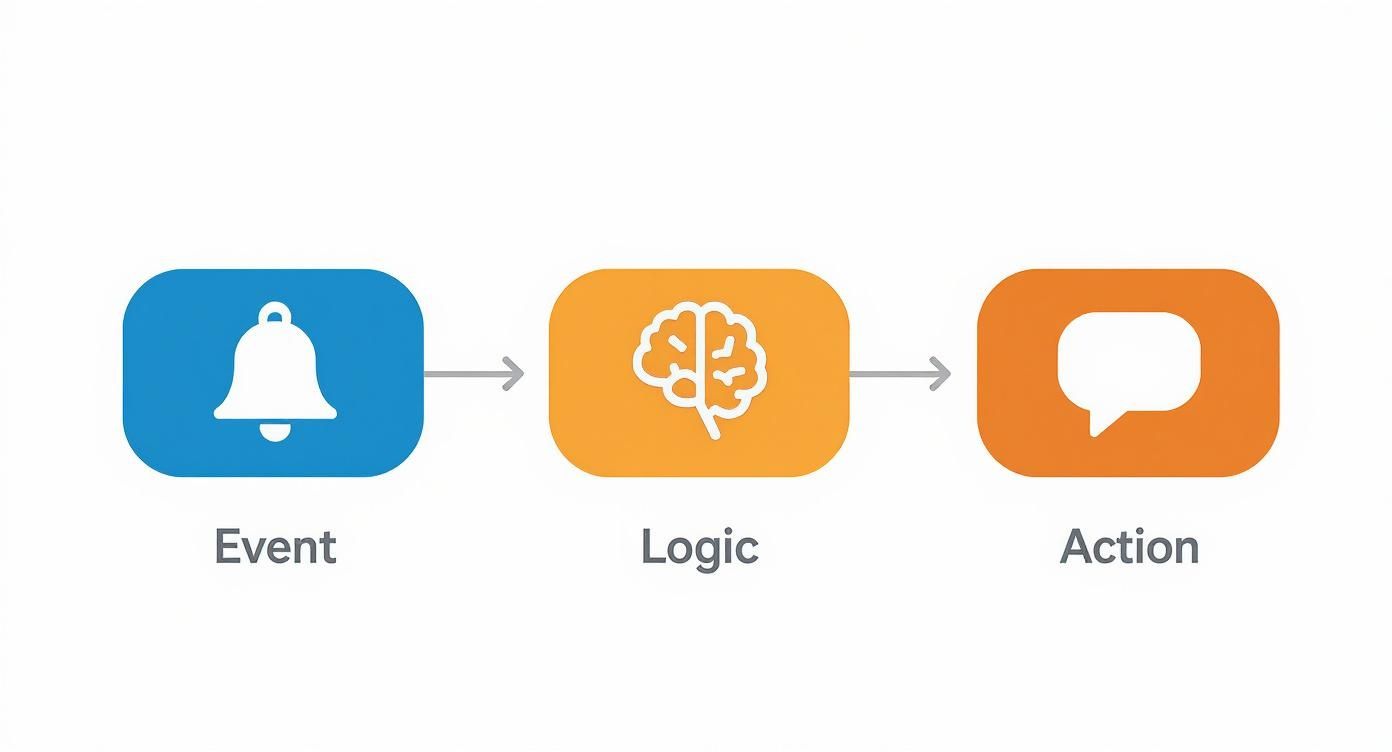
As you can see, every bot interaction follows this simple but powerful sequence, which makes even complex workflows manageable.
Crafting an Interactive Message
Once the bot grabs the PR data—like the title, author, and current status (e.g., open, merged)—it needs to present this information in a clean, readable way. This is where Slack's Block Kit really shines. Instead of just dumping plain text, we can build a rich, visually appealing notification.
We can structure the message with a few distinct sections:
*   A header with the PR title that links back to GitHub.
*   Fields displaying the author, base branch, and head branch.
*   A final section packed with interactive buttons.
Those buttons are what make the bot truly powerful. We could add buttons like "Approve," "Request Changes," or "Add Comment." When a team member clicks one, it fires another payload back to our bot. From there, we can write action handlers to perform follow-up tasks, like posting a pre-filled approval comment to GitHub or opening a Slack modal for a more detailed review.
The real value emerges when your bot becomes a bridge between platforms. It’s not just reporting information; it’s enabling action directly from the conversation, which dramatically reduces context switching for your team.
Structuring Your Bot's Code
As your bot gets more features, keeping your code organized is essential for your own sanity. Please, don't put all your logic into one massive file. A good practice is to separate your code into logical modules.
For instance, you could have:
- A file for handling Slack event listeners (
slack-handlers.js). - A separate module for all GitHub API interactions (
github-client.js). - A utility file for building your Block Kit message layouts (
message-builder.js).
This separation makes your code far easier to read, test, and debug down the line. If you want to see a more sophisticated system in action, check out how you can use GitHub Actions to send Slack notifications, which follows similar principles of automation and clear communication. Building a practical bot like this solidifies your understanding and provides immediate value to your team.
Deploying and Securing Your Slack Bot
Having a bot that runs on your laptop is great for development, but it's really just a prototype. To turn it into a real tool your team can rely on, you need to get it onto a live server where it can run 24/7. This is the final step where your project becomes a reliable service.
There are a few ways to get your bot online, each with its own pros and cons.
For beginners or quick prototypes, platforms like Glitch or Heroku are fantastic. They handle most of the server management for you, which means you can get your bot running with minimal fuss.
But as your bot gets more complex, you might find you need more control. That’s when it makes sense to look at scalable cloud solutions like AWS (Amazon Web Services), Google Cloud, or Microsoft Azure. They have a steeper learning curve, sure, but they offer the kind of flexibility and raw power you need for production-grade applications.
The Most Important Security Step
Once your bot is live, it’s going to get a constant stream of events and commands from Slack. But how can you be sure those requests are actually from Slack, and not some malicious actor trying to spoof them?
This is where verifying request signatures comes in, and frankly, it's a non-negotiable security measure.
With every HTTP request it sends, Slack includes a unique cryptographic signature. It's up to your bot to use its Signing Secret (which you can find in your app's dashboard) to compute its own signature based on the request's body and timestamp. If the two signatures match, the request is legit.
If you're using a framework like Slack Bolt, this verification is handled for you automatically. But if you’re building from the ground up, you absolutely must implement this check yourself. Skipping it leaves your bot and your workspace dangerously exposed.
Production Best Practices
Beyond just getting your bot online, running it in production requires a bit of foresight. A key challenge is dealing with Slack’s API rate limits. If your bot gets popular and starts sending too many messages too quickly, Slack will temporarily throttle it.
Your code needs to be ready to gracefully handle those 429 Too Many Requests errors. A common approach is to use an exponential backoff strategy, which means retrying the request after a short, increasing delay.
Also, basic logging will be your best friend when troubleshooting. Set up a system to log incoming events, the actions your bot takes, and any errors that pop up. When something inevitably breaks, those logs will be the first place you look to figure out what went wrong.
As you think about scaling, it’s worth noting that monetizing Slack bots has become a serious business. The market for workplace collaboration tools was valued at 58.38 billion by 2032. Some bots have seen incredible growth, proving that a well-built tool can make a huge impact. You can find more insights on the growth of the Slack ecosystem on notta.ai.
Answering Your Top Slack Bot Questions
When you first dive into building a Slack bot, you’ll quickly run into a few common questions. Seriously, almost everyone hits these same walls. Getting a handle on them early will save you a ton of frustration and help you build a bot that's both secure and efficient right from the get-go.
Let's clear up some of the most frequent hurdles developers face.
Web API vs. Events API: What's the Difference?
One of the first things that trips people up is the difference between the Slack Web API and the Events API. It’s simpler than it sounds.
Think of it like a phone call:
*   The **Web API** is for when your bot wants to *make* a call. It's proactive. You use it to send a message, create a channel, or update a user's status.
*   The **Events API** is for when your bot needs to *answer* the phone. It's reactive. It listens for things happening in Slack, like a user mentioning your bot or adding an emoji reaction.
A truly useful bot almost always needs to do both. It needs to listen for events and then act on them using the Web API.
Nailing Down Permissions and Testing Like a Pro
Another critical area? Permissions. It's tempting to just give your bot a bunch of scopes so it "just works," but that's a security nightmare waiting to happen.
The golden rule here is the principle of least privilege. Only give your bot the absolute bare minimum permissions it needs to do its job. If its only purpose is to post messages in a channel, then chat:write is all it should have. This is way more secure than starting with broad access. You can always add more scopes later as you build out new features.
Finally, you’re probably wondering if you can test your bot locally without deploying it every five seconds. Yes, you can—and you absolutely should.
A tool like ngrok is a lifesaver for this. It creates a secure public URL that tunnels requests directly from Slack's servers to the bot running on your local machine. This lets you test slash commands, button clicks, and events in a real workspace without a painful deployment cycle for every tiny change.
As you get more comfortable building Slack bots, you might start thinking about how to turn these skills into a career. It's a great niche to be in, and you can find plenty of companies looking for this expertise on platforms offering remote software developer jobs.
Ready to build a smarter, quieter GitHub notification bot without the hassle? PullNotifier integrates seamlessly with Slack to deliver concise PR updates, cutting through the noise and accelerating your team's code reviews. Try it for free at https://pullnotifier.com.