- Published on
How to generate ssh key pair for secure access
- Authors

- Name
- Gabriel
- @gabriel__xyz
If you're still using passwords for server logins, you're essentially leaving the front door of your digital house unlocked. To truly batten down the hatches on your servers and code, you need to generate an SSH key pair. This swaps a simple, guessable password for a powerful cryptographic signature that’s virtually impossible to crack.
Why SSH Keys Are Essential for Modern Security

Moving to key-based authentication is a non-negotiable step for anyone managing servers, deploying code, or just working in a modern development environment. It completely changes how you prove your identity to a remote machine. Instead of relying on something you know (a password), you use something you have (a private key). This simple shift slams the door shut on brute-force attacks that hammer away at login prompts guessing passwords.
Think of an SSH key pair as a digital passport, but one that's far more secure. It’s made of two distinct parts:
*   **The private key:** This is your secret. It lives on your computer and should never, ever be shared. It's used to digitally sign your connection requests, proving you are who you claim to be.
*   **The public key:** This key can be shared freely. You place it on any server you need to access, and the server uses it to verify the signature made by your private key.
The Rise of a Security Standard
The practice of using SSH key pairs became a security cornerstone right after SSH-1 was released back in 1995—a direct response to a credential-sniffing attack at a university. By the year 2000, SSH adoption had exploded to an estimated 2 million users worldwide. Today, with UNIX-based systems powering 66.6% of all web servers, SSH is still the go-to method for remote management.
The core benefit is simple: a properly generated SSH key is mathematically impossible to guess. An attacker could spend millennia trying to crack a modern key and get nowhere, whereas a weak password can be broken in minutes.
It's More Than Just Logging In
The power of SSH keys goes way beyond just manual logins. They are absolutely critical for automating secure workflows, especially in CI/CD pipelines where scripts need to pull from code repositories or deploy applications without any human typing in a password. This kind of automation is key to modern development, and it dramatically cuts the risk of exposing credentials in plain text scripts.
To get the bigger picture on access security, think about how SSH keys fit into broader strategies like those in a Privileged Access Management (PAM) guide. Protecting high-level access is essential for securing the 'keys to the kingdom' in any IT environment. At the end of the day, mastering SSH keys isn't just a neat technical skill; it's a fundamental security practice.
Choosing the Best SSH Key Algorithm: Ed25519 vs. RSA
Before you even type ssh-keygen, you’ve got a choice to make: which encryption algorithm should you use? For a long time, RSA (Rivest-Shamir-Adleman) was the default, the undisputed king of SSH keys. It's battle-tested, reliable, and you'll find it supported just about everywhere.
But times have changed. Today, the smart money is on a newer, more efficient algorithm: Ed2519. It offers a one-two punch of better security and faster performance, making it the clear winner for almost any situation you'll face today.
Why Ed25519 Is the Modern Standard
The main advantage of Ed25519 is that it gives you more security with a much smaller key. A typical Ed25519 key is only 256 bits long, but it provides security on par with a beefy 3072-bit RSA key. This isn't just a nerdy detail—it has real-world consequences.
Smaller keys mean that cryptographic handshakes are significantly faster. When you're connecting to a server, those milliseconds might not seem like much, but they add up. For developers pushing code all day or for automated CI/CD pipelines making thousands of connections, that speed boost is a big deal.
The takeaway is simple: unless you have a very specific reason not to, you should be using Ed25519. It's faster, just as secure (if not more so), and the modern standard for a reason.
SSH Key Algorithm Comparison: Ed25519 vs. RSA
To help you choose the best option, here's a side-by-side comparison of the most popular SSH key algorithms. The choice you make here impacts security, speed, and where you can use your key.
| Attribute | Ed25519 | RSA |
|---|---|---|
| Security | Excellent, based on elliptic-curve cryptography. Highly resistant to known attacks. | Strong, but requires longer keys (3072-bit or 4096-bit) for equivalent security. |
| Performance | Very fast. Signature generation and verification are significantly quicker than RSA. | Slower, especially with longer keys. Can add noticeable latency to connections. |
| Key Size | Small. Public keys are compact, which is efficient for storage and transmission. | Large. Keys can be quite long, especially at higher security levels like 4096-bit. |
| Compatibility | Widely supported in modern systems (OpenSSH 6.5+, released in 2014) but may not work with very old legacy hardware or software. | Universally supported. It's the fallback option when modern algorithms aren't available. |
Ultimately, Ed25519's blend of high security and lightweight performance makes it the superior choice for modern infrastructure. RSA remains a solid fallback for legacy systems.
So When Should You Still Use RSA?
There's really only one good reason to stick with RSA these days: backward compatibility.
If you're connecting to an ancient server—maybe a piece of enterprise hardware that hasn't seen an update in a decade—it might not know what to do with an Ed25519 key. These systems were built when RSA was the only game in town. In those rare situations, generating a strong RSA key is the right call.
For everyone else, the path forward is clear. When you generate your next key, make it an Ed25519. You’ll get better performance today and a security posture that’s ready for the future.
Generating Your SSH Key Pair on Any OS
Alright, it's time to roll up our sleeves and generate an SSH key pair. The great news is that the process is virtually identical whether you're on macOS, Linux, or Windows (using PowerShell or the Windows Subsystem for Linux). They all use the same battle-tested command-line tool: ssh-keygen.
I'm not just going to throw a command at you and call it a day. We'll break down exactly what each piece does so you understand the why behind the how. The goal here is to demystify the process and give you the confidence to create secure keys for any server or service you need to connect to.
The Go-To Command for Modern Keys
For modern systems, the best practice is to use the Ed25519 algorithm. It’s faster, more secure, and has become the new standard, leaving older algorithms like RSA in the dust.
Open your terminal (or PowerShell on Windows) and run this command:
ssh-keygen -t ed25519 -C "your_email@example.com"
Let's quickly dissect what's happening here so you know what you're actually telling the computer to do.
*   **`ssh-keygen`**: This is the core program that does all the heavy lifting of creating your key pair.
*   **`-t ed25519`**: The `-t` flag stands for "type." We're explicitly telling the tool to create an **Ed25519** key, our recommended choice.
*   **`-C "your_email@example.com"`**: The `-C` flag adds a "comment" to your key. It's a solid habit to use your email address here. While it doesn't change how the key works, it's a lifesaver for identifying which key belongs to who, especially when you're managing multiple keys on a server.
This quick comparison highlights why Ed25519 has become the preferred option over its older RSA counterpart.
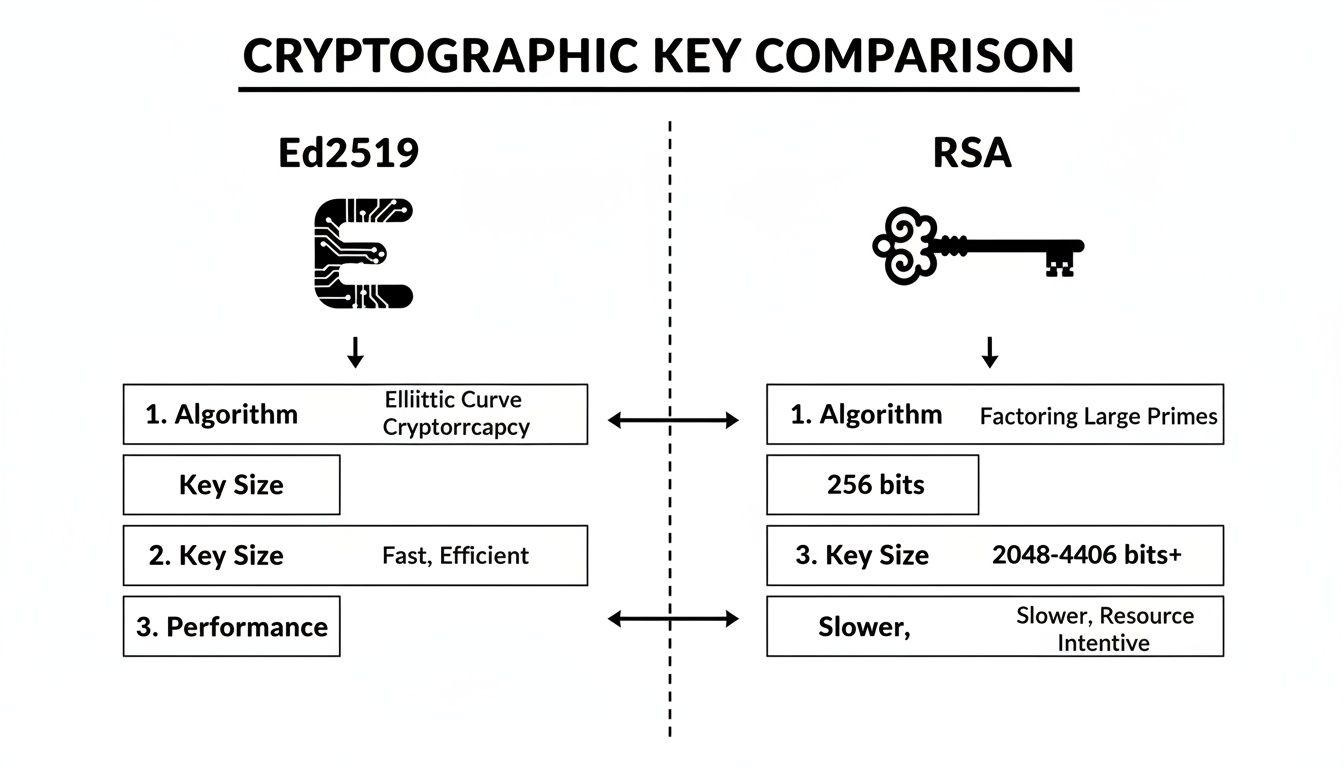
As you can see, modern keys pack a stronger cryptographic punch in a much smaller package.
Navigating the Interactive Prompts
Once you hit Enter, ssh-keygen will ask you a couple of questions. Don't just mash the Enter key through these—each one is an important decision.
Let's walk through what each prompt is asking.
"Enter file in which to save the key..."
First up, it asks where you want to save the key files it's about to create.
Enter file in which to save the key (/Users/your_user/.ssh/id_ed25519):
Unless you have a very specific reason not to, just press Enter to accept the default location. This places your keys in the hidden .ssh directory inside your home folder, which is the standard place where SSH tools expect to find them. Sticking to the default will save you a lot of headaches later.
"Enter passphrase (empty for no passphrase):"
Next, you'll be asked to create a passphrase. This is a critical security step.
Think of a passphrase as an extra layer of armor for your private key. If a bad actor ever gets a copy of your private key file, they still won't be able to use it without knowing this passphrase.
You should always set a strong, memorable passphrase. It's a small bit of friction that provides a massive security upgrade for your digital identity. You'll be asked to type it a second time to make sure you didn't have any typos.
What Just Happened? Meet Your New Keys
After you've answered the prompts, ssh-keygen will confirm that your key pair has been created. It has generated two new files inside your ~/.ssh/ directory:
*   **`id_ed25519`**: This is your **private key**. Guard this file with your life. Never, ever share it, upload it to a public repository, or send it to anyone over email.
*   **`id_ed25519.pub`**: This is your **public key**. The `.pub` extension says it all—this key is meant to be public. You can safely share this file and upload it to services like GitHub, GitLab, or your own private server.
Managing servers is a deep topic, but if you're curious about setting up your own box from scratch, our guide on how to build a home server is a great place to start.
The tool will also spit out a quirky "randomart image." While it looks like abstract art, it's actually a visual representation of your key's fingerprint. It’s designed to be a quick, human-readable way to verify you’re connecting to the correct server, which helps defend against man-in-the-middle attacks.
And that's it! You've successfully generated a secure, modern SSH key pair. You're now ready to use it to connect to remote systems securely.
Adding Your New SSH Key to GitHub

Creating an SSH key pair is a great first step, but it’s not much use until you tell services like GitHub about it. This is where the magic happens. By linking your key, you're replacing insecure password-based Git operations with a far more robust, cryptographic handshake.
This process essentially tells GitHub, "Hey, any connection request signed with this private key is coming from me, and you can trust it." It's what lets you securely push and pull code without punching in your username and password every single time.
Copying Your Public Key Correctly
One of the first places people get tripped up is copying the public key. Just opening the file in a text editor can introduce weird formatting or cause you to miss a character. The most reliable method is to print its contents directly to your terminal.
On macOS or Linux, the cat command is your best friend for this: cat ~/.ssh/id_ed25519.pub
For Windows users in PowerShell, the equivalent is Get-Content: Get-Content ~/.ssh/id_ed25519.pub
Running either command will spit out a long string starting with ssh-ed25519 and ending with your comment (probably your email). Highlight the entire output and copy it to your clipboard.
Pro Tip: Be extremely careful here. Missing even a single character will cause the authentication to fail. I always triple-check that I have the whole string, from the
ssh-ed25519at the beginning to my email at the very end.
Adding the Key to Your GitHub Account
With your public key copied, it's time to head over to GitHub. This part takes less than a minute but is absolutely critical.
Here’s the quick path to get it done:
- Head to your settings: In the top-right corner of any GitHub page, click your profile photo, then choose Settings.
- Find your SSH keys: In the left sidebar, click SSH and GPG keys.
- Add the new key: Click the green New SSH key button.
You'll see a form pop up. In the "Title" field, give your key a descriptive name you'll recognize later. I usually name it after the machine it’s on, like "MacBook Pro M3" or "Personal Dell XPS." This really helps when you connect from multiple computers and need to manage your keys.
Next, paste the public key you copied into the "Key" text box. Give it one last look to make sure it's all there, then click Add SSH key. GitHub might ask for your password to authorize the change.
Once the key is added, you’ve established a secure channel for all your Git interactions. This is a huge step for a smooth development workflow. Speaking of Git, things can sometimes get messy; having a good guide on how to resolve conflicts in Git can be a real lifesaver.
Testing Your SSH Connection
Alright, the moment of truth. Let's make sure everything is wired up correctly. You can do this with a simple test command that tries to authenticate with GitHub's servers using your new key.
Open your terminal one last time and run this: ssh -T git@github.com
The first time you connect, you’ll likely see a warning about the authenticity of the host. Don't panic; this is a normal security measure.
The authenticity of host 'github.com (IP ADDRESS)' can't be established. ED25519 key fingerprint is SHA256:+DiY3wvvV6TuJJhbpZisF/zLDA0zPMSvHdkr4UvCOqU. Are you sure you want to continue connecting (yes/no)?
Just type yes and hit Enter. This adds GitHub’s public key to your machine's list of known hosts. If everything worked, you'll get a welcome message:
Hi
your-username! You've successfully authenticated, but GitHub does not provide shell access.
That "successfully authenticated" part is exactly what we're looking for. It confirms your private key on your machine authenticated perfectly with the public key you added to GitHub. You're all set to use SSH for your Git operations.
Advanced SSH Key Management Techniques
Generating your first SSH key is a solid first step, but the real power comes from mastering the tools that manage them. Moving beyond the basics is what separates the pros from the amateurs, turning your workflow from just secure to remarkably efficient.
These aren't just fancy tricks; they solve real-world headaches. They get rid of the constant friction of typing passphrases, make complicated connection commands dead simple, and seriously harden your servers against entire classes of attacks.
Supercharge Your Workflow with SSH Agent
If you took our advice and set a strong passphrase on your key, you've probably noticed one tiny annoyance. Every single time you run git push or connect to a server, you have to type it in. It's secure, sure, but it gets old fast.
This is exactly what ssh-agent was made for. It's a small background helper that holds your private keys in memory, remembering your passphrase for your entire login session. You unlock your key once when you start your day, and the agent handles the rest.
On most modern systems, the agent is already running. All you have to do is add your key to it.
ssh-add ~/.ssh/id_ed25519
You'll be prompted for your passphrase one last time. Once you enter it, the key is loaded, and you can connect to any authorized server without getting bugged for the passphrase again.
This is an absolute game-changer for productivity. You get all the security of a strong passphrase without the constant interruptions. It’s the best of both worlds.
Simplify Connections with a Config File
Ever find yourself digging through your notes or typing out ridiculously long SSH commands with special usernames, hostnames, and custom ports? There's a much cleaner way. It's time to meet the SSH config file.
This simple text file, living at ~/.ssh/config, lets you create shortcuts or aliases for your most-used connections. Instead of a long, clunky command, you get to use a simple, memorable name.
For instance, let's say you regularly connect to a server using a command like this:
ssh -i ~/.ssh/work_key -p 2222 dev-user@production-web-server.example.com
You can shrink that whole mess down by adding this to your ~/.ssh/config file:
Host webserver HostName production-web-server.example.com User dev-user Port 2222 IdentityFile ~/.ssh/work_key
Now, connecting is as easy as typing ssh webserver. It saves time and completely eliminates typos. This file becomes indispensable when you're juggling multiple keys for different clients or environments—a common scenario for any developer. For those deep in CI/CD, understanding how to create reusable GitHub Actions can streamline your development process even further.
Enforce Key-Only Access on Your Server
The single most effective security move you can make on a server is to disable password authentication entirely. This simple change makes your server completely immune to brute-force password guessing attacks. If an attacker doesn't have a valid private key, there is simply no way in.
This is done in the main SSH daemon configuration file, which you'll typically find at /etc/ssh/sshd_config on your server.
Warning: Before you do this, triple-check that your key-based login works perfectly. If you disable passwords and something is wrong with your key setup, you will lock yourself out of your own server. Seriously.
Open the file with a text editor (you'll need sudo privileges):
sudo nano /etc/ssh/sshd_config
Look for a line that says PasswordAuthentication yes and change it to no.
PasswordAuthentication no
Save the file, then restart the SSH service to apply the change. The command varies a bit, but it's usually sudo systemctl restart sshd or sudo service ssh restart.
This kind of key hygiene is vital in professional settings. Generating SSH key pairs is the first step, but managing them is the real challenge. "SSH key sprawl" is a real problem, affecting 84% of organizations. It's not uncommon for servers to have 50-200 keys piled up, and some large companies are wrangling over a million keys—creating massive security holes when employees leave. A 2020 study found that 57% of teams find managing these keys "painful or very painful," a struggle that directly increases the risk of a breach. You can find more on the challenges of SSH key management on researchintelo.com.
Common Questions About SSH Keys, Answered
As you start weaving SSH keys into your daily workflow, you're bound to have some questions. It’s a powerful tool, but let's be honest, some of the concepts feel a bit abstract at first. Let's clear the air and tackle the most common things that trip people up.
Think of this as your quick-reference guide for those "what if" scenarios. Getting these fundamentals right is the key to managing your connections securely and efficiently.
What Happens If I Lose My Private SSH Key?
Losing your private key is like losing the master key to your house—it immediately cuts off your access and creates a major security risk. The first and most critical step is to revoke the compromised key's access everywhere it was used.
Here's your immediate action plan:
- Generate a brand new SSH key pair on your machine. This becomes your new master key.
- Log in to every service where the old public key was installed, like GitHub, GitLab, or your cloud provider. You'll have to use an alternative login method, like your password.
- Delete the old public key. This is the crucial step. On servers, that means removing it from the
authorized_keysfile. On services like GitHub, you'll find it in your SSH key settings. This prevents anyone who finds your old key from getting in. - Add your new public key to take its place.
This exact scenario is why keeping a secure, encrypted backup of your private key in something like a password manager is such a smart move. It can save you from a massive headache.
Is It Safe to Share My Public SSH Key?
Yes, absolutely. The public key is designed to be shared openly without any risk. You can email it, paste it onto a server, or add it to any service you need to access. It contains zero secret information.
Think of it this way: your public key is the address to your secure mailbox. Anyone can have the address to send you an encrypted package, but only you hold the private key to actually open that mailbox. The public key's only job is to verify signatures made by its private half; it can't be reverse-engineered to reveal your private key.
The entire principle of public-key cryptography rests on this separation. The public key is for distribution, while the private key is for your eyes only. Never, ever share your private key.
This security model is fundamental to the entire SSH ecosystem. The explosive growth of cloud computing has made the ability to generate an SSH key pair an indispensable skill. With 90% of public cloud workloads running on Linux systems that lean heavily on SSH, managing these keys has become a huge operational challenge. Enterprises often face "SSH everywhere," with 84% using it for everything from admin access to automation, leading to a sprawl of 50-200 keys per server. You can discover more insights about the challenges of the burgeoning SSH key management market, which is projected to hit $4.8 billion by 2033.
Should I Use a Passphrase for My SSH Key?
You absolutely should. No exceptions. A passphrase adds a critical second layer of defense for your private key. If your laptop is ever stolen or a malicious actor gets access to your files, they might grab a copy of your private key file.
Without a passphrase, they have an instant backstage pass to every system that key is authorized for. With a passphrase, the key file is just an encrypted block of text—useless without the secret phrase to unlock it.
And don't worry about the hassle. Tools like ssh-agent make this security measure incredibly convenient. You can add your key to the agent when you start your day, enter your passphrase just once, and the agent handles authentication for you until you log out. You get the robust security of an encrypted key without the friction of typing a passphrase for every single connection.
Can I Use the Same SSH Key Pair for Everything?
While you technically can, it's a terrible security practice. Using a single key pair for your work projects, personal servers, and various cloud services creates one massive single point of failure. If that one private key is ever compromised, an attacker gains the keys to your entire digital kingdom.
A much safer and more professional approach is to generate separate key pairs for different contexts.
*   A key for your work-related activities (e.g., `id_ed25519_work`).
*   A key for your personal projects (e.g., `id_ed25519_personal`).
*   You could even have dedicated keys for specific high-security servers.
Managing these is surprisingly easy using the ~/.ssh/config file we talked about earlier. You can create host aliases that automatically tell SSH which key to use for which connection, making the whole process feel seamless. This kind of compartmentalization ensures that a compromise in one area of your life doesn't cascade into a total security disaster.
Tired of the notification chaos from GitHub? PullNotifier integrates seamlessly with Slack to deliver quiet, real-time pull request updates. It cuts through the noise, helps you slash code review times, and keeps your entire team in sync without the constant pings. Join over 10,000 engineers who trust PullNotifier to streamline their workflows. Start for free and experience a calmer, more productive development cycle.