- Published on
Mastering the GitHub Merge Branch Workflow
- Authors

- Name
- Gabriel
- @gabriel__xyz
When you're ready to combine a feature branch into your main codebase, you've reached the final step. But how you merge isn't just a click of a button—it's a decision that permanently shapes your project's history. The choice between a merge commit, a squash, or a rebase has a huge impact on the clarity and maintainability of your repository down the road.
4. Choosing the Right Merge Strategy
That green "Merge pull request" button holds more power than you might think. The strategy you choose will be etched into your project's git log forever. Each approach tells a different story about your project's evolution, so picking the right one is a key strategic decision.
The core question is simple: do you need a detailed, commit-by-commit history of how a feature was built, or is a clean, summarized history more valuable for your team?
This decision tree breaks it down perfectly.
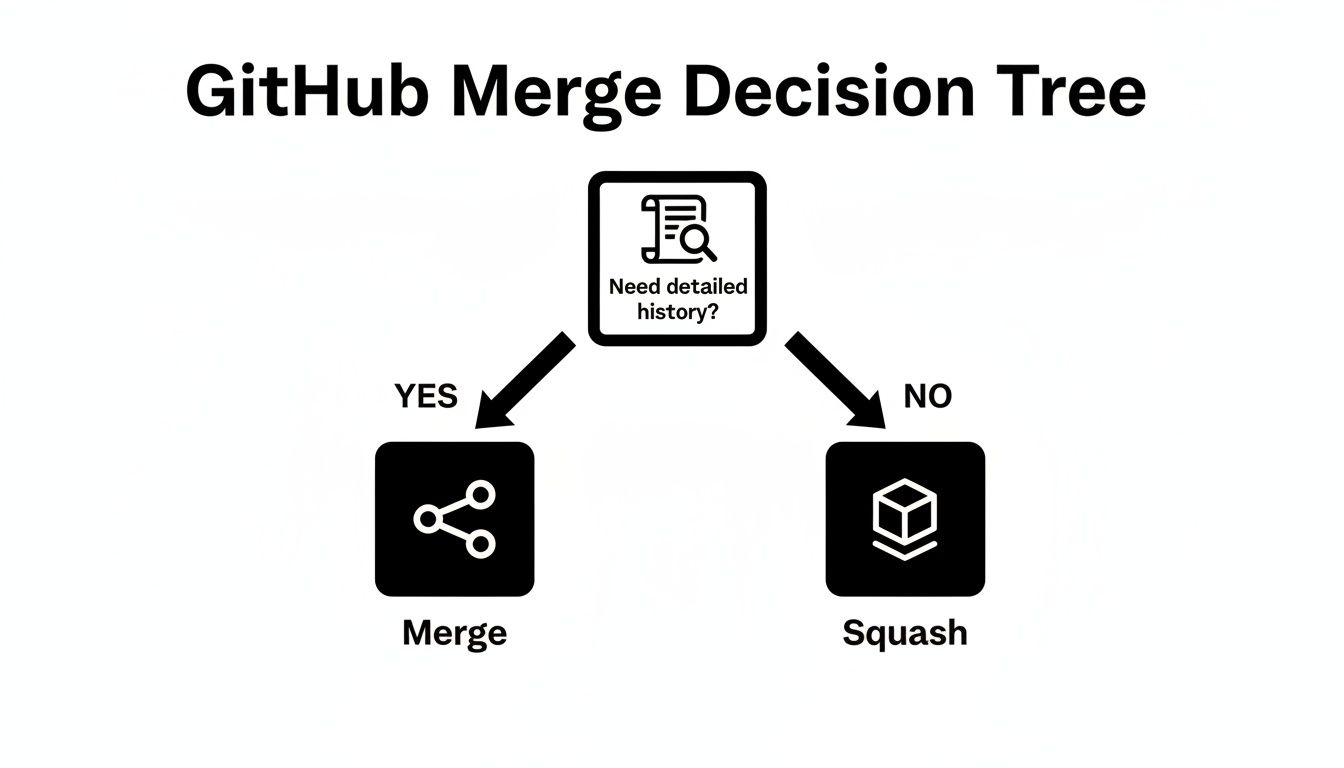
Ultimately, what works best comes down to your team’s workflow and what information you find most useful when looking back through your project's history.
To help you decide, let's break down the three main strategies you'll encounter in GitHub.
Comparing GitHub Merge Strategies
Here's a quick side-by-side look at how each merge strategy stacks up, highlighting its effect on your Git history and where it shines.
| Strategy | Commit History | Use Case | Pros | Cons |
|---|---|---|---|---|
| Merge Commit | Preserves all commits from the feature branch and adds a new merge commit. | Great for team collaboration where detailed history and context are important. | Non-destructive; keeps the full context of the branch's development. | Can clutter the main branch history with many small commits. |
| Squash and Merge | Combines all feature branch commits into a single, new commit on the main branch. | Ideal for keeping the main branch history clean and linear. Perfect for small features or bug fixes. | Creates a tidy, easy-to-read history. The final result is clear. | Loses the granular, step-by-step development history of the feature. |
| Rebase and Merge | Re-applies feature branch commits on top of the main branch, creating a linear history without a merge commit. | Best for developers who want the cleanest possible history, making it look like work was done sequentially. | Results in a perfectly linear and easy-to-follow project history. | Can be risky if the branch is shared; rewriting history can cause issues for collaborators. |
Each strategy has its place. The key is to pick the one that aligns with your team's goals for repository history and collaboration.
Create a Merge Commit
This is the default option for a reason. "Create a merge commit" keeps the entire, unfiltered history of your feature branch exactly as it happened. It creates a special "merge commit" that ties the two branches together, making it crystal clear when and where the feature was integrated.
This approach is fantastic for collaboration. It preserves the context of every single commit, which can be a lifesaver for debugging or understanding the thought process behind a complex feature months later. You get a true, unaltered timeline of the work.
Because this method is non-destructive and ensures no history is ever lost, it's often the safest and most recommended strategy for teams, especially when multiple developers are working on the same branch.
Squash and Merge
If you value a clean, tidy main branch, "Squash and merge" is your best friend. This option bundles up all the commits from your feature branch—from "wip" to "fix typo"—and squishes them into one clean, single commit on the main branch. Instead of a dozen small updates, your history shows one meaningful entry, like "Implement user profile page."
This is the perfect strategy when the journey isn't as important as the destination. It keeps your primary branch history linear and incredibly easy to read, focusing on the what, not the how.
Rebase and Merge
For the absolute purists who crave a perfectly linear history, "Rebase and merge" is the way to go. This method essentially lifts the commits from your feature branch and replays them one-by-one on top of the main branch before merging. The final result is a straight line—no merge commits, no branching narratives. It looks as if all the work happened sequentially on the main branch.
This mirrors what you might do on the command line with git rebase. Historically, Git has always tried to balance these needs. It's interesting to note that in open-source projects, fast-forward merges (common in rebase workflows) make up about 40% of all merges, while the classic three-way merge commit still dominates at 55%, preserving that crucial collaborative context. You can learn more about how GitHub handles these branch histories and what it means for your project.
Your Guide to a Perfect Pull Request
Before you even think about running a github merge branch command, the real magic happens inside the pull request. A well-crafted PR is so much more than a pile of code—it's a conversation starter, a living document, and your ticket to a smooth, fast review process.
The whole point is to give reviewers everything they need to understand your changes at a glance. They shouldn't have to painstakingly read every line of code just to figure out the why. A clear PR respects your team's time and makes the feedback loop way faster.

Crafting a Clear and Actionable PR
Your PR description is the single most important part. It needs to be a tight summary that explains the context, the problem you're solving, and how your solution works. A great description doesn't just list what changed; it explains why it changed.
Think of it as the commit message for the entire feature. If your team isn't using them already, PR templates are a game-changer for keeping this consistent.
A simple structure that works wonders:
*   **The Problem:** Briefly lay out the issue or feature request. "Users can't reset their password from the mobile app."
*   **The Solution:** Explain your high-level approach. "This PR adds a new API endpoint and a screen for password resets."
*   **How to Test:** Give clear, step-by-step instructions so reviewers can verify your changes themselves. This is a massive help for QA and other devs.
A well-documented PR becomes future documentation. Six months from now, when another developer is trying to figure out why this code exists, your PR description should tell them the whole story.
Linking Issues and Tagging Reviewers
Connecting your PR to the bigger picture is key for keeping projects on track. Always link it to the corresponding issue or ticket. In GitHub, you can just drop keywords like "Fixes #123" or "Closes #123" into your description. This automatically links the two and will even close the issue when the PR is merged.
It’s a tiny step that keeps your project board clean and provides a clear audit trail from task to code.
Just as important is tagging the right people. Don't just blast the whole team. Use the Reviewers feature to specifically request feedback from people who have context on the code. You can also use @ mentions in comments to pull in specialists for specific questions, like asking a designer for a quick opinion on a UI tweak. To make sure your pull requests are not just functional but flawless, consider how AI-powered coding assistant tools are reshaping development workflows by offering real-time suggestions and code improvements.
Giving and Receiving Constructive Feedback
Code review is a skill, and the goal is always collaboration, not criticism. When you're leaving feedback, try framing your comments as questions or suggestions instead of commands.
*   Instead of saying: "This is inefficient."
*   Try something like: "Have you considered another approach here? I'm wondering if using a map would be faster."
This small change invites a discussion and acknowledges that there's usually more than one way to solve a problem. If you want to go deeper on this, our guide on mastering the pull request workflow has a ton more strategies for effective team collaboration.
When you're on the receiving end, approach feedback with an open mind. Thank your reviewers for their time and engage with their points thoughtfully. A positive and collaborative review process is the bedrock of a healthy engineering culture and ultimately leads to a much cleaner github merge branch history.
Ditching the UI: Merging Branches from the Command Line
While the GitHub UI is fantastic for a visual overview, many seasoned developers live in the command line. Why? Speed, control, and a much deeper connection to what Git is actually doing under the hood. Handling merges directly from your terminal isn't just a time-saver; it’s a core skill. Let's walk through how to manage the entire process using both the standard git CLI and the seriously powerful GitHub CLI (gh).
First things first, get your local environment synced up. Before you even think about merging, you need to pull the latest changes from the remote main branch. This one habit will save you from a world of unnecessary merge conflicts.
Get on your main branch
git checkout main
Pull down the latest and greatest from the remote
git pull origin main
With main fresh and clean, you can hop back to your feature branch and get it ready to merge.
The Classic Merge: Using Plain Old Git
The git merge command is the original, no-frills way to get the job done. It weaves the history of your feature branch into main, creating a new merge commit that neatly ties everything together. This method preserves the full, detailed history of your work, which can be super useful for tracking changes later on.
Here’s how you do it:
- Check out the branch you want to merge into. Nine times out of ten, that’s
main. - Run the
mergecommand and point it at your feature branch.
Switch over to your target branch
git checkout main
Merge your feature branch into main
git merge your-feature-branch
Don't forget to push the merged main branch back to the remote
git push origin main
This sequence updates your local main, then pushes that combined history up to GitHub. Boom, merge complete.
Pro Tip: Keep your repository tidy. After a successful merge, it's good housekeeping to delete your old feature branches. Clutter leads to confusion.
You can zap the branch both locally and on the remote server with these two commands:
Delete the branch on your local machine
git branch -d your-feature-branch
Now delete it from the remote server
git push origin --delete your-feature-branch
A Better Way: The GitHub CLI Workflow
The GitHub CLI (gh) is a game-changer. It brings the pull request and merge workflow right into your terminal, making the whole process feel much more integrated. If you prefer merging via a PR (which you should), gh is your best friend.
Instead of juggling multiple git commands, you can just use gh pr merge. This one command can handle a standard merge, a squash, or a rebase. It can even delete the branch for you when it's done.
Let's say you want to squash and merge PR #123. It’s as simple as this:
Merge pull request #123 using the squash strategy
gh pr merge 123 --squash --delete-branch
Here’s a quick breakdown of what’s happening:
*   `gh pr merge 123`: This targets pull request **#123**.
*   `--squash`: This tells `gh` to use the **squash and merge** strategy.
*   `--delete-branch`: This handy flag automatically deletes the feature branch on GitHub after the merge.
This single command wraps up several steps into one clean action. It does exactly what you’d do in the UI, but with the speed and scriptability that only the command line can offer. It's an incredibly efficient way to manage your merges.
How to Confidently Resolve Merge Conflicts
Seeing that red "merge conflict" warning can feel like hitting a brick wall. Don't sweat it. This isn't a sign you've done something wrong; it’s a totally normal part of collaborative development. It just means Git needs a human to make a decision.
Conflicts pop up when two branches have changed the same lines in the same file, or when one branch deletes a file that another branch has modified. Git is smart, but it can’t read your mind to figure out which change should win.

Decoding the Conflict Markers
When a conflict happens, Git hits pause on the merge and injects special markers into the problem file to show you exactly where the issue is. Getting comfortable with these markers is the first step.
You'll see chunks of your code wrapped in symbols like these:
*   `<<<<<<< HEAD`: This is the start of the conflicting change from your **current branch** (the one you're merging *into*).
*   `=======`: This line separates your changes from the incoming ones.
*   `>>>>>>> feature-branch-name`: This marks the end of the conflict block from the **other branch** (the one you're trying to merge).
Your job is to jump into this block, manually edit the code to reflect the final version you want, and then delete all the <<<<<<<, =======, and >>>>>>> markers. You might keep your version, the incoming version, or a bit of both.
A great way to get more context is by setting your merge conflict style to
diff3. This shows you the original code before either change was made, which can be a lifesaver when you're trying to figure out the original intent.
Resolving Conflicts in VS Code
Let's be real, nobody enjoys resolving conflicts in a plain text editor. Modern tools like VS Code make this process so much smoother by highlighting the conflict blocks and giving you clickable actions.
When you open a file with a conflict, you’ll see handy links right above the code:
*   **Accept Current Change:** Keeps the version from your `HEAD` branch.
*   **Accept Incoming Change:** Keeps the version from the branch you're merging.
*   **Accept Both Changes:** Mashes both versions together, which usually requires some manual cleanup afterward.
Click the option that makes the most sense for each conflict in the file. Once you've resolved everything and the Git markers are gone, just save the file. For a deeper dive into different scenarios, check out our practical guide on how to resolve conflicts in Git.
After saving, you just need to tell Git you're done. Add the fixed file to staging and commit it to finalize the merge. This methodical approach turns a moment of panic into a routine, confident fix.
Using Branch Protection to Safeguard Your Code
As your team grows, leaving your main branch unprotected is like leaving your front door unlocked. It's only a matter of time before an accidental push or a poorly vetted merge breaks production, causing downtime and derailing your sprint goals. This is exactly what GitHub's branch protection rules are designed to prevent.
Think of branch protection as an automated, tireless gatekeeper for your most important code. It's essentially a configurable quality control checklist. Before any code can be merged, it must meet the specific criteria you've defined, ensuring every github merge branch command is deliberate and safe. This isn't just about catching mistakes; it's about building a sustainable, high-quality engineering culture where every single change is peer-reviewed and validated.

Enforcing Code Reviews and Status Checks
The two most powerful rules you can enable are mandatory code reviews and required status checks. When used together, they create a robust defense against buggy code ever reaching your main branch.
First up, you can require pull request reviews before merging. A great starting point is to demand at least one approval from a team member. This simple rule single-handedly ensures no code lands without a second pair of eyes on it. For more critical repositories, you can even require approvals from specific code owners. The impact is huge; since its acquisition by Microsoft, GitHub has seen how protected branches enforcing reviews can slash code defects by as much as 45%.
Next are the required status checks. These are the automated hurdles, usually run by a CI/CD tool like GitHub Actions, that must pass before the merge button even becomes clickable.
These checks typically include:
*   **Unit and integration tests** to confirm that new code doesn't break existing functionality.
*   **Linting and code style checks** to keep the codebase consistent and readable.
*   **Security scans** to sniff out vulnerabilities in dependencies or new code.
If any of these checks fail, the PR is blocked. This creates a tight, immediate feedback loop where developers have to fix the issues before their code is even considered for merging.
By making tests and reviews non-negotiable, you shift quality control from a manual, post-merge activity to an automated, pre-merge requirement. This builds a main branch that is always stable, tested, and ready for deployment.
Preventing Force Pushes and Other Dangers
Beyond reviews and checks, branch protection offers other crucial safeguards. You should absolutely prohibit force pushes to your main branch. A git push --force can rewrite history, which makes it incredibly difficult to track down changes or recover from a bad mistake. Disabling it is a simple click that prevents a whole category of potential disasters.
Getting these rules right can be tricky, especially when balancing security with team velocity. To implement and enforce robust branch protection rules and other security measures within your GitHub workflows, bringing in expert DevOps consultants can be a game-changer. They can help you configure these rules optimally for your team's specific needs, ensuring your pipeline is both secure and efficient while safeguarding your codebase's integrity.
Automating Your Post-Merge Cleanup and Notifications
A successful github merge branch action isn't the end of the story—it's the perfect trigger for automation. Once your code is safely in main, you can set up workflows that clean up your repository and keep the team in the loop, all without any manual effort.
The first and easiest win here is automating branch cleanup. A repository cluttered with dozens of old, merged branches is just confusing and slows everyone down. It's a simple fix. In your repository settings under "Pull Requests," just check the box to "Automatically delete head branches."
This one-click configuration is surprisingly effective. According to GitHub's own data, enabling this feature automatically cleans up around 70% of stale feature branches, keeping your repository tidy from the get-go.
Keeping Your Team Informed
Beyond simple cleanup, you can use the merge event to broadcast important updates. Imagine a world where your team's Slack channel instantly gets a notification when a major feature lands in main. This keeps product managers, QA, and other developers aware of progress without them having to constantly check GitHub.
This is where GitHub Actions really shines. You can create a simple workflow that just listens for a pull request to be closed and merged.
When the merge event fires, your workflow can trigger all sorts of downstream actions, from deploying code to a staging environment to sending custom notifications. It transforms your merge from a simple code change into a powerful integration point for your entire toolchain.
For example, you can configure an action to post a message to a specific Slack channel, complete with a link to the merged PR and the developer who merged it. Our guide on using GitHub Actions to send Slack notifications walks you through the exact steps to get this running.
Common Questions About GitHub Merging
Let's be honest, even with the best workflow, some questions about merging in GitHub just keep coming up. Getting a handle on these common sticking points can save you a ton of headaches when you're in the middle of a development cycle.
Here are the answers to a few of the most persistent ones I hear.
What Is the Difference Between Git Merge and Git Rebase?
This is the big one, and it trips up a lot of developers. The easiest way to think about it is by imagining you're telling the story of your project's history.
git merge tells the complete, unabridged story, including all the side quests and detours. It takes your feature branch and weaves it into the main branch, creating a brand new "merge commit" to tie the two histories together. This preserves the full context of every branch, which is great for transparency.
git rebase, on the other hand, is like editing that story to be a clean, linear narrative. It rewrites history by taking all the commits from your feature branch and placing them, one by one, on top of the target branch. The result is a perfectly straight commit log. Rebase makes your history look pristine, but it's risky on shared branches because it literally changes the past.
When Should I Use Squash and Merge?
You’ll want to squash and merge when the individual commits on your feature branch don't really add value to the main branch's history. We've all been there—a branch filled with commits like "fix typo," "wip," and "oops, another fix." Squashing is perfect for this.
This handy feature bundles all those small, messy steps into a single, clean commit on the main branch. The final history is much more readable, focusing on the what (the completed feature) rather than the noisy how it got there.
The real win here is a streamlined
git logon your main branch. It makes it dead simple to figure out when a feature was added or to revert it if something goes wrong, since you're only dealing with one commit per feature.
How Do I Undo a Merge in GitHub?
So, you've merged something by mistake and already pushed it. Don't panic, and definitely don't force-push to undo it—that's a recipe for disaster in a shared repository.
The safe way to fix this is with git revert.
- First, run
git logto find the hash ID of the merge commit you want to undo. - Then, run the command:
git revert -m 1 <merge-commit-hash>.
This creates a new commit that is the exact inverse of the merge, effectively canceling it out. The best part? It keeps the project's history intact, so you won't cause chaos for your collaborators.
Tired of noisy GitHub notifications and delayed code reviews? PullNotifier integrates with Slack to deliver concise, real-time pull request updates, cutting through the clutter so your team can merge faster. Join over 10,000 engineers who trust PullNotifier to streamline their workflows.