- Published on
Slack Create Bot: slack create bot with Bolt.js from Scratch
- Authors

- Name
- Gabriel
- @gabriel__xyz
Building your own Slack bot is about more than just automating a few tasks; it's about making Slack a true command center for your engineering team. When you move beyond simple chat and start integrating custom workflows, you can solve real problems, slash manual effort, and boost your team's productivity. It's about turning a communication tool into an interactive powerhouse.
Why Build a Custom Slack Bot for Your Team

Look, off-the-shelf integrations are great, but they rarely solve the unique problems your team faces every day. When you build your own bot, you're creating a solution that's perfectly sculpted to your operational pain points.
A custom bot gets specific. Think about a bot that automates daily stand-up reminders and neatly collects responses in a single thread. Or imagine one that pulls all pull request discussions from GitHub directly into Slack, ending the constant notification noise that kills deep work. That's the kind of targeted automation that transforms Slack into a genuine productivity hub. Getting a handle on what virtual agents are can give you a bigger picture of what these bots are truly capable of.
Reduce Context Switching and Boost Focus
Context switching is a productivity killer for developers. Every time you have to jump from one tool to another, you lose your flow. A thoughtfully designed Slack bot minimizes this drain by pulling essential tools and information right into your chat window.
Instead of leaving Slack to check a CI/CD pipeline, a developer can just query the bot. Instead of opening Jira to create a ticket, they can use a quick slash command. It’s all about keeping the team focused and in the zone.
A study found it can take over 23 minutes to get back on track after an interruption. A custom bot fights this head-on by centralizing routine tasks, protecting that priceless focus time.
Unlock Powerful Automation Opportunities
Beyond simple pings and reminders, a custom bot opens up a world of powerful automation that directly improves your team's velocity and happiness.
Here are just a few ideas I've seen work wonders:
*   **Deployment Notifications:** Set up a bot to announce successful deployments to specific channels, complete with a link to the release notes.
*   **On-Call Rotations:** Automate reminders for who's on call next, ensuring handoffs are always smooth and no one drops the ball.
*   **Environment Management:** Build a bot that can lock or unlock staging environments, putting an end to conflicting tests and deployments.
When you automate these kinds of routine procedures, you give your developers their time back to do what they do best: build great software. If you're looking for more ways to streamline your team's workflow, dive into our guide on mastering Slack for developers.
Alright, you've decided to build your own Slack bot. Fantastic choice. The first real step is to get it registered inside Slack's ecosystem. You'll start this journey at the Slack API dashboard, where you'll officially create your app.
This isn't just a formality. This initial setup is where you give your bot an identity and—more importantly—define its boundaries.
When you hit the "Create New App" screen, you'll see two options: "From scratch" or "From an app manifest." For your first go-around, starting from scratch is the way to go. It gives you a much clearer, hands-on feel for each moving part. This process will spit out the credentials your app needs to talk securely with Slack's APIs.

Think of this dashboard as your command center for everything—from adding new features to managing how your app gets distributed.
Understanding Scopes and the Principle of Least Privilege
Once the app exists, your next critical job is to assign permissions, which Slack calls scopes. Scopes dictate exactly what your bot can see and do inside a workspace. It's tempting to just grant a bunch of permissions to avoid hitting a wall later, but that's a security nightmare waiting to happen.
The best practice here is the principle of least privilege: only give your bot the absolute minimum permissions it needs to do its job. Nothing more.
For instance:
*   A bot that just posts notifications? It only needs the `chat:write` scope.
*   An interactive bot that needs to read messages? It'll require `channels:history` to see what was said and `app_mentions:read` to know when someone is talking to it.
*   A bot that adds or removes people from channels? That would need something like `channels:manage`.
By being deliberate with your scopes, you build a bot that's more secure and predictable. If a token ever gets compromised, the potential damage is contained only to the permissions you explicitly granted.
This level of control is a core part of the platform. You're joining a huge community, by the way—there are a staggering 750,000 custom bots and integrations active across Slack workspaces. Adopting solid security habits from the start is non-negotiable.
Bot Tokens Versus Signing Secrets
During the setup, Slack will hand you two critical pieces of information: a Bot User OAuth Token and a Signing Secret. They have very different security jobs, and you need to know the difference to build a secure app.
| Credential | Purpose | How It's Used |
|---|---|---|
| Bot Token | Authorization | This is your bot's password. It's sent with API requests to prove to Slack that your bot has permission to do something (like post a message). |
| Signing Secret | Verification | This is used to confirm that incoming requests (like a user typing a slash command) genuinely came from Slack and not some imposter. |
Here’s a simple way to think about it: the Bot Token is your bot's key to open doors and make API calls. The Signing Secret is the bouncer at the door of your server, checking the ID of every request that tries to get in.
Never, ever hardcode these in your application. They should always be stored as environment variables. For a more detailed walkthrough of this whole process, check out our complete guide on how to make a Slack app from scratch.
Bringing Your Bot to Life with Bolt for JavaScript
Alright, you've got your Slack app configured with the right permissions and tokens. Now for the fun part: making your bot actually do something. We'll be using Bolt for JavaScript, Slack's official framework that brilliantly handles the messy parts of the Slack API, like request verification and event routing.
This means you can skip writing a ton of boilerplate code and get straight to building out your bot's personality and core features. Bolt basically acts as a smart translator, turning Slack's event system into clean, simple listeners in your code.
First things first, you'll need a local Node.js project. Once you've run npm init -y and installed the @slack/bolt package, you're ready to lay down the basic structure.
Responding to Messages and Commands
Most bots spend their time listening for specific keywords or reacting to slash commands. Bolt makes this ridiculously easy.
To have your bot perk up when it hears a certain word, you'll use the app.message() listener. This little guy can listen for a simple string or even a more complex regular expression. For instance, if you want your bot to say hi whenever someone types "hello," the code is as clean as it gets.
const { App } = require('@slack/bolt');

// Initializes your app with your bot token and signing secret
const app = new App({
  token: process.env.SLACK_BOT_TOKEN,
  signingSecret: process.env.SLACK_SIGNING_SECRET
});

// Listens for a specific keyword in messages
app.message('hello', async ({ message, say }) => {
  // say() sends a message to the channel where the event was triggered
  await say(`Hey there <@${message.user}>!`);
});

(async () => {
  // Start your app
  await app.start(process.env.PORT || 3000);
  console.log('⚡️ Bolt app is running!');
})();
Handling slash commands is just as straightforward with app.command(). Let's say you're building a /jira command to quickly create a new ticket. The listener would look something like this:
// Listens for the /jira slash command
app.command('/jira', async ({ command, ack, say }) => {
  // Acknowledge command request within 3 seconds
  await ack();

  const ticketSummary = command.text;
  // Here you would add your logic to call the Jira API
  await say(`Roger that! Creating a Jira ticket with summary: "${ticketSummary}"`);
});
See that ack() call? It's non-negotiable for slash commands. You absolutely must acknowledge Slack's request within three seconds, even if your bot needs more time to figure out the full response.
Listening for Workspace Events
Your bot can do more than just react to direct mentions. It can also respond to things happening across the workspace, like a new person joining a channel. This is where the app.event() listener comes in. A classic use case is automatically welcoming new members.
The
app.event()listener is what elevates a bot from a simple tool to a proactive part of the team's culture. It automates those small but important interactions, like onboarding new folks.
To pull this off, you'll want to listen for the member_joined_channel event.
*   **Event Trigger:** A user joins a channel the bot is in.
*   **Bot Action:** The bot posts a friendly, public welcome message and tags the new user.
*   **Required Scopes:** To make this work, your bot needs the `channels:history` and `chat:write` scopes.
This kind of proactive behavior makes your bot feel like a natural part of the team's daily rhythm. While Bolt.js is fantastic, it's always a good idea to understand the wider world of different chatbot development frameworks to see how other tools handle these kinds of interaction models.
Testing and Debugging Your Bot Locally
Before you unleash your bot on your team, you absolutely need a safe place to kick the tires. A bot that breaks in a live channel is a noisy headache you can easily avoid. This is where local testing becomes your best friend, letting you squash bugs and refine features without disrupting anyone.
The main hurdle is that your development server, running happily on localhost, is invisible to the public internet. Slack’s servers need a way to reach your code to send events like slash commands or mentions. The classic tool for this job is ngrok.
Using Ngrok to Expose Your Local Server
Ngrok is a brilliant little utility that creates a secure tunnel from a public URL straight to your machine. Think of it as a temporary bridge that lets Slack's API knock on your localhost's front door.
Once you have ngrok installed, you can fire it up with a single command that points to the port your Bolt app is listening on—usually port 3000. It will spit out a public HTTPS URL, which you can then paste into your Slack app’s settings under "Event Subscriptions" as the Request URL. Just like that, any event Slack sends will be forwarded right to your local code.
This local feedback loop is non-negotiable for efficient development. It lets you inspect incoming event payloads, log data in real-time, and step through your code with a debugger to fix issues before they ever see the light of day.
At its core, your bot follows a simple but powerful flow: it listens for an event, processes the information, and then sends a response.
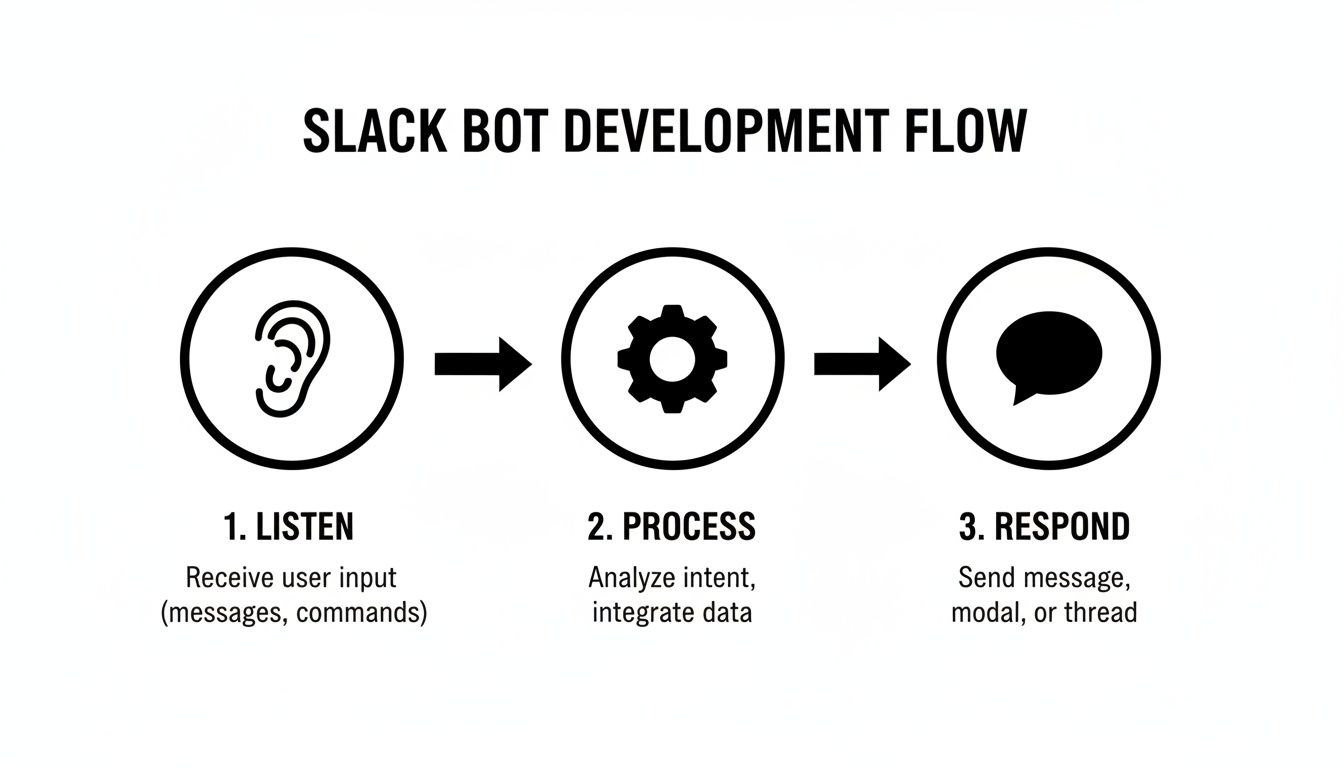
This simple three-step cycle—listen, process, respond—is the fundamental loop your bot will run for every single interaction it handles.
An Easier Alternative: Socket Mode
While ngrok is fantastic, Slack offers an even smoother workflow when you create a bot: Socket Mode. Instead of exposing a public endpoint to receive HTTP requests, your app opens a secure WebSocket connection directly to Slack. All your events stream over this persistent connection, completely bypassing the need for a public URL or any tunneling.
To get it going, just flip the "Enable Socket Mode" switch in your app settings and use a specific App-Level Token in your Bolt configuration. Honestly, this is my go-to method for local development. It’s faster to set up and often more reliable, especially if you're working behind a corporate firewall.
Local Testing Methods Comparison
Choosing the right local development setup depends on your needs. This table compares the two primary methods for testing your Slack bot locally.
| Feature | ngrok (HTTP Tunneling) | Socket Mode |
|---|---|---|
| Connection Type | Public HTTPS endpoint tunnels to your localhost. | Direct, persistent WebSocket connection to Slack's servers. |
| Setup Complexity | Requires installing and running the ngrok command-line tool. | Enabled with a toggle in Slack app settings and an App-Level Token. |
| Firewall Friendliness | Can sometimes be blocked by strict corporate firewalls. | Generally works well behind firewalls as it uses outbound connections. |
| Public URL Required | Yes, ngrok generates a temporary public URL for each session. | No, it completely bypasses the need for a public endpoint. |
| Best For | Quick, one-off tests or when you need a public webhook endpoint. | Day-to-day development, especially in restricted network environments. |
Ultimately, both methods get the job done, but Socket Mode is purpose-built for Slack development and provides a much more streamlined experience.
Deploying Your Slack Bot to a Live Environment

Alright, you've built and tested your bot on localhost. Now it's time for the final leap: moving it to a live server where it can start working for your team 24/7. This isn't just a copy-paste job. Deploying is about giving your bot a secure, reliable, and scalable home.
Your number one priority here is protecting your credentials. The Bot Token and Signing Secret are the keys to the kingdom. If you hardcode them into your source code and that code ever ends up in a public repository, you’ve just handed over control of your bot. It’s a massive security risk, and one that's easily avoided.
The Golden Rule of Secrets Management
This part is non-negotiable: use environment variables. Never, ever store secrets directly in your code.
Environment variables are set up on your hosting platform, not in your code files. Your application then reads these values at runtime. This simple practice keeps your sensitive credentials completely separate from your codebase, which is exactly where they should be.
Every modern hosting provider makes this easy:
*   **PaaS platforms** like [Heroku](https://www.heroku.com/) or [Render](https://render.com/) have a straightforward settings dashboard for adding them.
*   **Serverless environments** like [AWS Lambda](https://aws.amazon.com/lambda/) or [Google Cloud Functions](https://cloud.google.com/functions) have dedicated configuration sections.
*   **Virtual servers** let you set them up directly in your server's shell profile.
By using something like process.env.SLACK_BOT_TOKEN in your code, you're writing portable software. It can run anywhere—dev, staging, production—and it will automatically pull the right credentials for that specific environment.
The goal is to make your deployment artifact—whether it's a container image or a code bundle—completely sterile. It shouldn't contain any sensitive data. It only comes "alive" with its secrets when it's running on the production server.
Finalizing Your Production Setup
With your environment variables safely in place, there's just one last thing to do. Head back to your app’s dashboard on the Slack API site. Find the setting where you put your temporary ngrok URL and swap it out for the permanent URL of your live server. This is how you tell Slack where to send all future events in your production environment.
The Slack bot landscape is absolutely booming. Slackbot itself is evolving to save users up to 90 minutes daily, and with a projected 47 million daily active users by 2026, building secure and efficient bots is more important than ever. Tools like PullNotifier showcase the power of well-deployed bots, threading GitHub PR updates to slash notification spam and boost review speeds by a massive 90%. You can read more about Slack's AI-driven evolution on Salesforce News.
And if you want to take your deployment process to the next level, check out our guide on using GitHub Actions to send Slack notifications.
Common Questions When Building a Slack Bot
As you get ready to take your bot live, a few common questions always seem to pop up. Nailing these details is the difference between a bot that just works and one that people actually love using.
What About Slack’s Rate Limits?
One of the first real-world hurdles you'll hit is Slack's rate limits. If your bot gets a little too chatty and sends messages too quickly, Slack will temporarily put it in a timeout. The best way to handle this is to plan for it from the start.
Build exponential backoff logic right into your code. It's a simple concept: if a request fails, your bot waits a moment before trying again. If it fails a second time, it doubles the waiting period, and so on. This prevents you from spamming Slack's API and keeps your bot running smoothly.
How Do I Make It User-Friendly?
Another big one is designing interactions that feel natural. No one should have to guess what your bot is capable of or how to use it. A few simple things can make a world of difference:
*   **Have a help command.** A straightforward `/your-bot help` that lists out what it can do is a must-have.
*   **Keep the language clear.** Drop the jargon. Your bot's responses should be simple and easy for anyone to understand.
*   **Always give feedback.** When a user runs a command, the bot should acknowledge it. Even a simple "Got it, working on your request..." is better than silence.
Preparing for App Distribution and a Great User Experience
Thinking about sharing your bot with other teams? That's when the polish really matters. You need to anticipate edge cases and make sure your bot fails gracefully with helpful error messages. A bot that just stops working without explanation is frustrating and will get uninstalled fast.
A well-designed bot feels like a helpful teammate, not a clunky tool. Focus on clear communication and predictable behavior to build trust and get people excited to use it. This is a critical final step when you slack create bot solutions for others.
Finally, always put yourself in the user's shoes. The best way to do that? Get fresh eyes on it. Ask a few teammates who weren't involved in the development process to test it out. Their feedback will be gold for spotting confusing commands or unclear responses. A little user testing goes a long, long way.
At PullNotifier, we specialize in creating seamless, quiet, and powerful integrations. Our tool cuts through the noise of GitHub notifications to deliver focused, actionable pull request updates directly in Slack. Learn how PullNotifier can accelerate your team's review process.