- Published on
A Developer's Guide to the Git Pull Request
- Authors

- Name
- Gabriel
- @gabriel__xyz
A git pull request is less of a command and more of a conversation starter. It's a feature you'll find on platforms like GitHub or GitLab that lets you formally propose changes to a project. Think of it as politely asking the project maintainers, "Hey, I've done some work here. Can you please pull it into the main codebase?"
The Core Concept of a Git Pull Request
At its heart, a pull request (or PR) is all about collaboration and quality control. It’s the gatekeeper that protects your project’s most important code.
Imagine a team of authors writing a book together. If everyone edited the master document at once, it would be chaos. Instead, each author works on their chapter in a separate copy. When a chapter is ready, they don’t just slot it in—they submit it for review.
That submission is the pull request. It gives editors and other authors a chance to read the proposed chapter, suggest edits, and discuss improvements before it becomes a permanent part of the book. This structured process stops errors in their tracks, keeps the writing style consistent, and makes the final product so much better.
A Safe Space for Code Review
The main job of a pull request is to create a dedicated space for code review. When you open a PR, you’re putting your changes on display for your teammates and inviting them to take a close look. It creates a transparent forum where every single line of code can be discussed.
This review process is critical for a few reasons:
*   **Knowledge Sharing:** Junior developers get priceless feedback from seniors, and seniors get a fresh perspective on their own solutions.
*   **Bug Prevention:** A second or third pair of eyes is incredible at spotting logical flaws, typos, or edge cases the original author might have overlooked.
*   **Maintaining Standards:** Teams can enforce coding styles and best practices, making sure the codebase stays clean, organized, and easy to work with down the line.
The Guardian of Your Main Branch
One of the most vital roles a pull request plays is acting as the bouncer for your project's main branch (often called main or master). This branch is the definitive, stable version of your software—the one that gets deployed to users.
Committing untested or unreviewed code directly to it is a recipe for disaster. It can introduce bugs, break features, and grind the whole team to a halt. A pull request keeps those changes isolated on a separate branch, letting them be fully tested and reviewed before they ever get near the main codebase.
A pull request isn't just about code; it's about communication. It's the central hub where developers align on changes, debate technical approaches, and collectively take ownership of the project's health.
This model is so fundamental to modern software development that a huge number of projects rely on it. In fact, studies show that about 75% of developers use Git commands to sync their work daily. On top of that, roughly 70% of software projects require automated tests to pass on every single pull request before it can be merged.
This really drives home how pull requests serve as a critical quality checkpoint. To fully grasp the fundamentals, you can dive deeper into a great explanation of this core concept: What Is a Pull Request.
Anatomy of a Modern Pull Request
To really understand what's happening inside a PR, it helps to break it down into its key components. This quick summary shows the essential parts of a pull request and their functions, helping you visualize its structure at a glance.
| Component | Purpose | What to Look For |
|---|---|---|
| Title & Description | Explains the "what" and "why" of the change. | A clear summary of the changes and the problem it solves. |
| Source & Target Branches | Shows where the changes are coming from and where they're going to. | Is the target branch correct? (e.g., main, develop) |
| Commit History | Lists all the individual commits included in the PR. | Clean, descriptive commit messages that tell a story. |
| File Diffs | The "red and green" view showing exactly what lines of code were added or removed. | This is the core of the code review. Look for logic flaws and style issues. |
| Comments & Discussion | The conversation thread where reviewers ask questions and suggest changes. | Active discussion and resolution of feedback. |
| CI/CD Status Checks | Automated checks for tests, builds, and linting. | Green checkmarks! Ensures the changes meet quality standards. |
| Reviewers & Assignees | The people responsible for reviewing and merging the code. | Are the right people assigned to review the changes? |
Each of these pieces works together to create a complete picture of the proposed change, making the review process transparent, collaborative, and effective.
How to Create Your First Pull Request
Now that you get the "why" behind a git pull request, let's dive into the "how." Making your first PR might feel a little daunting, but it's really just a few logical steps. We'll start with what you do on your own machine, then move over to the web interface where the magic happens.
Think of it like getting a package ready to ship. First, you gather and pack your items (your code changes). Then, you put them in a clearly labeled box (a new branch). Finally, you send it off to its destination (the remote repo) with a clear note for the recipient (your pull request).
Step 1: Working on Your Local Machine
It all starts on your computer. Before you can propose any changes, you need to make them in a safe, isolated space. This is where branches are your best friend.
*   **Create a New Branch:** Rule number one: never work directly on the `main` branch. Always spin up a new branch for your feature or fix. This keeps the main codebase stable and your changes neatly contained. A descriptive name like `fix-user-login-bug` or `feature-add-profile-page` works wonders.
*   **Make Your Code Changes:** This is the fun part—writing new code, squashing a bug, or refactoring something that's been bugging you. Take your time and make sure everything is working as it should.
*   **Commit Your Changes:** A commit is like a snapshot of your work. Each one should be a small, logical chunk of progress. Write a clear, concise commit message that explains what you did, something like, "Fix validation error on login form."
*   **Push Your Branch:** Once you've committed your changes locally, you need to push them up to the remote repository (like [GitHub](https://github.com/)). This makes your branch available to everyone else and sets the stage for opening a pull request.
Step 2: Opening the Pull Request in the Web Interface
With your branch pushed, it's time to head over to your repository on GitHub, GitLab, or whatever platform you use. This is where you officially propose your changes to the team.
Right after you push a new branch, you'll usually see a big yellow banner on your repository's homepage with a "Compare & pull request" button. That's your shortcut. If you don't see it, no big deal—just click the "Pull requests" tab and hit "New pull request."
This brings you to the "Open a pull request" screen. You'll see a comparison, or "diff," showing exactly what's different between your branch and the target branch (usually main). It's a great final chance to make sure you’re merging the right code into the right place.
Step 3: Crafting a Compelling PR Description
This is easily the most important part of the whole process. Your PR's title and description are your main line of communication with your reviewers. A lazy description causes confusion and slows things down, but a well-written one can get your code approved in record time.
A great pull request description answers three simple questions for your reviewers:
*   **What problem does this solve?** Give them some context. If there's a ticket in your project management tool, link to it.
*   **How was this problem solved?** Briefly explain your technical approach. Did you add a new library? Refactor a key component? Let them know.
*   **How can a reviewer test these changes?** Provide clear, step-by-step instructions so a teammate can easily confirm your code works as expected.
A pull request is really a request for someone else's time and attention. A detailed, well-written description respects that time and makes the reviewer's job easier, which means faster approvals and better feedback for you.
For teams looking to get this right every time, using pull request templates is a game-changer. These templates pre-fill the description with sections for context, implementation details, and testing steps, so you never miss a beat.
Step 4: Assigning Reviewers and Finalizing
The last step is to loop in the right people. Over on the right-hand side of the page, you'll see options to add Reviewers and Assignees.
*   **Reviewers:** These are the people you want feedback from. Pick teammates who know the part of the code you're working on or who can offer a fresh perspective.
*   **Assignees:** This is usually the person responsible for the work—which is most likely you, the author.
You can also add labels like bug, feature, or needs-testing to keep things organized. Once everything is set, click that "Create pull request" button. And that's it! Your changes are officially proposed and ready for discussion.
The Art of Constructive Code Review
A Git pull request isn't just a technical step; it's a conversation. Once you submit a PR, its success rides on the quality of that conversation just as much as the quality of the code. This is where the whole process shifts from a dry procedure into a collaborative art form.
Think of it less as a hunt for mistakes and more as a shared mission to build a better product. It’s a powerful moment for mentorship, for passing on knowledge, and for building a sense of collective ownership over the codebase.
The scale of this collaborative model is huge. GitHub, the main hub for pull request workflows, soared past 100 million developers in early 2023. This massive global community shows just how central PRs have become for managing code and keeping projects stable across every industry imaginable. You can dig into these trends to see the full impact on how modern development teams operate.
Giving Feedback That Helps, Not Hinders
For the reviewer, the goal is simple: give feedback that empowers the author. You're trying to help them improve their work and grow as a developer, not just demand changes or leave blunt, critical comments that shut down the conversation.
It all starts with the right tone.
*   **Ask Questions, Don’t Make Demands:** Instead of "Change this to a `map` function," try framing it as a question: "What was your thinking behind using a `for` loop here? I wonder if a `map` function might be a bit more readable." This opens the door for a discussion.
*   **Explain the ‘Why’:** Don't just point out a problem; explain its impact. For example, "This approach could lead to a memory leak under heavy load because..." This simple addition turns a correction into a genuine learning opportunity.
*   **Balance Criticism with Encouragement:** Always find something positive to highlight. A quick "Great job on the test coverage here!" or "I really like how you simplified this logic" makes the tougher feedback much easier to swallow.
The goal of a code review is to improve the code, not to prove you're smarter than the author. Approach every comment with empathy and the genuine intention to help your teammate succeed.
Getting this balance right is what separates a good team from a great one. For a deeper dive, our ultimate guide to constructive feedback in code reviews has even more actionable strategies.
Receiving Feedback Gracefully and Effectively
On the flip side, getting criticism on work you’ve poured hours into can be tough. The trick is to separate your ego from your code. See the feedback for what it is: a gift. It's a free chance to learn from a colleague's experience and unique perspective.
Here’s how to handle feedback like a pro:
- Assume Good Intent: Your teammates are on your side. Work from the assumption that they’re trying to help the project and you, even if the delivery is a little rough around the edges.
- Seek to Understand: If a comment isn’t clear, just ask. A simple "Could you give me an example of what you mean?" can save you from a ton of misunderstanding and wasted time.
- Don't Argue—Discuss: If you disagree with a suggestion, don't get defensive. Calmly explain your reasoning and stay open to finding a middle ground. The best solution often comes from a healthy back-and-forth.
- Show Gratitude: A simple "Thanks for catching that!" or "Good point, I'll update it" goes a long way. It acknowledges the reviewer's effort and helps build a positive review culture.
Shifting from Gatekeeping to Growth
When it all comes together, a world-class pull request process stops being a simple quality gate and becomes an engine for team growth. Every comment, every suggestion, and every resolved discussion strengthens not just the code, but the skills and relationships of the people behind it.
When everyone commits to this collaborative mindset, the pull request becomes the very heart of a high-performing engineering team. It’s where standards are upheld, knowledge is shared, and great software gets built.
Mastering Advanced Pull Request Workflows
Once you’ve got the hang of creating and reviewing a basic git pull request, it’s time to level up. The real magic happens when you start exploring the advanced workflows that separate the pros from the rest. These strategies are all about working smarter, keeping your project history clean, and making collaboration seamless, even as your team and projects grow.
This is where we move beyond the simple “propose and merge” mindset. It’s about being intentional with how your changes get integrated, making choices that will pay off for the long-term health and readability of your codebase.
Untangling Merge Conflicts
Sooner or later, you'll hit the dreaded message: "This branch has conflicts that must be resolved." Don't panic. Merge conflicts are a totally normal part of working on a team, not a sign you did something wrong. They just mean your changes have overlapped with someone else's recent work on the target branch.
Fixing them is a straightforward process:
- Sync Your Local Branches: First things first, pull the latest changes from the target branch (like
main) down to your local machine. You need the most up-to-date version to work with. - Initiate the Merge: From your feature branch, run the command to merge
maininto it. Git will immediately point out the exact files—and even the specific lines—that are clashing. - Resolve Manually: Pop open the conflicting files in your editor. You’ll see Git’s markers (
<<<<<<<,=======,>>>>>>>) showing you the different versions of the code. Your job is to play editor: pick the right code, delete what’s not needed, and remove the markers. - Finalize the Merge: Once you’ve fixed all the conflicts, just stage the changes and commit them. This creates a special "merge commit" that signals to Git you've sorted everything out. Now you can push your updated branch.
Merge, Squash, or Rebase? Choosing Your Strategy
When you’re ready to get your pull request into the main codebase, you usually have three ways to do it. The path you choose really shapes your project's Git history, so knowing the difference is key.
Each strategy has its place, and the right choice often comes down to your team's workflow and how you want your project's history to read.
Choosing Your Merge Strategy
This table breaks down the three main merge strategies to help you decide which one best fits your team's needs.
| Merge Strategy | Git History Result | When to Use It |
|---|---|---|
| Merge Commit | Preserves all commits from your feature branch, adding a new "merge commit" that ties the histories together. The history is complete but can get noisy. | When you want to keep the full, detailed history of every single commit made on a feature branch. |
| Squash and Merge | Combines all of your feature branch's commits into a single, clean commit on the main branch. | Perfect for keeping the main branch history tidy and readable. It hides all the "work-in-progress" commits. |
| Rebase and Merge | Replays your feature branch's commits on top of the latest version of the target branch, creating a perfectly linear, easy-to-follow history. | When you want the cleanest possible history that looks like all the work was done in a straight line. Use with caution on shared branches. |
Ultimately, there's no single "right" answer. The goal is to pick a strategy that your team agrees on—one that creates a Git history that’s useful, tells a clear story, and is easy for everyone to understand. For larger teams, applying principles from Agile project management methodologies can help align your merge strategy with your overall delivery process.
Embracing Draft Pull Requests
Ever wanted to get a second pair of eyes on some code that’s not quite ready for a formal review? That’s exactly what Draft Pull Requests are for. By marking a PR as a "draft," you’re sending a clear signal to your team: "This is a work-in-progress, please don't merge it!"
This is a great way to get early feedback on your approach before you go too far down a certain path. It prevents accidental merges and encourages collaboration from the very start. To make sure the right people see your draft PR, you can learn how to automatically assign reviewers in GitHub and get that crucial early input.
Connecting to CI/CD Pipelines
These days, modern pull requests are plugged directly into automation. Continuous Integration/Continuous Deployment (CI/CD) pipelines can automatically run your test suite, check your code for style issues, and even perform security scans every time you push a new commit.
You'll see these automated checks as status indicators right on the pull request page. This is a massive time-saver for reviewers. They no longer have to pull down the code and run tests locally; they can see at a glance whether your changes are safe and meet the project's quality standards. It makes the whole review process faster, more reliable, and a lot less painful.
The infographic below shows how a pull request moves from submission through the feedback loop until it's finally ready to merge.
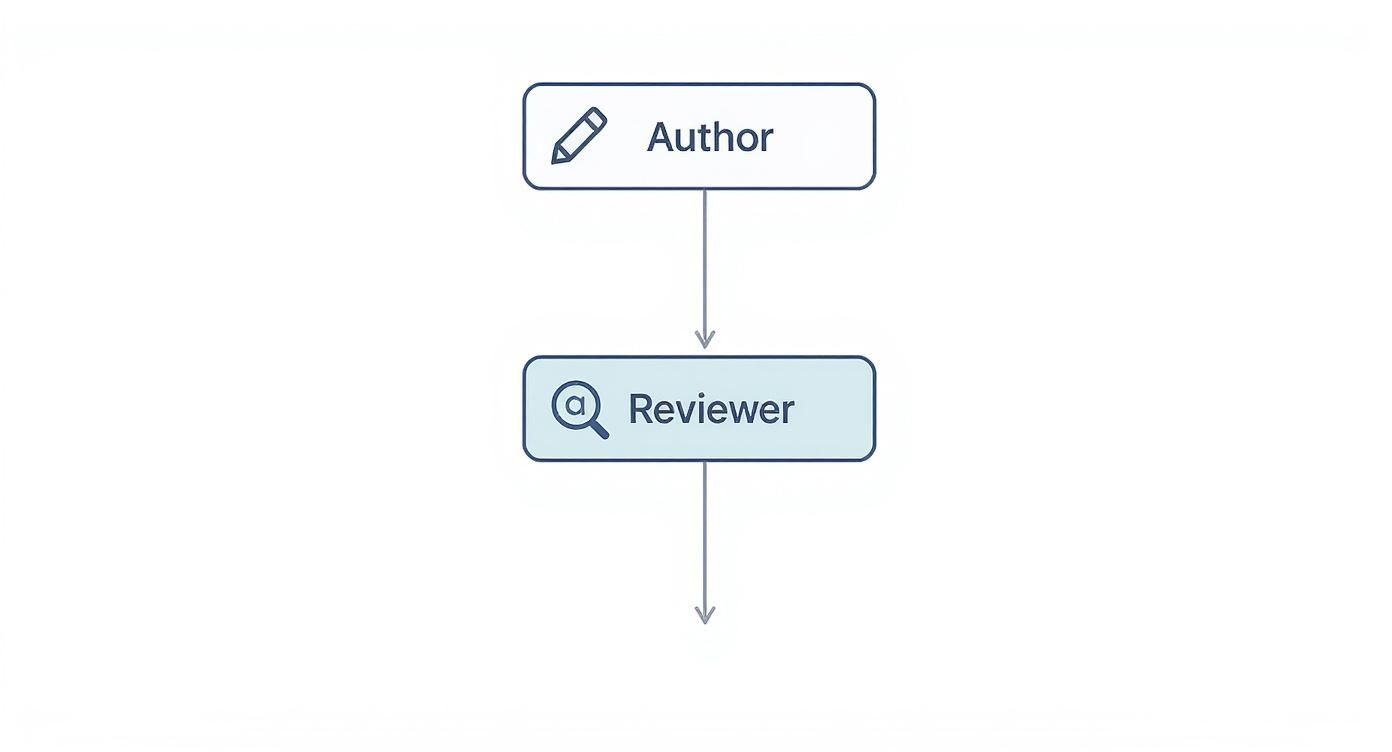
It really highlights that back-and-forth cycle where feedback leads to new commits, pushing the code closer and closer to that final approval.
How AI Is Transforming the Pull Request
The good old git pull request, a process that’s been central to how we code together for years, is getting a serious upgrade. Artificial intelligence is jumping into the mix, not to kick developers out, but to act as a hyper-efficient assistant. It’s here to automate the boring stuff and speed up the entire review cycle. We're seeing new tools pop up that are fundamentally changing how we write, review, and merge code.
This shift is tackling some of the most frustrating bottlenecks in software development head-on. Manual tasks, writing out lengthy descriptions, and the endless waiting game for reviews can grind even the sharpest teams to a halt. AI is designed to cut through that friction, letting developers get back to solving tricky problems instead of drowning in administrative work.
Automating the Tedious Work
One of the most immediate ways AI is making a difference is by taking over the repetitive, time-sucking parts of creating a pull request. Instead of developers burning precious minutes trying to write the perfect summary, AI tools can now whip one up for them.
*   **AI-Generated Descriptions:** Modern AI can look at the code changes (the "diff") in a PR and automatically generate a clear, concise summary. This gives reviewers instant context on what the changes are all about.
*   **Intelligent Reviewer Suggestions:** In big organizations, figuring out who should review your code can feel like a shot in the dark. AI can analyze the changed files, see who has the most experience in that part of the codebase, and suggest the best people for the job.
This kind of automation doesn't just save time; it also drives up the quality and consistency of pull requests across the entire team.
AI in the pull request workflow is about augmenting human intelligence, not replacing it. It frees up developers' cognitive capacity to focus on the creative and critical thinking aspects of code review that machines can't replicate.
The numbers back this up. Take GitHub Copilot, for example. In enterprise settings, it slashed the average time to open a pull request from 9.6 days to just 2.4 days. That's a massive 75% reduction. On top of that, it made the code review process about 15% faster, helping teams ship better code, quicker. You can dig into more of the data on how Copilot is changing development workflows.
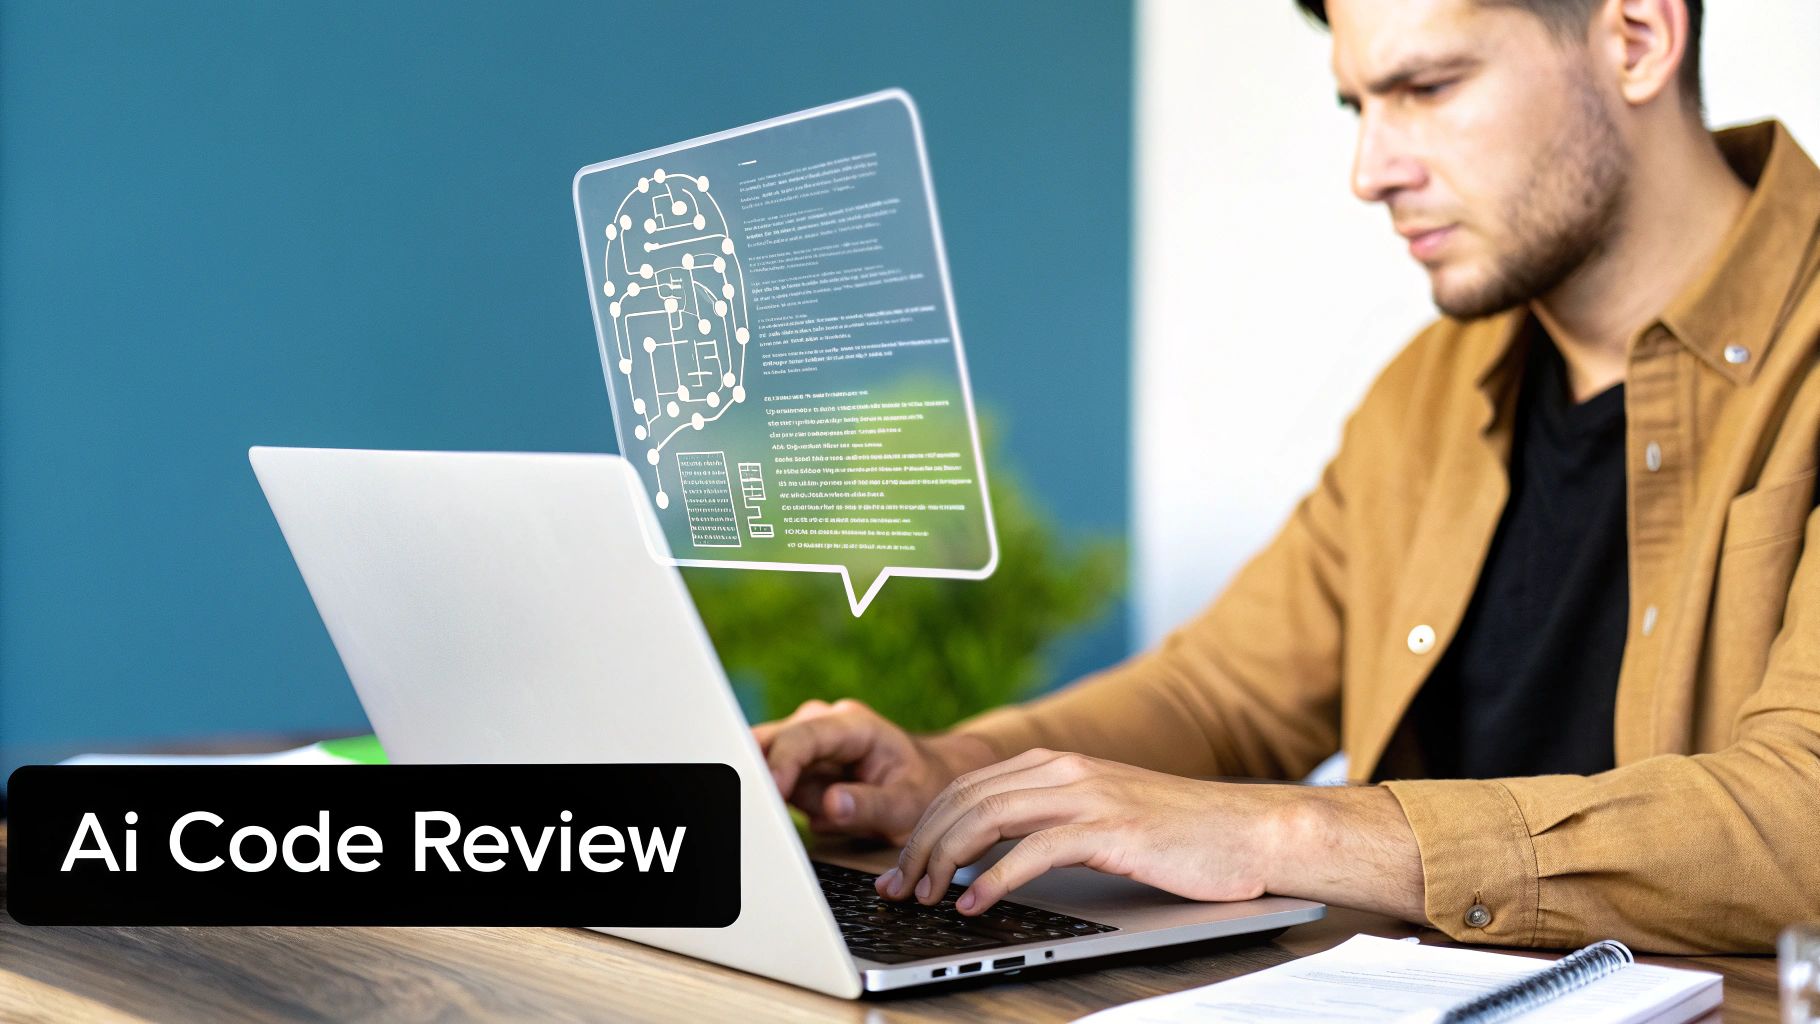
A First Pass with AI Code Review
Beyond just setting up the PR, AI is also stepping up as a preliminary reviewer. Before a human even gets a notification, an AI can do a first-pass analysis to catch common mistakes and potential bugs.
This initial check serves as a powerful quality filter, sniffing out issues like:
*   Deviations from the team’s coding standards.
*   Potential security holes.
*   Inefficient code or logical errors.
By flagging these things early, the AI ensures that when a human reviewer finally steps in, they can focus their brainpower on the bigger picture—like the architectural choices and overall logic—instead of getting bogged down in typos and simple mistakes. It elevates the quality of human reviews and makes the entire git pull request process far more effective, leading to a stronger, more reliable codebase.
Answering Your Top Pull Request Questions
As you start working with pull requests more, you’re bound to run into a few common questions. These are the classic hurdles and head-scratchers that pop up for everyone, whether you're a seasoned pro or just getting started. This section is your go-to FAQ for cutting through the confusion.
Think of it as a quick reference guide. We'll clear up the difference between similar-sounding commands, share strategies for tricky situations, and walk through the practical steps for fixing common headaches.
What Is the Difference Between Git Pull and a Pull Request
This is hands-down the most frequent point of confusion for folks new to Git and platforms like GitHub. They sound alike, but they do completely different jobs in totally separate contexts. One is a command you type, and the other is a core feature of how teams collaborate.
A git pull is a command you run locally on your machine. Its only job is to grab the latest changes from a remote repository and immediately merge them into your current branch. It’s a direct, forceful way to get your local code up to speed with what the team has done.
A pull request, however, isn’t a Git command at all. It’s a feature built into platforms like GitHub, GitLab, and Bitbucket.
Here’s a simple way to think about it:
git pullis you taking updates from the main repo. A pull request is you offering your updates to the main repo for others to approve. One is a personal sync; the other is a public proposal.
The pull request is what kicks off a conversation. It gives your team a dedicated space to review your code, leave feedback, and let automated checks run before anything gets merged into the main codebase. It’s the formal, collaborative process that keeps quality high and everyone in the loop.
How Do You Handle a Large and Complex Pull Request
The best way to handle a massive pull request is to not create one in the first place. Seriously. Small, focused PRs are way easier and faster to review, which means you get feedback quicker and fewer bugs make it through. Try to break down big features into smaller, self-contained chunks that can be reviewed and merged one by one.
But sometimes, you’re the one stuck reviewing a beast of a PR. When that happens, don't even try to tackle it all at once.
Here’s a better approach:
- Ask for a Breakdown: Your first move should always be to communicate. Politely ask the author if they can split the PR into a few smaller, more logical ones. This almost always makes life better for everyone involved.
- Review Commit by Commit: If splitting it isn't an option, use your platform's tools to walk through the changes one commit at a time. This helps you follow the author’s train of thought and see how they built the solution piece by piece.
- Focus on One Area at a Time: Zero in on a single file, function, or logical change. Once you’ve reviewed it, mark that file as "viewed" and then move on. This keeps you from feeling overwhelmed and helps you give a much more thorough review.
- Request a Walkthrough: Don't ever hesitate to ask the author for a quick call or a written summary to explain the high-level changes. Getting that context upfront can make the line-by-line review go so much faster.
What Should I Do If My Pull Request Has a Merge Conflict
Don't panic! Merge conflicts aren't errors; they're just a normal part of working on a team. A conflict simply means that someone else changed the exact same lines of code in the target branch after you created your feature branch. Learning to fix them is a core developer skill.
The responsibility for sorting out a merge conflict almost always lands on the author of the pull request, since they know their own changes best.
Here’s the standard, step-by-step way to resolve a conflict:
- Update Your Local Main Branch: First, switch over to your local
mainbranch (or whatever your target branch is called) and rungit pull. This makes sure you have the absolute latest version of the code. - Start the Merge: Hop back to your feature branch. Now, run the command to merge the updated
mainbranch into your feature branch (e.g.,git merge main). Git will pause and tell you exactly which files have conflicts. - Resolve the Conflicts: Open the conflicting files in your code editor. You’ll see special markers (
<<<<<<<,=======,>>>>>>>) that show you the clashing code—your version versus the version frommain. Your job is to manually edit the file to combine the changes correctly, then delete those markers. - Commit and Push the Fix: Once you’ve sorted out all the conflicts, stage the fixed files with
git add .and create a new commit usinggit commit. A simple commit message like "Resolve merge conflict" works great. Finally, push your updated branch. This will automatically update the open pull request with your fix.
Tired of missing important pull request updates in the chaos of your inbox and noisy Slack channels? PullNotifier delivers clean, real-time PR notifications right where your team works. Cut through the noise, accelerate your code reviews, and keep your development cycle moving smoothly. See how PullNotifier works.