- Published on
branching and merging: Master Git Strategies for Teams
- Authors

- Name
- Gabriel
- @gabriel__xyz
Think of your main codebase as the master copy of a novel. Branching is like giving a writer a photocopy to draft a new chapter.They can scribble, experiment, and rewrite as much as they want without messing up the original manuscript. Merging is when that polished, finished chapter gets officially added back into the main story. This simple idea is the bedrock of modern software development.
Why Branching Is Your Most Important Tool

At its core, branching gives you an isolated workspace. When you kick off a project, Git creates a default branch, usually called main or master. This branch is the official, stable version of your code—it's the single source of truth everyone on the team depends on.
Making changes directly to this main line of development is playing with fire. One little mistake could break the entire application and bring everyone's work to a screeching halt. This is precisely where branching and merging come in, creating a critical safety net for innovation.
The Power of Isolated Development
Let's say a developer needs to build a new user login page. Instead of coding directly on main, they create a new branch called feature/user-login. At the moment of creation, this new branch is an identical clone of main.
From that point on, all the work for this new feature happens only in that isolated branch. This separation is a game-changer for a few key reasons:
*   **Safe Experimentation:** The developer can add, delete, and refactor code without a shred of fear. Nothing they do can disrupt the stable, production-ready codebase.
*   **Parallel Workflows:** While one developer is busy on the login page, another can spin up a `bugfix/fix-typos` branch to correct a few errors, and a third can get started on a `feature/profile-page` branch. Everyone works in parallel without tripping over each other.
*   **Clear Organization:** Each branch represents a single, specific task. This makes it incredibly easy to track progress and understand the purpose of every change in the project's history.
For any team project, this structure isn't just nice to have; it's non-negotiable. It prevents the chaos of developers overwriting each other's work and ensures the main codebase stays clean and ready to deploy at all times.
A branch is essentially a movable pointer to a commit. It’s a lightweight, temporary line of development that allows you to diverge from the main project history to work on something new, whether it’s a feature, a bug fix, or an experimental idea.
Completing the Workflow
Once the new login page is built, tested, and working perfectly within its own branch, the developer is ready to bring it back into the main project. This is the merging step. By merging the feature/user-login branch into main, all the new commits and code changes are woven seamlessly into the official codebase.
After a successful merge, the feature branch has served its purpose and can be deleted to keep the repository tidy. This cycle—branch, develop in isolation, and merge when complete—is the foundational rhythm of modern software engineering. It’s what allows teams to build complex applications safely and efficiently.
Choosing the Right Branching Model for Your Team
Once you’ve got the hang of the basic branch-and-merge cycle, the next logical question is: how do we organize all of this? The way a team manages its branches can make or break its workflow, impacting everything from how fast you ship to how stable your code is. This isn't just a technical choice; it's about finding a rhythm that fits your team's size, your project's goals, and your release cadence.
There are tons of ways to structure your branches, but two models have really come to dominate the conversation, each with a completely different philosophy: GitFlow and Trunk-Based Development. Let's break them both down so you can figure out which is the right fit.
The Structured World of GitFlow
GitFlow is a highly structured branching model where every branch has a specific job. It was built to bring a sense of order to projects with scheduled release cycles, like mobile apps or traditional software that ships on a fixed timeline.
Think of it like an impeccably organized library. You have the main branch (the archive of published books), a develop branch (the manuscript currently being written), and then separate sections for new chapters (feature branches), final edits (release branches), and urgent corrections (hotfix branches).
This clear separation of duties creates a really robust framework:
*   **`main` Branch:** This branch is sacred. It holds only production-ready, tagged releases. No direct development ever, *ever* happens here.
*   **`develop` Branch:** This is the integration hub where all completed features are merged. It’s a living preview of the next release.
*   **Feature Branches:** Developers create these from `develop` to work on new features in isolation (e.g., `feature/user-profile`).
*   **Release Branches:** Once `develop` has all the features for the next version, a `release` branch is cut. This is where you’ll do final bug fixes and documentation updates, freezing feature development.
*   **Hotfix Branches:** If a critical bug sneaks into production, a `hotfix` branch is created directly from `main` to patch it up immediately.
This model gives you incredible stability and clear organization, making it perfect for projects that need to support multiple versions in the wild. The downside? All that structure can slow down teams that are trying to move fast and deploy continuously.
The Lean Approach of Trunk-Based Development
On the flip side, Trunk-Based Development (TBD) is a much simpler, faster-paced model. The core idea is that all developers work in very short-lived branches that get merged directly into a single main branch, often called the "trunk." We're talking about integrating small changes frequently—often multiple times a day.
Trunk-Based Development prioritizes a constant flow of small, incremental updates over large, isolated feature work. The goal is to keep the main branch always green and deployable, enabling continuous delivery.
Instead of long-running feature branches that can drift miles away from the main codebase, developers work on tasks that take no more than a few days. This frequent integration is a game-changer because it dramatically reduces the chance of hitting those soul-crushing merge conflicts. TBD is the go-to model for teams practicing DevOps and continuous integration/continuous delivery (CI/CD), as it keeps the entire team synced up and the code ready to ship at a moment's notice.
This approach demands a mature testing culture and often leans heavily on feature flags—a way to merge new code into the trunk but keep it hidden from users until it's battle-tested and ready. To see how this works in more complex setups, you can explore different monorepo branching strategies for teams.
Comparing the Models Head-to-Head
So, GitFlow or TBD? The right answer almost always depends on your project's context. One large-scale empirical study that analyzed over 3.6 million builds found that while feature-based development (like GitFlow) is more common, each model shines in different areas. Projects with feature branching had higher delivery frequency and fewer defects, whereas trunk-based development came out on top for change lead time and recovery speed.
To help you see the differences at a glance, here’s a direct comparison.
GitFlow vs Trunk-Based Development Comparison
The choice between GitFlow and Trunk-Based Development comes down to a trade-off between structure and speed. GitFlow offers a safety net with its multiple layers of branches, making it a solid choice for projects with formal releases. TBD, on the other hand, is built for velocity, supporting teams that want to integrate and deploy code as quickly as possible.
| Attribute | GitFlow | Trunk-Based Development |
|---|---|---|
| Pace | Slower, more deliberate releases. | Fast, continuous integration. |
| Complexity | High; multiple long-lived branches. | Low; one main branch and short-lived feature branches. |
| Best For | Projects with scheduled releases, versioning. | Web apps, SaaS, CI/CD environments. |
| Merge Conflicts | Can be large and complex. | Fewer and smaller, due to frequent merges. |
| Code Review | Happens on large, completed features. | Happens on small, incremental changes. |
Ultimately, there’s no single "best" strategy. The right branching model is the one that helps your team ship high-quality code efficiently and confidently, without getting in the way.
Your Practical Guide to Essential Git Commands
https://www.youtube.com/embed/8JJ101D3knE
Alright, now that we’ve covered the high-level branching models, it’s time to get our hands dirty. This is where the theory meets the terminal.
Think of this section as your practical bootcamp for the Git commands you’ll be using every single day. We're going to walk through the entire lifecycle of a feature branch, from the moment you create it to the final merge back into the main codebase. No dry, academic stuff here—just the commands you need to get work done.
Creating and Developing on a New Branch
Everything kicks off by creating a safe, isolated space for your new feature or bug fix. The whole point is to leave the stable main branch alone while you tinker.
Create and Switch to a New Branch: You could run two commands, but why? This single, efficient command creates a new branch and immediately puts you on it. It's the standard first step for any new piece of work. git checkout -b feature/new-user-profile This one-liner creates a new branch called
feature/new-user-profileand makes it your active working environment. Simple.Make Your Changes: Now you’re free to do your thing. Write code, add new files, tweak existing ones. For our example, let's pretend you just created a file named
profile.html.Stage and Commit Your Work: Once you've hit a good stopping point—maybe you’ve finished a small, logical chunk of the feature—it's time to save your progress. This is always a two-step dance in Git: first you stage your changes, then you commit them with a message. git add profile.html git commit -m "feat: Add initial structure for user profile page"
git addtells Git, "Hey, I want to include these specific changes in my next snapshot." Then,git commitactually saves that snapshot to your branch's history, stamped with a clear message explaining what you did.
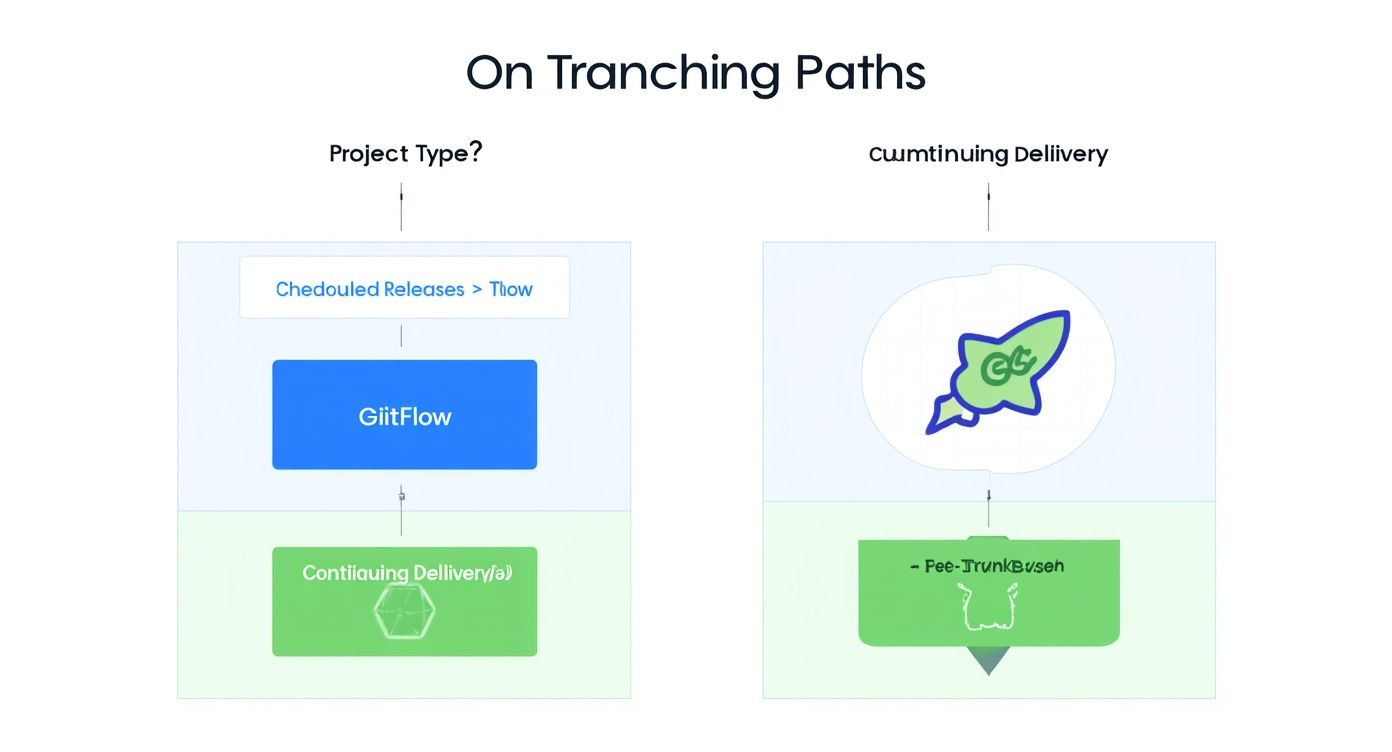
This decision tree gives you a great visual for picking a branching model. If you’re shipping on a predictable schedule, GitFlow’s structure is your friend. If you’re all about pushing code out constantly, Trunk-Based Development is the way to go.
Sharing and Integrating Your Work
Okay, you've made some commits locally. Now it's time to share that work with the rest of the team for feedback and, eventually, get it merged.
- Push Your Branch to the Remote Repository: Right now, your new branch only exists on your computer. To make it visible to your teammates and kick off a pull request, you need to push it up to the central repository (usually called
origin). git push -u origin feature/new-user-profile That-uflag is a handy shortcut. It sets up a tracking connection, so the next time you push from this branch, you can just typegit push.
At this point, you'd head over to a platform like GitHub, GitLab, or Bitbucket and open a Pull Request (PR). This is what starts the code review process, where your teammates can look over your changes, leave comments, and give their approval.
- Merge Your Changes: Once your PR gets the green light, it’s time to merge your feature into the main codebase. First, hop back over to your target branch (let's say it's
main) and make sure you have the latest version. Then, run the merge. git checkout main git pull origin main git merge feature/new-user-profile This command grabs all the commits from your feature branch and weaves them right into themainbranch, officially completing the workflow.
Mastering these commands gives you the confidence to handle pretty much any branching scenario. And once you've got the basics down, you can look into other quality-of-life improvements, like setting up credential management in Git CLI to stop typing your password all the time.
How to Resolve Merge Conflicts Without the Headache
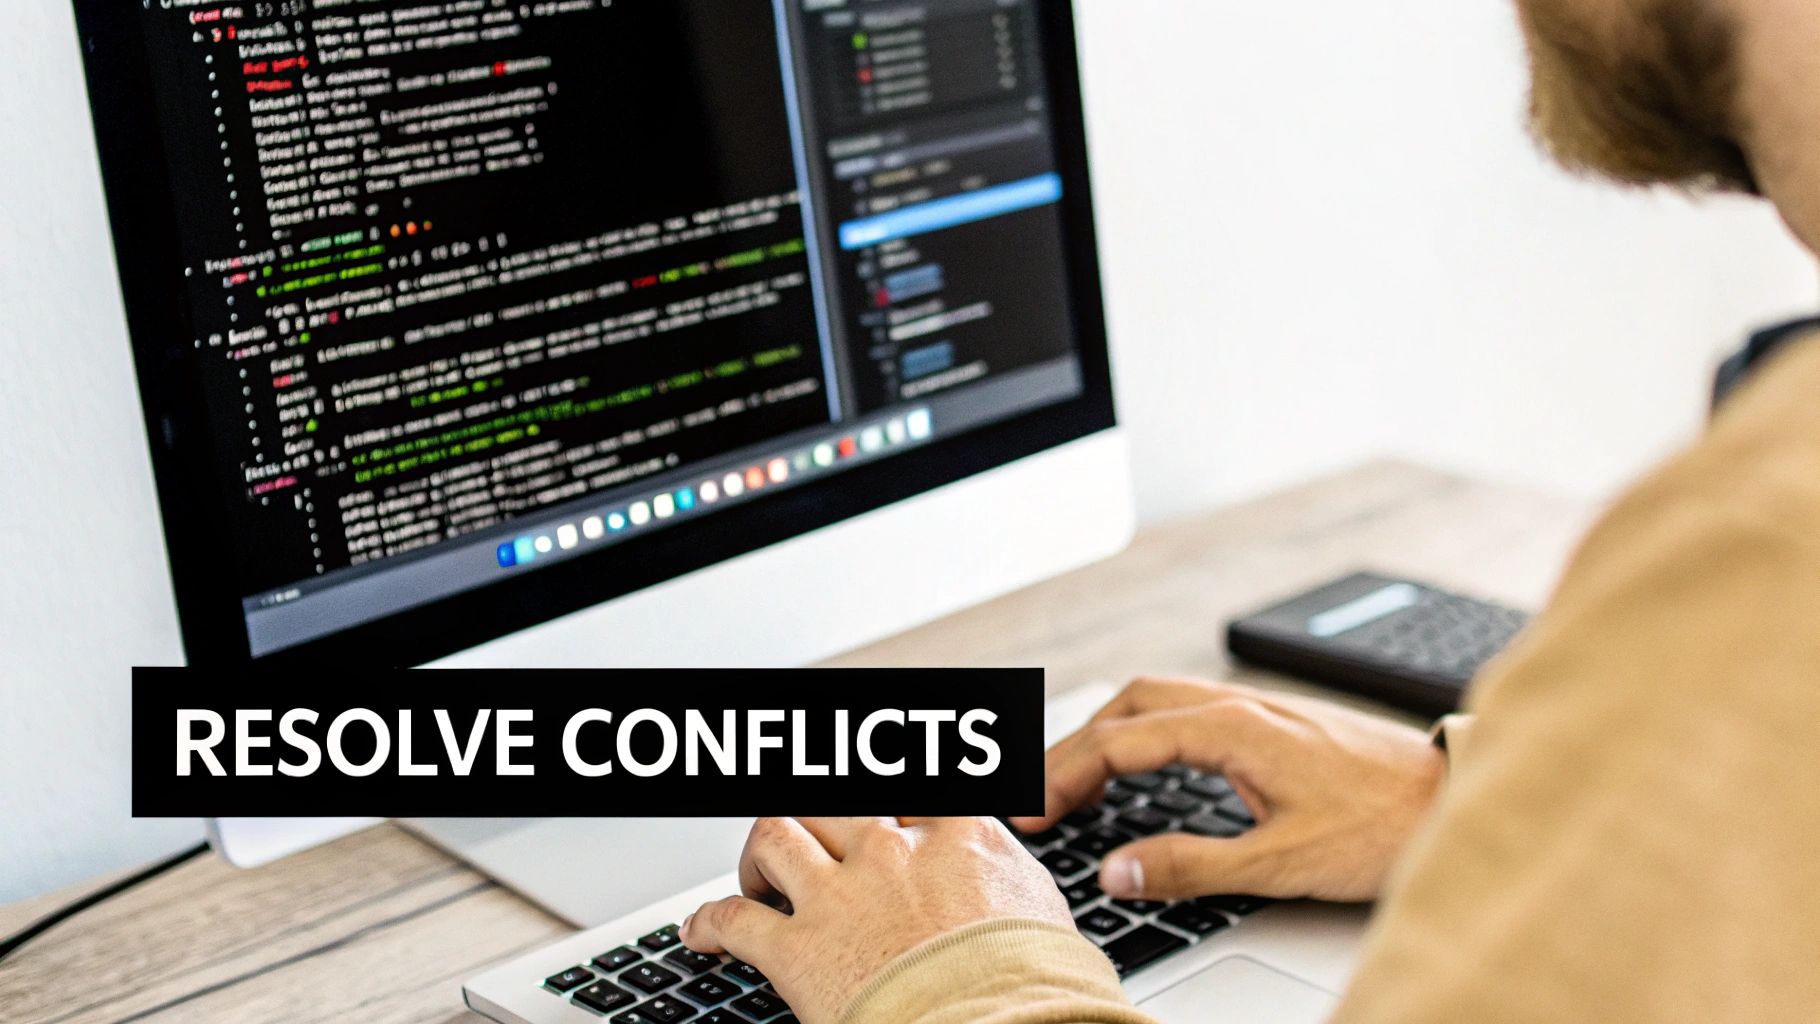
Sooner or later, every developer runs into it: the dreaded "merge conflict" message. It can feel intimidating, but a conflict is just Git’s way of pausing the process and asking for a human decision. It’s a completely normal part of working on a team.
A merge conflict pops up when you try to merge two branches that have competing changes in the exact same part of the exact same file. Git is smart, but it can’t read your mind. It doesn't know whether to keep your changes, the other person’s, or some combination of both. So, it stops the show and hands the controls over to you.
Decoding the Conflict Markers
When a conflict happens, Git edits the file for you, inserting special markers to show you exactly where the competing changes are. They might look a bit cryptic at first, but they follow a simple, predictable pattern.
*   `<<<<<<< HEAD`: Everything below this line is from *your* current branch (the one you're merging into). **HEAD** is just Git’s pointer to where you are right now.
*   `=======`: This is the divider. It separates your code from their code.
*   `>>>>>>> [branch-name]`: Everything between the divider and this line is the code from the branch you're trying to merge in.
Think of it like Git showing you two different paragraphs from two versions of a book, side-by-side, and asking you to pick the one that belongs in the final manuscript.
A Step-by-Step Guide to Resolving Conflicts
Let's walk through a common example. You and a teammate both edited the same CSS file. You changed a button color to blue, and they changed it to green. When you try to merge their branch, Git will throw a flag.
1. Identify the Conflicted Files
Git will tell you which files have issues right away. You can also run git status to get a clear list of "unmerged paths."
2. Open the File and Find the Markers
Open the conflicted file in your favorite code editor. You'll see the markers surrounding the clashing lines of code, like this:
<<<<<<< HEAD
.button {
  background-color: blue;
}
=======
.button {
  background-color: green;
}
>>>>>>> feature/new-button-style
3. Make a Decision and Edit the Code
This is where you, the developer, make the call. If you're not sure, it's a good time to chat with your teammate. You have a few options: keep your version (blue), accept their version (green), or write something new entirely.
To fix it, you must delete all the conflict markers (<<<<<<<, =======, >>>>>>>) and leave only the code you want to keep. Let's say you both agree green is the way to go. Your file should now look like this:
.button {
  background-color: green;
}
4. Stage and Commit the Resolution
Once you've saved the cleaned-up file, you need to tell Git the conflict is handled.
git add . git commit -m "fix: Resolve merge conflict in button styles" And that’s it! The conflict is resolved, and the merge is complete. For a deeper look, you can check out our guide on how to resolve conflicts in Git for more advanced scenarios.
Preventing Conflicts Before They Start
The best way to handle conflicts is to avoid them in the first place. While you can't eliminate them entirely, you can definitely reduce how often they happen. Research on major Windows releases found that up to 12.5% of all code changes could result in conflicts, with more branches leading to more problems. You can read the full research about software quality and branching activity to learn more.
A key strategy is to sync your feature branch with the main branch often. Running
git pull origin mainfrom your branch pulls in the latest updates from your team. This lets you resolve smaller conflicts on your own, long before they become a massive headache in a pull request.
Ultimately, mastering conflict resolution is a fundamental skill in any modern development workflow. It turns a potential roadblock into a routine, manageable task.
Building a Healthy Team Workflow

Let's be honest—effective branching and merging has less to do with mastering obscure Git commands and more to do with clear communication and shared habits. The technical side gives you the tools, but a healthy team workflow provides the discipline to use them well. It's the human element that turns a simple code repository into a powerful engine for collaboration.
High-performing teams don't just wing it. They build a foundation of consistency with clear, simple rules that everyone follows. This removes ambiguity and lets developers focus on what they do best: building great software.
Establish Clear Naming Conventions
The first step toward a sane repository is a consistent branch naming convention. A well-named branch tells you its purpose at a glance, making it easy for anyone on the team to understand what's in flight. Without a standard, your repo can quickly devolve into a confusing mess.
A popular and incredibly effective convention is to use prefixes based on the type of work being done. This simple structure provides immediate context.
*   **`feature/`**: For new functionality (e.g., `feature/user-login-form`).
*   **`bugfix/`**: For correcting errors in existing code (e.g., `bugfix/fix-header-alignment`).
*   **`hotfix/`**: For urgent production fixes (e.g., `hotfix/critical-api-timeout`).
*   **`chore/`**: For maintenance tasks that don't change functionality (e.g., `chore/update-dependencies`).
This small piece of process pays huge dividends in team-wide clarity. When a developer sees feature/user-login-form, they know its purpose instantly without having to inspect a single line of code.
A consistent workflow is built on small, repeatable actions. Standardizing branch names and commit messages are two of the highest-impact, lowest-effort practices a team can adopt to improve their development process.
Write Commit Messages That Tell a Story
Just as important as branch names are your commit messages. A commit message like "updated stuff" is completely useless. A great commit message explains the why behind the change, not just the what. Think of it as a message to your future self and your teammates—it provides context that will be invaluable months down the road.
A good practice is to follow the "Conventional Commits" specification. This involves starting your commit message with a type (like feat, fix, docs, style, refactor), followed by a short summary. This structured approach not only makes your commit history readable but also allows for automated changelog generation.
The Power of the Pull Request
The Pull Request (PR) is where your team’s workflow truly comes to life. It’s far more than just a gate for merging code; it’s the central hub for collaboration, knowledge sharing, and quality control. A well-managed PR process is the cornerstone of any healthy branching strategy.
This is where code review happens. Teammates can inspect changes, ask questions, suggest improvements, and ultimately ensure the new code meets the team's standards for quality and style. To ensure high code quality and smooth integrations, exploring established code review best practices is an excellent way to level up your entire team's process.
A strong PR process also acts as a crucial learning tool. Junior developers get direct feedback from senior engineers, and team members learn about parts of the codebase they might not otherwise touch. Our guide on mastering the pull request workflow offers a deeper dive into making this process as effective as possible.
Ultimately, keeping branches small and short-lived is key. A comparative study highlighted that teams merging changes at least once per day saw a 40% reduction in merge conflicts compared to those merging less frequently. This practice of frequent integration makes PRs easier to review and merges significantly less painful.
Common Branching and Merging Questions Answered
Even when you’ve got the basics down, Git workflows can throw some real curveballs during day-to-day development. This section tackles the questions that pop up most often, with direct, easy-to-follow answers. Think of it as your go-to guide for sorting out common branching and merging puzzles.
What Is the Difference Between a Merge and a Rebase?
This is easily one of the most common points of confusion. While both git merge and git rebase get your code from one branch into another, they operate on two totally different philosophies about how to handle your project’s history.
*   **A merge** combines two branches by creating a special new “merge commit.” This unique commit has two parents, effectively tying the two separate histories together like a knot. The big takeaway here is that a merge **preserves the exact history** of both branches, showing every parallel line of development as it actually happened.

*   **A rebase**, on the other hand, rewrites history. It takes the commits from your feature branch and replays them, one by one, on top of the target branch. This moves the starting point of your branch, creating a perfectly clean, linear timeline. It avoids the extra merge commit, which many teams prefer for its tidiness.
As a general rule, merging is the safer bet for shared branches like main or develop because it doesn’t mess with existing history. Rebasing is a fantastic tool for individual developers to clean up their own commits on a local feature branch before opening a pull request.
Choosing between them is a trade-off. Merging gives you a true, unabridged history of what happened, while rebasing tells a simpler, cleaner story of how the project evolved.
How Do I Avoid Creating Massive Pull Requests?
We’ve all been there. Giant pull requests are a nightmare—they’re a pain to review, more likely to hide bugs, and almost always lead to gnarly merge conflicts. The secret is to break down your work into the smallest possible, self-contained chunks.
Instead of tackling a huge task like "Build New User Profile" in a single branch, slice it up. Deconstruct the feature into logical, independent pieces that can be built, reviewed, and merged on their own.
For instance, that one massive task could become several smaller branches:
*   `feature/add-avatar-upload-api`
*   `feature/build-contact-info-form`
*   `feature/style-profile-header`
This approach makes code reviews lightning-fast and much more focused. It also dramatically lowers the risk of painful merge conflicts and lets you ship value to the main codebase far more frequently. It’s also a great habit to sync with the main branch often (git pull origin main) so your feature branch doesn't drift too far from the team's latest work.
What Is a Fast-Forward Merge?
A fast-forward merge is the simplest, cleanest type of merge you can get in Git. It only happens when the target branch (let’s say, main) has received zero new commits since you first created your feature branch. In this perfect scenario, your feature branch’s history is a direct extension of the main branch’s history.
Since there's no divergent work to stitch together, Git doesn’t need to create a merge commit. It simply moves the main branch pointer forward to point to the latest commit on your feature branch. It’s like adding new pages to the end of a book—no complex integration required.
This is the ideal merge situation because it's completely clean and conflict-free. It’s also a great illustration of why short-lived feature branches and frequent syncing are so beneficial.
Should I Delete My Branch After It Is Merged?
Yes, absolutely. This is a critical best practice for keeping your repository tidy and easy for everyone to navigate. Once your pull request is approved and the commits from your branch are safely in main, the branch itself has served its purpose.
Its history is now a permanent part of the main branch, so keeping the old branch pointer around just adds clutter. Deleting the merged branch—both on the remote server and on your local machine—makes it crystal clear what work is done and what's still in progress.
Most platforms like GitHub and GitLab even give you a handy button to delete the branch for you right after a successful merge. Taking that simple step saves your repository from accumulating hundreds of stale, irrelevant branches over time.
Are your pull requests getting lost in the noise of endless Slack notifications? PullNotifier cuts through the chaos by delivering smart, real-time PR updates directly where your team works. Stop review delays and merge faster by getting the right information to the right people at the right time. Join over 10,000 engineers who trust PullNotifier to streamline their code review workflow.